
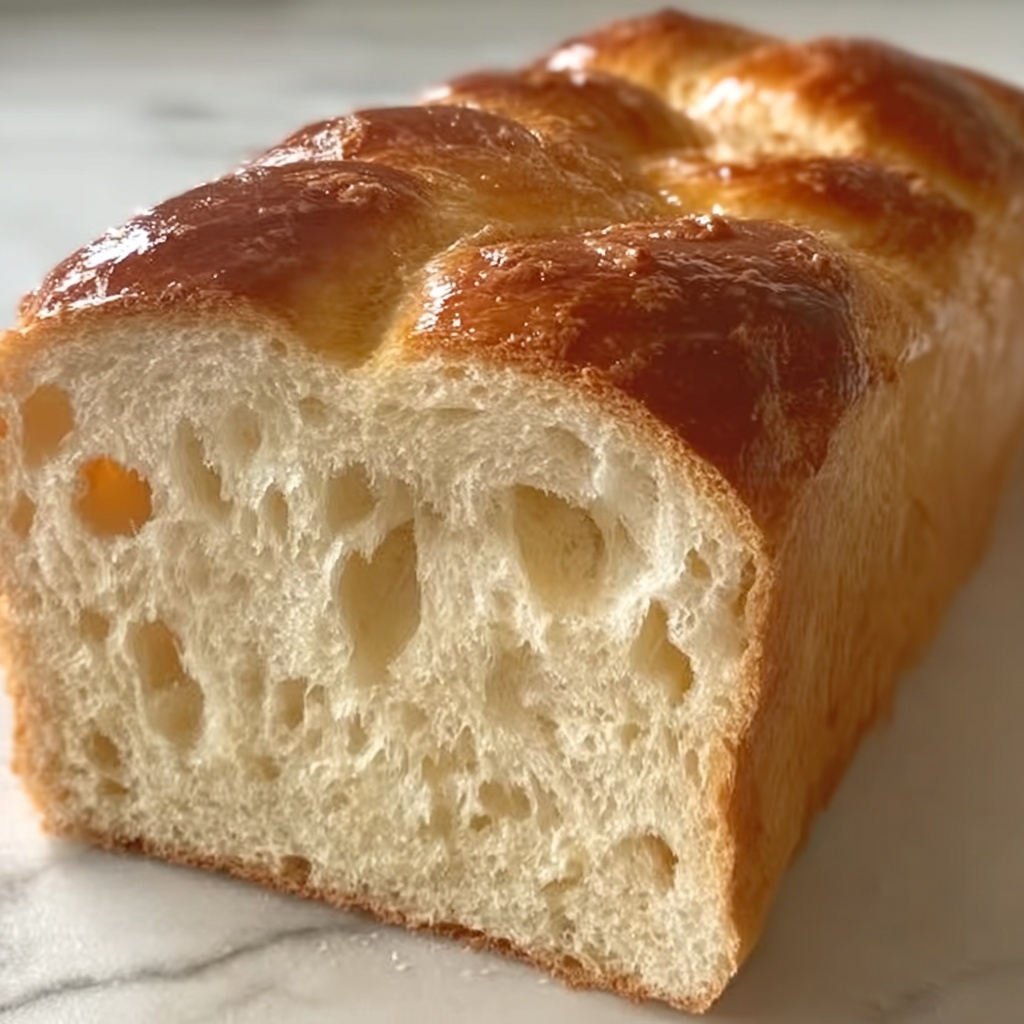
If you have a soft spot for wonderfully sweet, fluffy bread that practically melts in your mouth, then you’ll fall head over heels for this Easy Sweet Condensed Milk Bread Recipe. It’s the perfect balance of tender crumb and subtle sweetness, enriched by the creamy depth of sweetened condensed milk. Whether you’re new to baking or a seasoned pro, this bread will become your go-to comfort food, ideal for breakfast, afternoon tea, or just whenever a little homemade magic is needed.
Ingredients You’ll Need
These ingredients are simple staples you probably already have in your pantry, but each one plays a vital role in achieving the perfect texture, flavor, and golden color of this delightful bread.
- All-purpose flour: The base that provides structure and chewiness to your bread.
- Sugar: Adds just the right touch of sweetness to complement the condensed milk.
- Sweetened condensed milk: Brings moisture and a rich, caramel-like sweetness that makes the bread irresistibly soft.
- Warm water: Activates the yeast and helps develop the dough.
- Dry yeast: The magical ingredient that makes your bread rise and become gloriously fluffy.
- Melted butter: Adds richness and tenderizes the crumb for that melt-in-your-mouth feel.
- Salt: Balances the sweetness and enhances all the other flavors.
How to Make Easy Sweet Condensed Milk Bread Recipe
Step 1: Activate the Yeast
Begin by combining warm water and dry yeast in a small bowl. Let this mixture sit for about 5 minutes, just enough time for the yeast to wake up and form a bubbly, foamy surface. This signals that your yeast is alive and ready to work its magic.
Step 2: Mix the Wet Ingredients
Stir in the sugar, sweetened condensed milk, melted butter, and salt to your bubbly yeast mixture. These ingredients not only flavor your dough but also contribute to its softness and golden crust. Give it a good mix until everything is nicely combined.
Step 3: Add the Flour
Gradually introduce the flour to your wet mixture, adding it little by little. This slow approach helps you get a feel for the dough’s consistency. You might need to add a bit more flour than listed to reach a soft, slightly sticky dough that’s easy to handle.
Step 4: Knead the Dough
Turn your dough out onto a floured surface and knead for about 8 to 10 minutes. This step develops the gluten, giving the bread its characteristic elasticity and chew. If the dough sticks too much, sprinkle a little more flour, but don’t overdo it to keep your bread tender.
Step 5: First Rise
Place your kneaded dough in a greased bowl, cover it with a damp towel to keep the moisture in, and let it rise for an hour. During this time, the dough will double in size as the yeast ferments, creating those delicate air pockets that make the bread so soft and airy.
Step 6: Shape the Dough
After the first rise, gently punch down the dough to release excess air, then shape it into a loaf. Place it into a greased loaf pan to maintain its perfect shape as it rises again and bakes.
Step 7: Second Rise
Cover your loaf pan and let the dough rise for another 30 minutes. Watch as it puff ups, nearly doubling in volume again, which means your bread will be light and fluffy with an inviting crust.
Step 8: Bake Your Bread
Preheat your oven to 350°F (175°C) and bake the bread for 25 to 30 minutes. You’ll know it’s done when the crust turns a gorgeous golden brown and sounds hollow when tapped on the bottom. That’s your cue to pull it out!
Step 9: Cool and Enjoy
Let your bread cool in the pan for about 5 minutes, so it firms up just enough to slice without squishing. Then transfer it to a wire rack to cool completely. Slice and enjoy the fruits of your effort, whether plain or slathered with butter.
How to Serve Easy Sweet Condensed Milk Bread Recipe

Garnishes
This bread shines on its own but adding a dusting of powdered sugar or a thin spread of butter with a sprinkle of cinnamon can take your serving to the next level. Fresh fruit preserves or a drizzle of honey also complement its subtle sweetness beautifully.
Side Dishes
Pair your sweet bread with light, fresh sides such as a bowl of berries or a crisp salad for a balanced breakfast or snack. It also works wonders alongside creamy soups or a hot cup of coffee or tea for a cozy afternoon treat.
Creative Ways to Present
Try slicing the bread and turning it into irresistible French toast for brunch, or cut it into cubes and use it as a base for a sweet bread pudding. For a playful twist, serve it warm with a scoop of ice cream and fresh fruit sauce on top.
Make Ahead and Storage
Storing Leftovers
Wrap any leftover bread tightly in plastic wrap or keep it in an airtight container. Stored at room temperature, it should stay fresh and soft for up to two days, making it perfect for quick snacks or sandwiches.
Freezing
This Easy Sweet Condensed Milk Bread Recipe freezes beautifully. Slice the cooled loaf before freezing and separate slices with parchment paper. Keep them in a sealed freezer bag, and they will stay fresh for up to a month.
Reheating
To enjoy your frozen bread slices, simply toast them or warm in the oven at 300°F (150°C) for 10 minutes until they’re soft and fragrant again. This revives that fresh-baked feeling like magic.
FAQs
Can I use whole wheat flour instead of all-purpose flour?
Absolutely! You can substitute whole wheat flour, but keep in mind it will create a denser loaf with a nuttier flavor. You may want to start by replacing half of the all-purpose flour to keep the bread light and fluffy.
What if my bread doesn’t rise properly?
If your bread doesn’t rise as expected, check that your yeast isn’t expired and that your water is neither too hot nor too cold. Yeast is a living ingredient that needs the right environment to activate and work.
Can I make this bread dairy-free?
Yes! You can use dairy-free butter alternatives and ensure your sweetened condensed milk is plant-based. This slight swap will maintain moistness and sweetness while keeping the bread suitable for dairy-free diets.
Is it okay to add extra sugar or flavors?
Definitely! Feel free to add a bit more sugar if you prefer a sweeter loaf or fold in cinnamon, vanilla extract, or citrus zest for an exciting twist on this classic recipe.
How long does it take to make this bread from start to finish?
The full process, including rising and baking, takes about 1 hour and 45 minutes. The prep work is minimal, so most of that time is just waiting for the dough to rise, which is the perfect moment to relax or prepare a tasty accompaniment.
Final Thoughts
This Easy Sweet Condensed Milk Bread Recipe isn’t just a treat for your taste buds but a wonderful way to fill your kitchen with heartwarming aromas and simple pleasures. It’s approachable, endlessly versatile, and guaranteed to become a cherished staple in your baking repertoire. Go ahead and try it—you’ll love how comforting homemade bread can be.
Print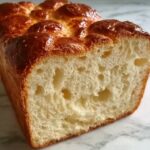
Easy Sweet Condensed Milk Bread Recipe
- Prep Time: 15 minutes
- Cook Time: 30 minutes
- Total Time: 1 hour 45 minutes
- Yield: 10 servings (1 loaf)
- Category: Bread
- Method: Baking
- Cuisine: Western
Description
This Easy Sweet Condensed Milk Bread recipe yields a soft, slightly sweet loaf perfect for breakfast or snacks. Made with simple pantry ingredients and featuring sweetened condensed milk for a tender crumb and gentle sweetness, this homemade bread is approachable for bakers of all skill levels. The recipe includes yeast activation, careful kneading, and two rises, resulting in a golden, aromatic loaf with a delicate texture ready to enjoy fresh or toasted.
Ingredients
Dry Ingredients
- 2 1/2 cups all-purpose flour (plus more as needed)
- 1/4 cup sugar
- 1 packet dry yeast (approximately 2 1/4 teaspoons)
- 1/2 teaspoon salt
Wet Ingredients
- 1/4 cup sweetened condensed milk
- 1/2 cup warm water (about 110°F/43°C)
- 1/4 cup butter, melted
Instructions
- Activate the yeast: In a small bowl, combine the warm water and dry yeast. Let the mixture sit for about 5 minutes until it becomes bubbly and foamy, indicating the yeast is active.
- Mix wet ingredients: Add the sugar, sweetened condensed milk, melted butter, and salt to the activated yeast mixture. Stir well to combine all wet ingredients evenly.
- Add flour: Gradually add the all-purpose flour to the wet mixture, a little at a time, stirring continuously until a dough starts to form. You may need to add a little extra flour to achieve the right dough consistency—that is slightly sticky but manageable.
- Knead the dough: Transfer the dough onto a floured surface and knead for 8 to 10 minutes until it becomes smooth and elastic. Add more flour as necessary to prevent sticking during kneading.
- First rise: Place the kneaded dough into a greased bowl, cover it with a damp towel or plastic wrap, and let it rise in a warm spot for 1 hour or until it has doubled in size.
- Shape the dough: Punch down the risen dough to release trapped air, then shape it into a loaf. Place the shaped dough into a greased loaf pan, evenly distributing it across the pan.
- Second rise: Cover the loaf pan and let the dough rise again for 30 minutes or until it has puffed up noticeably.
- Bake: Preheat your oven to 350°F (175°C). Bake the loaf for 25 to 30 minutes, until the bread is golden brown on top and sounds hollow when tapped on the bottom.
- Cool and serve: Remove the bread from the oven and allow it to cool in the pan for 5 minutes. Then transfer it onto a wire rack to cool completely before slicing and serving.
Notes
- Ensure water is warm, not hot, to avoid killing the yeast.
- Kneading time is important to develop gluten and achieve the right bread texture.
- You can add a tablespoon of milk powder to enrich the dough further if desired.
- Store leftover bread in an airtight container to maintain freshness.
- This bread freezes well; slice before freezing for easy thawing.


