If you’re searching for a luscious frozen treat that hits every sweet craving, look no further than The Ultimate Banana Ice Cream Recipe for Creamy Dairy-Free Bliss. This outrageously creamy dessert is proof that a few simple, wholesome ingredients can turn into pure magic. Whether you’re vegan, lactose-intolerant, or just love bananas, this “nice cream” will sweep you off your feet with its naturally sweet flavor, cloud-like texture, and irresistible versatility. The best part? It’s so easy, you’ll wonder where this gem has been all your life!
Ingredients You’ll Need
The Ultimate Banana Ice Cream Recipe for Creamy Dairy-Free Bliss calls for a handful of staple ingredients you might already have in your kitchen. Each one is essential—together, they create a dessert that’s impossibly creamy, perfectly balanced, and can be endlessly customized to fit your mood.
- 4 ripe bananas (peeled, sliced, and frozen): Overripe bananas bring all the natural sweetness and the silkiest smooth texture—don’t be afraid of bananas with lots of spots!
- 1/2 teaspoon vanilla extract: Adds a subtle warmth and depth you’d expect from classic ice cream.
- 2 tablespoons almond milk (or other plant-based milk, as needed): Helps achieve that creamy blend—plus, it amps up the dairy-free goodness.
- 1 tablespoon maple syrup (optional): For an extra kiss of sweetness, especially if your bananas aren’t super ripe.
- Pinch of salt: Just enough to heighten all those delicious flavors and keep your ice cream from being too sweet.
How to Make The Ultimate Banana Ice Cream Recipe for Creamy Dairy-Free Bliss
Step 1: Prep Your Bananas
Start by peeling your bananas, slicing them into coins, and popping them in the freezer until rock solid. Freezing them ahead of time is the secret to achieving that dreamy, soft-serve consistency without a drop of cream or eggs.
Step 2: Get Blending
Place your frozen banana slices in a high-speed blender or food processor. Blitz on high, pausing to scrape down the sides frequently, until the bananas break down into magical creamy swirls. It will look crumbly at first, but keep going—the transformation will amaze you!
Step 3: Add Flavor
At this point, pour in the vanilla extract, almond milk, a splash of maple syrup (especially if your bananas aren’t super sweet), and a tiny pinch of salt. Blend again, stopping when you reach a gloriously smooth, airy, and ice-cream-like mixture.
Step 4: Choose Your Texture
If you love soft-serve, you’re in for a treat: simply scoop the banana ice cream right out of the blender and enjoy instantly. For classic, scoopable ice cream, spread the mixture into a freezer-safe container and freeze for 1–2 hours until just firm enough to hold a perfect scoop.
Step 5: Time to Enjoy!
Scoop and serve! Top with whatever makes you happy—think chopped nuts, dairy-free chocolate chips, or even a drizzle of peanut butter for that extra wow factor.
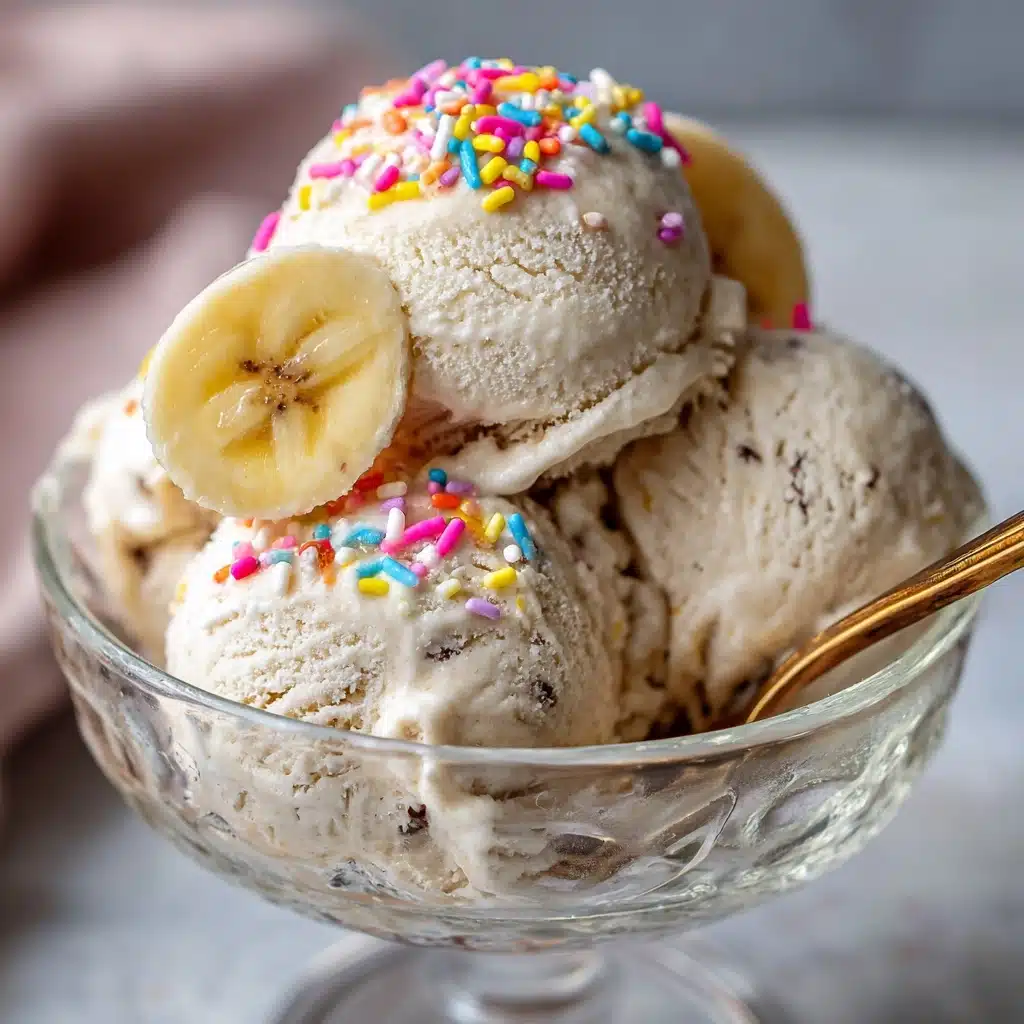
How to Serve The Ultimate Banana Ice Cream Recipe for Creamy Dairy-Free Bliss
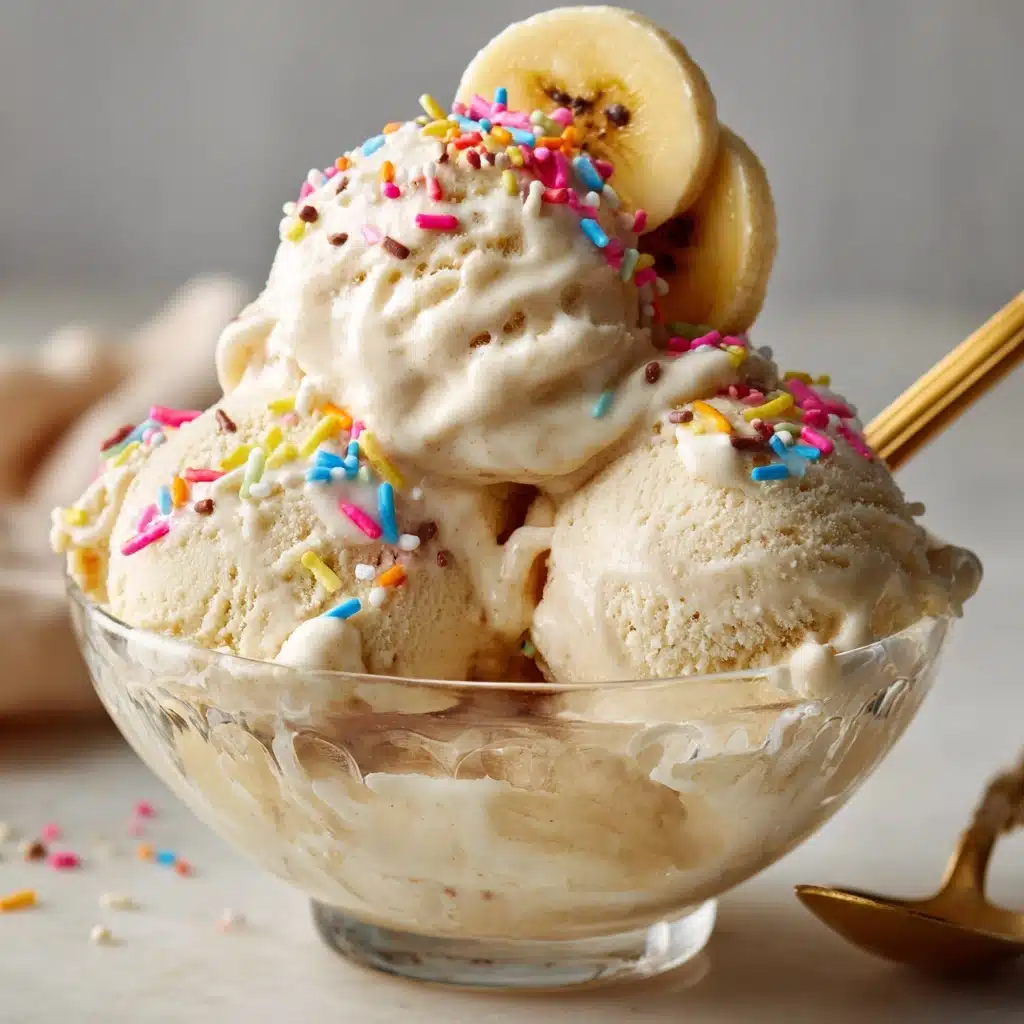
Garnishes
Treat yourself (and your guests!) to an elevated dessert experience by piling on the toppings. Chopped nuts add crunch, a sprinkle of toasted coconut brings on a tropical twist, and vegan chocolate chips turn every bite into a choco-banana dream. Don’t hold back—a final flourish of fresh berries or a dusting of cinnamon is always a good idea!
Side Dishes
Turn this ice cream into a true showstopper by pairing it with warm brownies, gluten-free shortbread, or even a bowl of seasonal fruit. The subtle sweetness of The Ultimate Banana Ice Cream Recipe for Creamy Dairy-Free Bliss makes it a wonderful partner for almost any dessert, breakfast waffles, or even pancakes on special occasions.
Creative Ways to Present
For a playful presentation, try serving your banana ice cream in halved coconut shells, mason jars, or layered like a parfait with crunchy granola and fruit. Hosting a party? Set up a “nice cream” bar with different toppings and flavor add-ins so everyone can customize their own bowl of The Ultimate Banana Ice Cream Recipe for Creamy Dairy-Free Bliss.
Make Ahead and Storage
Storing Leftovers
Got extra ice cream? Store it in an airtight, freezer-safe container. Press a piece of parchment paper directly onto the surface to prevent ice crystals from forming and help maintain that velvety texture you love.
Freezing
The Ultimate Banana Ice Cream Recipe for Creamy Dairy-Free Bliss keeps well in the freezer for up to two weeks. Just know that the longer it sits, the firmer it will become. For best results, let it thaw on the counter for 10–15 minutes before scooping for the creamiest experience.
Reheating
Reheating might sound odd when it comes to ice cream, but if your nice cream is too solid, just let it sit at room temperature for a few minutes. If you’re in a hurry, pop it in the microwave for 10–20 seconds, stirring halfway through, until it’s soft and scoopable—but watch it closely so it doesn’t melt completely!
FAQs
Can I use a regular blender instead of a high-speed one?
Absolutely! While a high-speed blender or food processor will give you the smoothest results, a regular blender can work if you cut your banana slices small and add a splash more plant-based milk to help everything blend together.
What if my bananas aren’t ripe enough?
Ripe bananas are key for natural sweetness and creamy texture. Look for bananas with lots of brown spots. If yours aren’t ripe yet, let them sit at room temperature for a day or two—patience pays off here!
Can I add other flavors to The Ultimate Banana Ice Cream Recipe for Creamy Dairy-Free Bliss?
Of course! Try blending in a tablespoon of cocoa powder for chocolate nice cream, a swirl of peanut butter for classic comfort, or even a pinch of cinnamon for warmth. This recipe is your blank canvass, so have fun experimenting!
Is this ice cream suitable for kids?
Yes, and it’s a parent’s dream! The Ultimate Banana Ice Cream Recipe for Creamy Dairy-Free Bliss contains only a handful of wholesome ingredients, no added refined sugars (unless you opt for a touch of maple syrup), and it tastes just like dessert should—without any guilt.
Can I double or halve the recipe?
Absolutely! Feel free to scale the recipe up or down. Just keep in mind that you might need to blend in batches if you make a large amount, and adjustments to plant-based milk may be necessary for the perfect creamy texture.
Final Thoughts
If you love a simple, healthy treat that feels utterly indulgent, you owe it to yourself to whip up The Ultimate Banana Ice Cream Recipe for Creamy Dairy-Free Bliss. It’s a cinch to make, endlessly customizable, and destined to become a freezer favorite. Give it a try and let a spoonful of this creamy magic brighten your day!
Print
The Ultimate Banana Ice Cream Recipe for Creamy Dairy-Free Bliss Recipe
- Total Time: 10 minutes (plus freezing time if desired)
- Yield: 4 servings 1x
- Diet: Vegan
Description
Indulge in the ultimate creamy and dairy-free banana ice cream that’s unbelievably easy to make and incredibly delicious. This guilt-free treat is perfect for satisfying your sweet cravings!
Ingredients
Ripe Bananas:
- 4 ripe bananas (peeled, sliced, and frozen)
Additional Ingredients:
- 1/2 teaspoon vanilla extract
- 2 tablespoons almond milk (or other plant-based milk, as needed)
- 1 tablespoon maple syrup (optional)
- Pinch of salt
Instructions
- Blend Frozen Bananas: Place the frozen banana slices in a high-speed blender or food processor. Blend until creamy, scraping down the sides as needed.
- Add Ingredients: Add vanilla extract, almond milk, maple syrup, and salt. Blend until smooth and creamy.
- Serve or Freeze: Enjoy immediately for soft-serve texture or freeze for a firmer consistency. Scoop and serve!
Notes
- Add cocoa powder or peanut butter for a flavor twist.
- For added texture, fold in chopped nuts, chocolate chips, or coconut flakes.
- Use spotty, overripe bananas for the creamiest results.
- Prep Time: 10 minutes
- Cook Time: 0 minutes
- Category: Dessert
- Method: Blending
- Cuisine: American
Nutrition
- Serving Size: 1/2 cup
- Calories: 110
- Sugar: 14g
- Sodium: 15mg
- Fat: 1g
- Saturated Fat: 0g
- Unsaturated Fat: 1g
- Trans Fat: 0g
- Carbohydrates: 27g
- Fiber: 3g
- Protein: 1g
- Cholesterol: 0mg