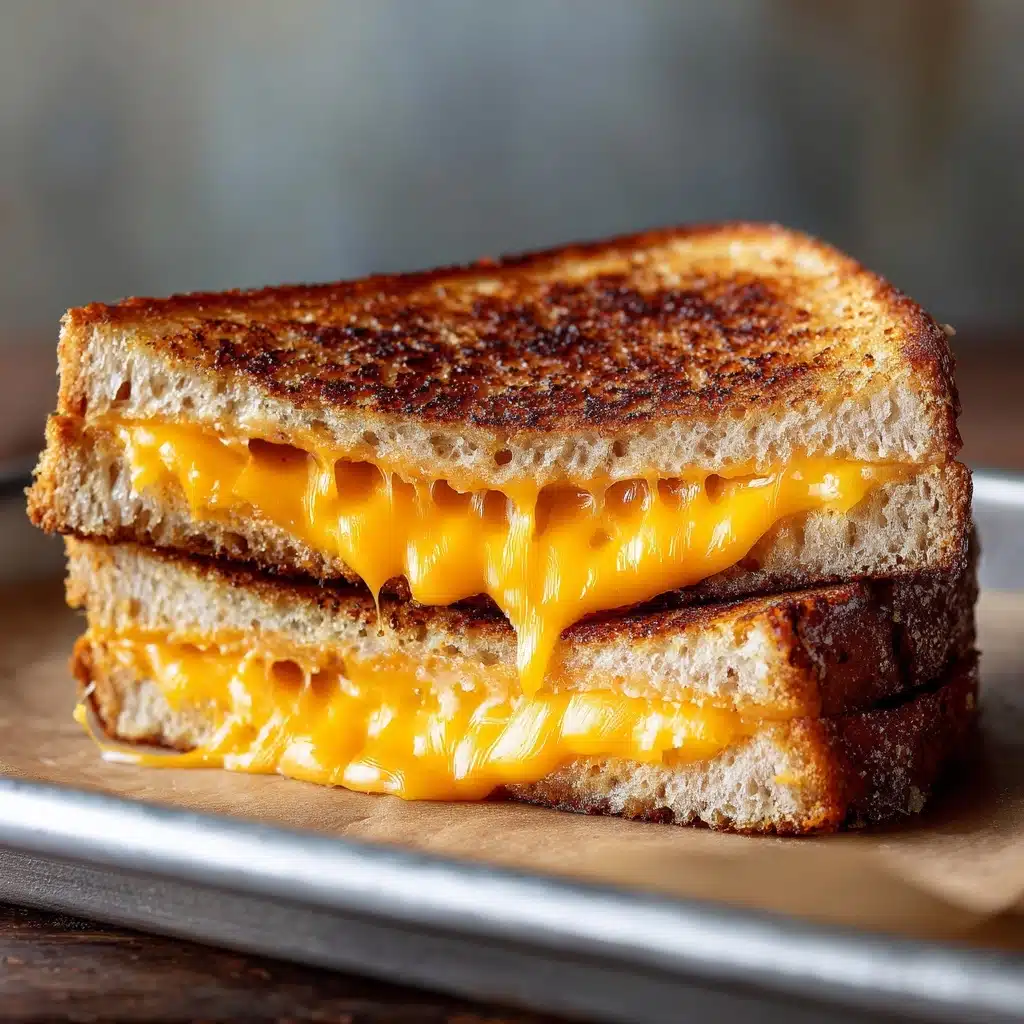
Every once in a while, you stumble across a recipe that instantly transports you to a place of pure joy—and Disney’s Grilled Cheese is exactly that kind of magic on a plate. Inspired by the gooey, golden masterpiece served at Disney parks, this sandwich takes comfort food to the next level with layers of melty cheeses, fluffy artisan bread, and a surprise creamy spread that delivers perfect crunch and flavor in every bite. Whether you’re chasing nostalgia or simply hunting for the ultimate grilled cheese to brighten up your day, this recipe guarantees smiles with every ooey-gooey mouthful.
Ingredients You’ll Need
The beauty of Disney’s Grilled Cheese lies in how just a handful of simple ingredients combine to create something extraordinary. Each one plays an important role, whether it’s adding melty texture, a pop of tanginess, or that picture-perfect crunch.
- Artisan Bread (8 slices): Sturdy sourdough or your favorite bakery-style bread forms the ideal structure for holding all that gooey cheese.
- Provolone Cheese (4 slices): This cheese brings a gentle, creamy melt that balances the richer flavors perfectly.
- Cheddar Cheese (4 slices): The sharpness of cheddar cuts through the richness and adds classic grilled cheese flair.
- American Cheese (4 slices): For extra creamy melt and that nostalgic diner-style stretch in every pull-apart bite.
- Mayonnaise (1/2 cup): Mayo on the outside gives you an evenly golden, crisp crust with a subtle tang.
- Cream Cheese, softened (1/2 cup): Blending this in creates a silky spread that keeps the sandwich moist and decadent.
- Garlic Powder (1/2 teaspoon): A tiny dash brings aromatic warmth and a savory bite to the exterior.
- Salt (1/2 teaspoon): For rounding out and brightening every flavor note throughout the sandwich.
- Shredded Double Gloucester or more Cheddar (1/2 cup, optional): For an extra boost of cheesiness and a speckled golden look when you slice in.
- Butter, softened (2 tablespoons): Essential for that classic grilled finish—don’t skip spreading a little in the pan for maximum flavor.
How to Make Disney’s Grilled Cheese
Step 1: Prepare the Creamy Spread
Start by stirring together the mayonnaise, softened cream cheese, garlic powder, and salt in a small bowl until the mixture is smooth and luscious. This simple spread is your secret weapon—it adds incredible tang and silkiness, keeping the outside of the sandwich perfectly crispy while the inside stays soft and rich.
Step 2: Prep the Bread
Lay out your slices of artisan bread on a cutting board. Spread a thin, even layer of your creamy mixture onto one side of each slice. Remember, this is the side that’ll hit the pan for grilling. It may seem unconventional, but trust me: this technique gives Disney’s Grilled Cheese its signature golden crunch.
Step 3: Layer the Cheeses
Flip the bread so the uncoated sides are facing up. On four slices, build your cheesy mountain: start with provolone, add cheddar, stack on the American cheese, and, if you like things extra cheesy, sprinkle on some shredded double Gloucester or more sharp cheddar. Each cheese brings its own melty personality, and together, they deliver that “can’t-stop-eating” factor that defines Disney’s Grilled Cheese.
Step 4: Assemble the Sandwiches
Gently top each cheesy layer with another bread slice, creamy spread side facing out. Press lightly so the cheeses begin to snuggle together—they’ll melt into glorious harmony shortly!
Step 5: Grill to Perfection
Heat a large skillet or griddle over medium heat and swirl in some softened butter. Once the butter sizzles, place in your sandwiches, creamy side down. Grill for 2–3 minutes per side, flipping when the crust is golden and crispy. If you have a panini press, now’s the time to use it for even pressure and next-level crunch. Pro tip: Press gently with a spatula as you go. The slow, gentle heat is key to melting the cheese all the way through without scorching the bread.
Step 6: Slice and Serve
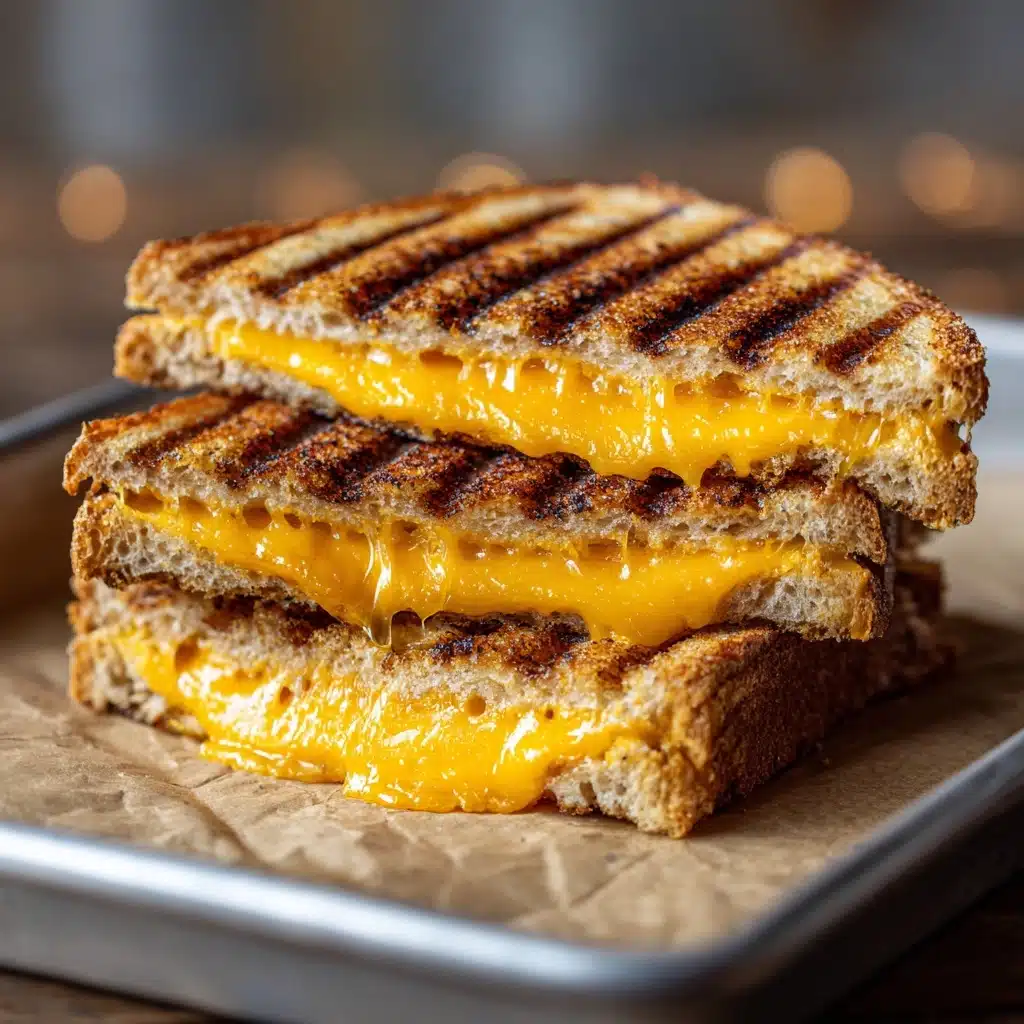
Remove the sandwiches from the heat and let them cool for just a minute—the cheese will set slightly so you get those magical melty pulls. Use a sharp knife to cut each sandwich on the diagonal, revealing all the colorful, molten layers inside. Don’t be surprised if everyone crowds around the kitchen at this stage!
How to Serve Disney’s Grilled Cheese

Garnishes
A sprinkle of fresh chopped parsley or a dash of smoked paprika makes the colors really pop and adds a whisper of extra flavor. For a playful nod to the theme park experience, add a tiny flag or even nestle some pickle slices on the side—just like you might find at a classic lunch counter.
Side Dishes
Nothing pairs better with Disney’s Grilled Cheese than a steaming bowl of tomato soup. The tangy acidity cuts through the richness for ultimate comfort. Chips, crunchy veggie sticks, or a simple side salad also work beautifully, making this a meal worthy of your favorite Disney memories.
Creative Ways to Present
You can transform your Disney’s Grilled Cheese into mini finger sandwiches for snacks and gatherings, or use cookie cutters for fun shapes that both kids and adults will love. Stack halves on a platter picnic-style, or serve as the centerpiece of a brunch board alongside fruits and dips. The smiles will follow no matter which way you slice it!
Make Ahead and Storage
Storing Leftovers
If you end up with extra sandwiches (though that’s a rarity!), wrap them tightly in foil or plastic wrap once fully cooled. Store them in an airtight container in the fridge for up to two days. This keeps them from drying out and preserves that cheesy goodness.
Freezing
To freeze Disney’s Grilled Cheese, wrap each cooled sandwich individually in parchment or waxed paper, then place in a freezer-safe zip bag or container. They’ll stay tasty for up to one month. When you’re ready for a quick, comforting meal, just thaw overnight in the refrigerator.
Reheating
For the crispiest results, reheat sandwiches in a skillet over medium-low heat, pressing gently until warmed through and crunchy again. You can also pop them in a toaster oven at 350°F for 5–10 minutes. Microwaving works in a pinch, but you’ll lose a bit of the beloved crisp factor.
FAQs
What makes Disney’s Grilled Cheese so special?
It’s all about the combination of cheeses and that magic creamy spread on the outside, which together create a next-level grilled cheese experience—ultra-melty, golden, and packed with nostalgic flavors you’d expect from the happiest place on earth.
Can I use a different type Main Course, Snack
Absolutely! While a sturdy artisan or sourdough bread holds up best, you can experiment with brioche, multigrain, or even plain white bread for a softer, sweeter bite. Just make sure the slices are thick enough to support all that cheese.
Is there a way to make Disney’s Grilled Cheese dairy-free?
Yes! Substitute your favorite dairy-free cheeses and use vegan mayo and cream cheese for the spread. Plant-based butters also work perfectly for grilling—you’ll still get that melty, satisfying result.
What other fillings can I add?
Feel free to tuck in slices of ripe tomato, crispy cooked bacon, or sautéed mushrooms for extra flavor. The recipe is wonderfully customizable, just like the best comfort foods always are.
Can I make this ahead for a crowd?
Definitely! Assemble all the sandwiches up to a few hours ahead, layer between waxed paper in the fridge, and simply grill them off as friends arrive. You can even keep them warm in a low oven for easy entertaining.
Final Thoughts
If you’re after the ultimate comfort food that brings magic to your table, you can’t go wrong with Disney’s Grilled Cheese. Every bite is a golden, melty reminder of why the classics endure and delight us all. Give this recipe a try—you might just discover your new favorite sandwich to share with family and friends!
Print
Disney’s Grilled Cheese Recipe
- Total Time: 20 minutes
- Yield: 4 sandwiches 1x
- Diet: Vegetarian
Description
Indulge in the nostalgic comfort of Disney’s Grilled Cheese with this easy recipe that combines gooey cheeses and a creamy spread for the ultimate cheesy sandwich experience.
Ingredients
Bread:
- 8 slices artisan bread (such as sourdough)
Cheeses:
- 4 slices provolone cheese
- 4 slices cheddar cheese
- 4 slices American cheese
- 1/2 cup shredded double Gloucester or more cheddar (optional)
Spread:
- 1/2 cup mayonnaise
- 1/2 cup cream cheese (softened)
- 1/2 teaspoon garlic powder
- 1/2 teaspoon salt
For Grilling:
- 2 tablespoons softened butter
Instructions
- Prepare Spread: In a small bowl, mix mayonnaise, cream cheese, garlic powder, and salt until smooth.
- Assemble Sandwiches: Spread the mixture on one side of each bread slice. Layer provolone, cheddar, American cheese, and optional shredded cheese on the other side. Form sandwiches with mayo side out.
- Grill Sandwiches: Heat a skillet over medium heat. Cook sandwiches mayo side down for 2–3 minutes per side until golden and cheese melts. Press gently with a spatula.
- Serve: Let cool slightly, slice diagonally, and enjoy!
Notes
- For a crispier crust, cook low and slow, pressing the sandwich. A panini press can also be used.
- Customize with tomato or bacon for added flavor.
- Prep Time: 10 minutes
- Cook Time: 10 minutes
- Category: Main Course, Snack
- Method: Stovetop
- Cuisine: American
Nutrition
- Serving Size: 1 sandwich
- Calories: 620
- Sugar: 3g
- Sodium: 950mg
- Fat: 42g
- Saturated Fat: 23g
- Unsaturated Fat: 16g
- Trans Fat: 0g
- Carbohydrates: 36g
- Fiber: 2g
- Protein: 22g
- Cholesterol: 95mg