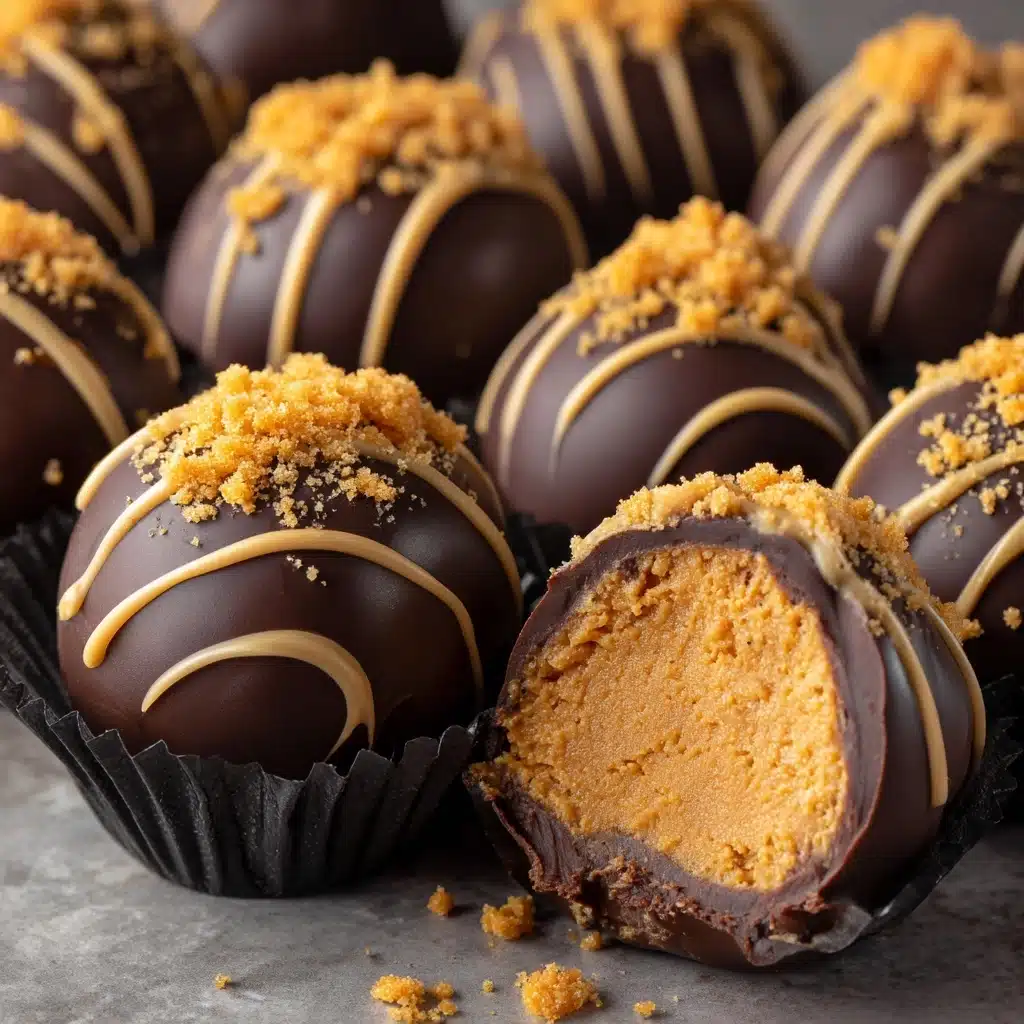
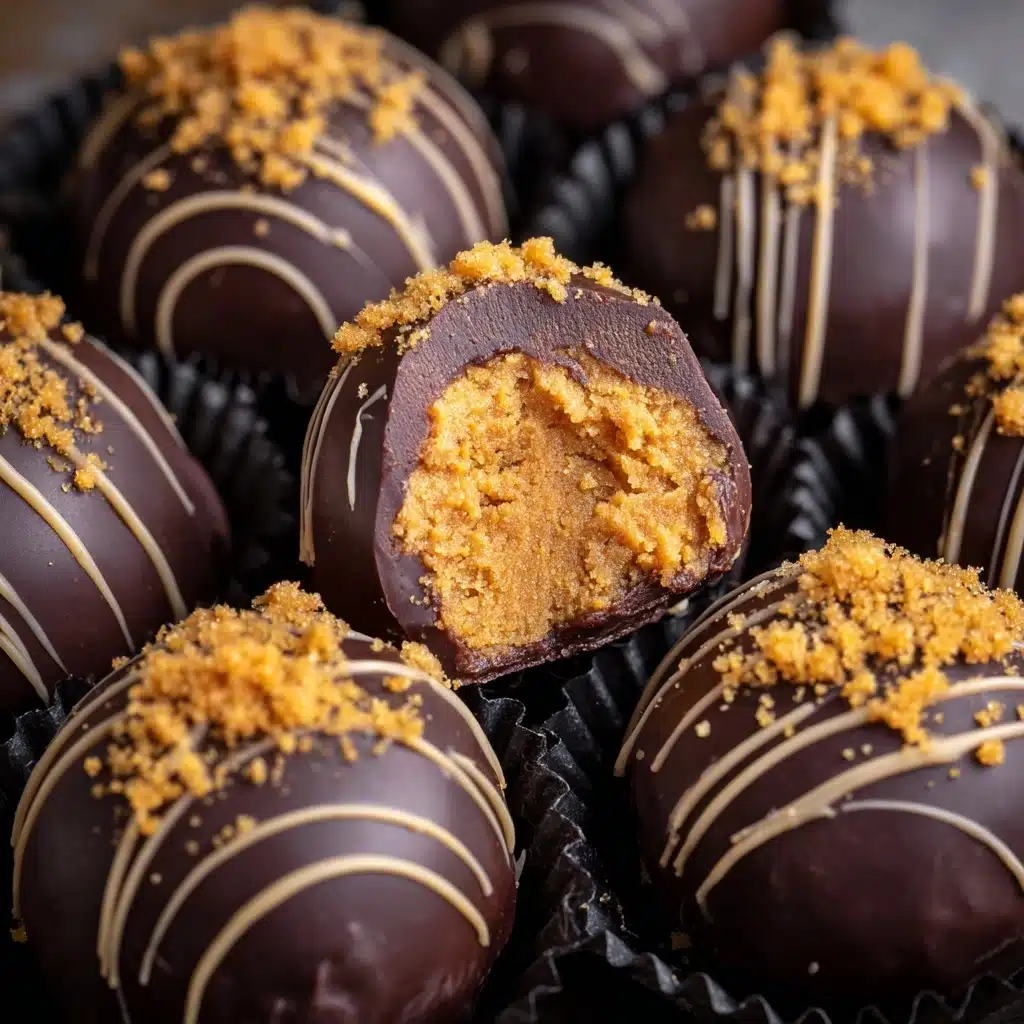
If you’re looking for a treat that’s equal parts nostalgic and utterly irresistible, Butterfinger Balls are exactly what you need. Imagine all the best parts of classic peanut butter balls — but bumped up with crunchy, chocolatey Butterfinger magic. Each bite is creamy, crispy, and cloaked in a rich chocolate shell. They couldn’t be simpler to throw together, but wow, do they make snack time or any special occasion feel like something extra special! If you love easy, no-bake desserts that pack big flavor, this is about to become a staple in your recipe file.
Ingredients You’ll Need
The real joy of making Butterfinger Balls is how these basic ingredients create something that tastes like you fussed for ages. Each one brings its own special magic for flavor, texture, or that perfect finishing touch.
- Creamy peanut butter: Delivers that gooey, salty-sweet base everyone loves; use crunchy for extra texture!
- Unsalted butter (softened): Adds richness and silkiness, letting the peanut butter flavor shine through.
- Powdered sugar: Sweetens things up and helps set the dough to just the right consistency for rolling.
- Crushed Butterfinger candy bars: The star: brings that signature crispety, crunchety, peanut-buttery zing to every bite.
- Semi-sweet or milk chocolate chips: Melted into a glorious, glossy coating — choose your favorite for maximum satisfaction.
- Coconut oil or shortening (optional): A splash helps melt the chocolate extra smooth for dipping, but you can skip if you like.
How to Make Butterfinger Balls
Step 1: Mix the Peanut Butter and Butter
Start by grabbing a large mixing bowl and combining your creamy peanut butter with the softened butter. It helps to let the butter sit out a bit beforehand so it mixes in easily. Use a hand mixer or sturdy spoon to blend until everything is super-smooth and luscious.
Step 2: Add Powdered Sugar
Now it’s time to sweeten things up! Gradually add the powdered sugar into your peanut butter mixture. Stir as you go; once all the sugar is in, you should have a thick, slightly sticky dough that easily pulls together. This step’s important for getting the right consistency, so don’t rush it!
Step 3: Stir in Crushed Butterfinger Candy
Next up is where the Butterfinger balls really start to shine: fold in those crushed Butterfinger pieces. Try not to nibble too many as you go! Mix gently but thoroughly so there’s crispy, peanut-buttery candy in every bite. The color gets speckled and textured—so fun!
Step 4: Shape the Balls and Freeze
With clean hands, roll the dough into 1-inch balls. They don’t have to look perfect! Place each one on a parchment-lined baking sheet. Once you’ve shaped all the balls, pop the tray in the freezer for about 30 minutes. This quick chill helps them firm up and makes the next step a breeze.
Step 5: Melt the Chocolate
In a microwave-safe bowl, add your chocolate chips and coconut oil (if using). Microwave in 30-second bursts, stirring after each one, until the chocolate is glossy and completely melted. The oil gives the chocolate a silky finish, but you can absolutely skip it if you don’t have any handy.
Step 6: Dip the Butterfinger Balls
Take the chilled balls from the freezer, and using a fork or toothpick, dip each one into the melted chocolate. Let any excess drip off, then set the chocolate-coated balls back onto your lined baking sheet. This is messy in the best way and so satisfying! Repeat for all the Butterfinger Balls.
Step 7: Chill to Set
Once they’re all dipped and dazzling, slide the tray into the fridge for another 20 to 30 minutes. This final chill gives the chocolate time to harden, so your Butterfinger Balls have that perfect snap at first bite. Serve chilled if you like a firmer texture, or let them sit a few minutes at room temp for extra creaminess.
How to Serve Butterfinger Balls
Garnishes
Dress these up by drizzling with melted white chocolate, or sprinkle with extra crushed Butterfinger pieces before the chocolate sets. A pinch of flaky sea salt on top is also a fantastic, grown-up touch for anyone who loves that sweet-and-salty combo.
Side Dishes
Pair Butterfinger Balls with a glass of cold milk or hot coffee for a classic treat. For parties, arrange them alongside a fruit platter or serve with a scoop of vanilla ice cream for an over-the-top dessert everyone will rave about.
Creative Ways to Present
These are a superstar on any dessert tray or cookie platter, especially during the holidays. Try stacking them in a glass jar and tying with ribbon for an unforgettable homemade gift, or skewer them on sticks for a playful, cake-pop inspired party treat.
Make Ahead and Storage
Storing Leftovers
Keep any leftover Butterfinger Balls in an airtight container in the refrigerator. They’ll stay fresh and delightful for up to a week, making them perfect for make-ahead snacking or last-minute dessert needs.
Freezing
Want to make these ahead or stock up for a guilty-pleasure emergency? Freeze Butterfinger Balls in a single layer on a sheet pan, then transfer to a zip-top bag or freezer-safe container. They’ll keep beautifully for up to two months. Thaw in the fridge or just pop in your mouth straight from the freezer!
Reheating
Since these are no-bake goodies, there’s no reheating required. If you like them softer, let them sit at room temperature for 10-15 minutes before enjoying. If you prefer them on the firmer side, serve straight from the fridge or freezer.
FAQs
Can I use crunchy peanut butter instead of creamy?
Absolutely! Crunchy peanut butter will add even more texture and little peanutty surprises in every bite. Feel free to swap it in for a bit of extra crunch.
Can I use a different candy bar?
You can experiment with other candy bars, but Butterfinger is what gives these treats their unique flavor and signature crunch. If you use something else, expect a different taste and texture — delicious in its own way!
Are Butterfinger Balls gluten-free?
The base ingredients themselves are gluten-free, but since Butterfinger bars may contain gluten or be processed in facilities with gluten, check labels carefully if dietary needs are a concern.
How do I crush Butterfinger bars easily?
Place unwrapped Butterfinger bars in a zip-top bag and give them a few firm whacks with a rolling pin or heavy can. You want small, tasty shards, but not powder!
Can I make the Butterfinger Balls smaller or larger?
Definitely! Shape the balls to your preferred size, just adjust the chilling and chocolate-coating times a bit. Mini balls are perfect for sharing, while jumbo ones make a fun, candy-bar-sized treat.
Final Thoughts
If you need a treat that everyone will ask you for again and again, Butterfinger Balls are it. They’re quick, fun, totally customizable, and an instant crowd-pleaser. Go ahead — whip up a batch and enjoy every crisp, chocolatey, peanut-buttery bite! Your sweet tooth will thank you.
Print
Butterfinger Balls Recipe
- Total Time: 50 minutes (including chilling)
- Yield: 24 balls 1x
- Diet: Vegetarian
Description
These Butterfinger Balls are a delightful no-bake treat that combines the rich flavors of peanut butter, Butterfinger candy bars, and chocolate. Perfect for satisfying your sweet tooth!
Ingredients
Peanut Butter Mixture:
- 1 cup creamy peanut butter
- 1/2 cup unsalted butter, softened
- 2 1/2 cups powdered sugar
Additional Ingredients:
- 1 1/2 cups crushed Butterfinger candy bars (about 6 fun-size bars)
- 12 oz semi-sweet or milk chocolate chips
- 1 tablespoon coconut oil or shortening (optional, for smoother coating)
Instructions
- Mix Peanut Butter and Butter: In a large bowl, blend peanut butter and softened butter until creamy.
- Add Powdered Sugar: Gradually incorporate the powdered sugar until a thick dough forms.
- Combine Butterfinger: Stir in the crushed Butterfinger pieces until evenly mixed.
- Shape into Balls: Roll the mixture into 1-inch balls and place on a parchment-lined baking sheet. Freeze for 30 minutes.
- Melt Chocolate: In a microwave-safe bowl, melt chocolate chips (and coconut oil if desired) in 30-second intervals, stirring until smooth.
- Coat Balls: Dip each ball into the melted chocolate using a fork or toothpick, allowing excess to drip off. Place on parchment paper.
- Chill: Refrigerate for 20–30 minutes until chocolate sets. Serve chilled or at room temperature.
Notes
- Store in the refrigerator for up to 1 week or freeze for up to 2 months.
- For added texture, use crunchy peanut butter.
- Enhance with a white chocolate drizzle or extra crushed Butterfinger for decoration.
- Prep Time: 20 minutes
- Cook Time: 0 minutes
- Category: Dessert
- Method: No-Bake
- Cuisine: American
Nutrition
- Serving Size: 1 ball
- Calories: 160
- Sugar: 14g
- Sodium: 60mg
- Fat: 10g
- Saturated Fat: 5g
- Unsaturated Fat: 4g
- Trans Fat: 0g
- Carbohydrates: 17g
- Fiber: 1g
- Protein: 2g
- Cholesterol: 10mg