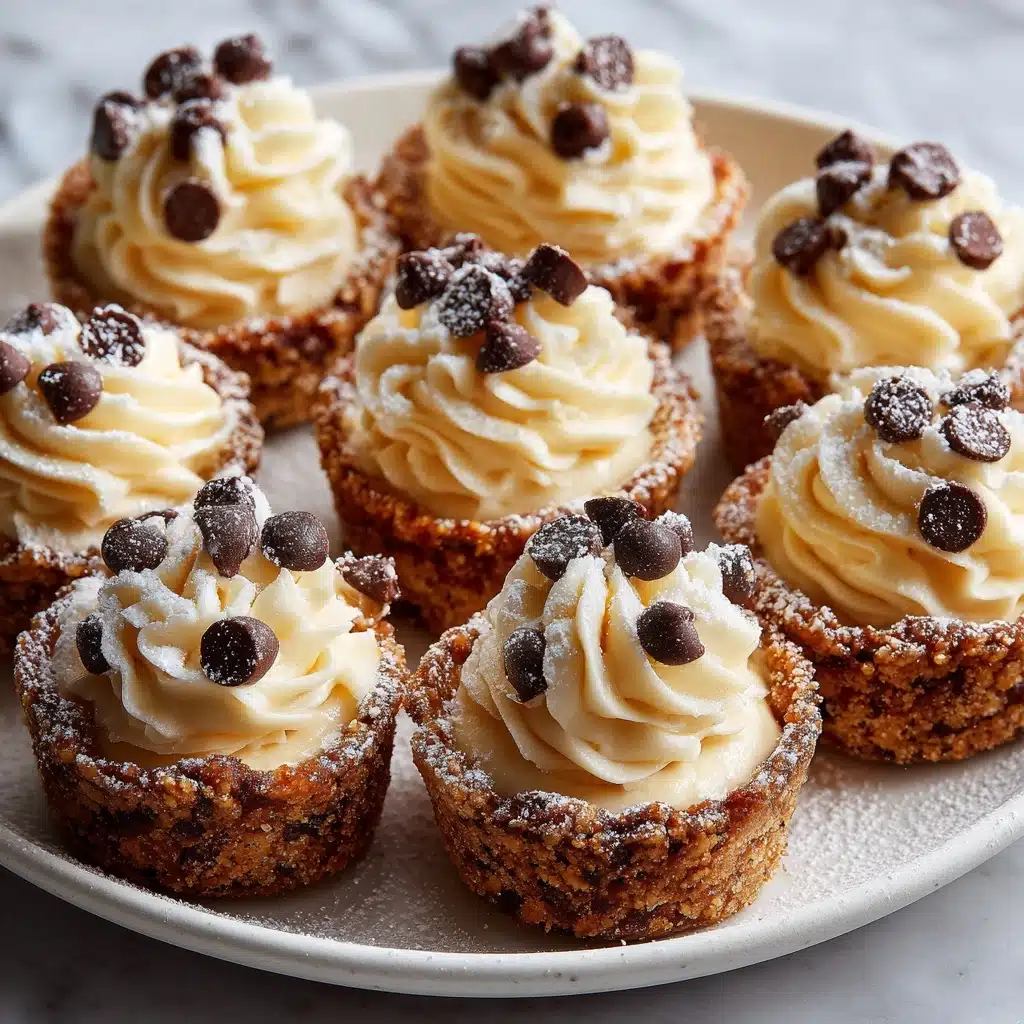
If you love Italian desserts but want something new, you’ll absolutely fall for Cannoli Cookie Cups: A Sweet Twist on a Classic Favorite. Imagine all the creamy, chocolatey goodness of a classic cannoli, but nestled in a buttery cookie cup that practically melts in your mouth! This recipe brings together simple pantry ingredients and transforms them into an adorable, party-ready treat everyone will rave about. Whether you’re baking for a family dinner or a holiday gathering, these cookie cups deliver that wow-factor flavor and irresistible texture in every single bite.
Ingredients You’ll Need
You might be surprised how few things you actually need for Cannoli Cookie Cups: A Sweet Twist on a Classic Favorite. Each ingredient has its own starring role, from crisp, golden cookie cups to a lusciously smooth filling—let’s take a closer look at what makes this treat truly special.
- All-purpose flour: Forms the sturdy but tender base of our cookie cup, perfect for holding that creamy filling.
- Baking soda: Just a touch helps the cups rise and achieve a light, crisp texture.
- Salt: Enhances sweetness and balances flavors—don’t skip it!
- Unsalted butter (softened): Essential for that rich, melt-in-your-mouth cookie—make sure it’s room temperature for easy mixing.
- Granulated sugar: Brings classic sweetness and helps create the golden-brown exterior.
- Light brown sugar: Adds a whisper of caramel undertone and keeps the cookie centers soft.
- Large egg: Binds the dough together and gives structure to the cookie cups.
- Vanilla extract: Wakes up the flavor in both the cookie and the filling.
- Mini chocolate chips (plus more for garnish): Because mini chocolate bursts in every bite make these magical!
- Whole milk ricotta cheese: For that authentic, ultra-creamy filling—drain it overnight if you want the smoothest texture.
- Mascarpone cheese: Elevates the filling with luxury-level creaminess—look for it in the cheese section.
- Powdered sugar: Sweetens and smooths out the filling for a cloud-like finish.
- Vanilla extract (for filling): Gives the filling its irresistible aroma and flavor—don’t forget this second addition!
- Ground cinnamon: Optional, but highly recommended for a warm, inviting note that ties everything together.
- Chopped pistachios (optional, for garnish): Sprinkle these on top for a pop of color, crunch, and old-school cannoli flair.
How to Make Cannoli Cookie Cups: A Sweet Twist on a Classic Favorite
Step 1: Prep Your Pan and Oven
Start by preheating your oven to 350°F (175°C) and lightly greasing a mini muffin pan. This ensures that every cookie cup pops out effortlessly once baked. If you have a nonstick pan, a quick spritz of baking spray is all you need—otherwise, use a little butter or shortening for insurance.
Step 2: Mix Your Dry Ingredients
In a medium bowl, whisk together your flour, baking soda, and salt. This quick step keeps the baking soda evenly distributed, giving your cookie cups perfect rise and texture—no pesky lumps to worry about later on!
Step 3: Cream the Butter and Sugars
In a large bowl, beat the softened butter, granulated sugar, and light brown sugar until the mixture looks pale and fluffy. This aeration step is what gives your cookies a beautiful lightness—don’t skimp on the mixing time here!
Step 4: Add Egg and Vanilla
Crack in your egg and add the vanilla extract, mixing until everything is fully combined. The egg brings moisture and structure, while vanilla builds a flavor base that will shine through every bite.
Step 5: Combine Wet and Dry Ingredients
Gradually add the dry ingredients into your butter mixture, mixing just until you can’t see any more streaks of flour. Overmixing can toughen the dough, so keep things gentle. When in doubt, finish folding by hand with a spatula.
Step 6: Fold in Mini Chocolate Chips
Gently stir in the mini chocolate chips until they’re evenly dispersed. That way, each cookie cup gets that irresistible chocolate crunch, just like a classic cannoli.
Step 7: Shape and Bake the Cookie Cups
Scoop about a tablespoon of dough into each mini muffin cavity and press it down and up the sides to form a cup. This little trick is what gives Cannoli Cookie Cups: A Sweet Twist on a Classic Favorite their signature look—and their ability to hold a luxurious amount of filling!
Step 8: Bake to Golden Perfection
Pop the pan into the oven and bake for 10–12 minutes, or until the cups are golden brown around the edges. As soon as they come out, use a spoon to gently re-press the centers for extra room for filling. Let them cool in the pan for about 10 minutes before moving them to a wire rack to finish cooling.
Step 9: Make the Creamy Cannoli Filling
While your cookie cups chill, blend together the drained ricotta, mascarpone, powdered sugar, vanilla extract, and a pinch of cinnamon in a medium bowl. Mix until you have a velvety, dreamy consistency—don’t be surprised if you catch yourself sneaking a taste!
Step 10: Fill and Garnish
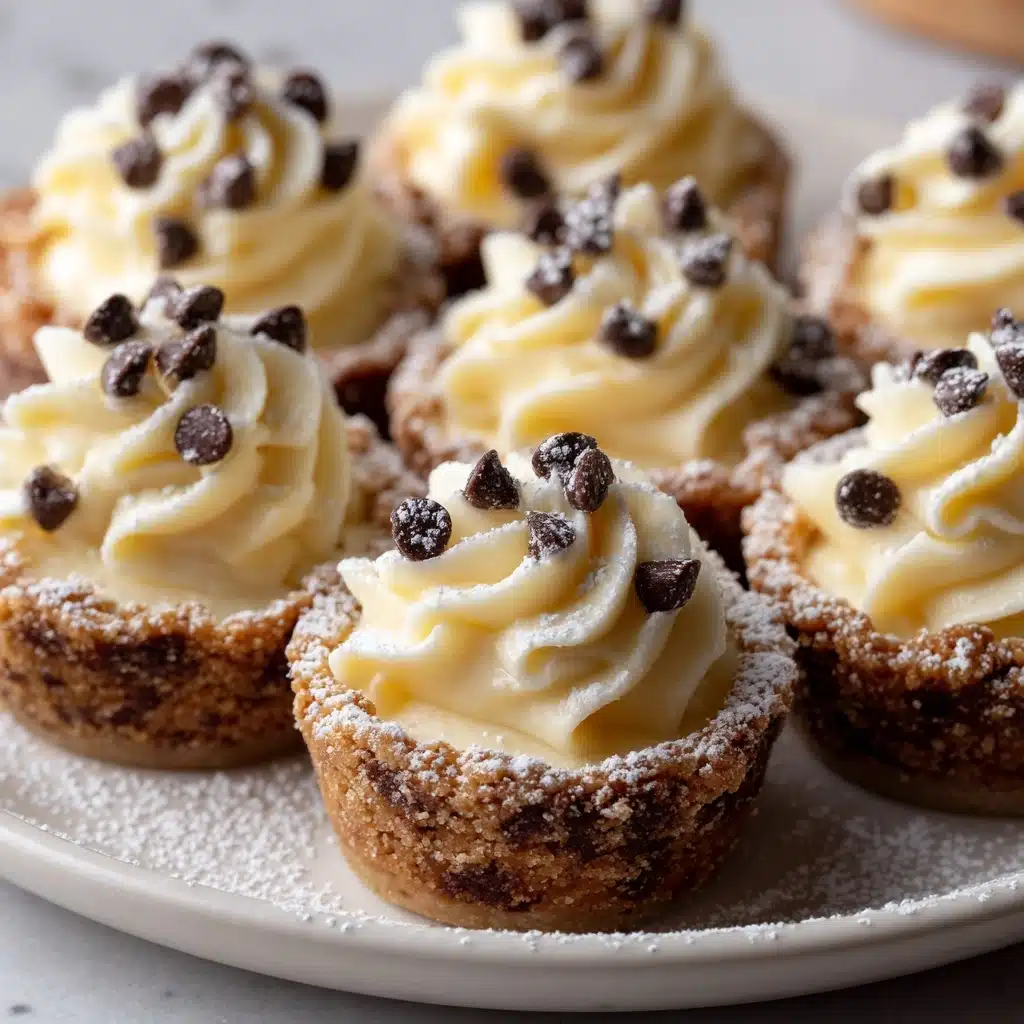
Spoon or pipe the filling into the cooled cookie cups. Top each with a few mini chocolate chips or a scattering of chopped pistachios. Then, pop the whole tray into the fridge until you’re ready to serve. That’s Cannoli Cookie Cups: A Sweet Twist on a Classic Favorite—done!
How to Serve Cannoli Cookie Cups: A Sweet Twist on a Classic Favorite

Garnishes
The right garnish makes your Cannoli Cookie Cups: A Sweet Twist on a Classic Favorite look as good as they taste. Sprinkle extra mini chocolate chips, chopped pistachios, or even a dusting of powdered sugar over the tops just before serving—each option adds its own festive flair and crunch.
Side Dishes
Cannoli Cookie Cups pair beautifully with fresh berries or a scoop of vanilla gelato for a decadent Italian-inspired dessert plate. If you’re hosting, set out a tray of espresso or cappuccino—the creamy, sweet cookie cups with a shot of bold coffee is truly unbeatable.
Creative Ways to Present
For a party, arrange the cookie cups on a pretty cake stand surrounded by colorful berries and edible flowers. Or create a build-your-own bar, letting guests choose their own toppings for a fun, interactive dessert experience—just another way to showcase Cannoli Cookie Cups: A Sweet Twist on a Classic Favorite!
Make Ahead and Storage
Storing Leftovers
If you have extras (it’s rare!), store the assembled cookie cups in an airtight container in the refrigerator for up to three days. For the crispiest cups, keep cookies and filling separate until you’re ready to indulge.
Freezing
The empty baked cookie cups can be frozen for up to two months—just put them in a freezer-safe zip bag. Thaw at room temperature before filling. The filling itself is best fresh, but you can mix it a day ahead and keep it chilled.
Reheating
No need to reheat—Cannoli Cookie Cups: A Sweet Twist on a Classic Favorite are best enjoyed cold or at room temperature. If you want to crisp up the empty cookie cups, pop them in a 300°F oven for 3–4 minutes before filling.
FAQs
Can I make these cookie cups gluten-free?
Absolutely! Substitute your favorite 1:1 gluten-free flour blend for the all-purpose flour, and double-check that all other ingredients are certified gluten-free. The recipe works beautifully for gluten-sensitive dessert lovers.
Can I drain ricotta quickly if I forget to do it overnight?
Yes! Spread the ricotta on paper towels or a cheesecloth, fold, and gently press out as much moisture as possible. While an overnight drain yields the best results, this shortcut still gives you a good creamy filling.
Can I use store-bought cookie dough?
In a pinch, store-bought sugar or chocolate chip cookie dough can be pressed into a mini muffin pan and baked, but the homemade version brings that signature flavor and texture—worth every minute!
What’s the best way to pipe the filling?
Use a piping bag fitted with a star or round tip for a pretty finish, or snip the end off a sturdy zip-top bag as a quick alternative. Piping gives you neater, more even portions and looks extra impressive!
How far ahead can I assemble Cannoli Cookie Cups?
It’s best to fill the cups no more than 2 hours before serving so the cookies stay crisp. If you need to prep ahead, keep the cups and filling separate, then assemble just before your guests arrive.
Final Thoughts
These Cannoli Cookie Cups: A Sweet Twist on a Classic Favorite bring everything you love about classic cannoli into a playful, bite-sized treat. They’re easy to make, totally irresistible, and guaranteed to wow your family and friends. Give them a try—you just might find your new favorite dessert!
Print
Cannoli Cookie Cups: A Sweet Twist on a Classic Favorite Recipe
- Total Time: 32 minutes
- Yield: 24 mini cookie cups 1x
- Diet: Vegetarian
Description
Cannoli Cookie Cups are a delightful twist on the classic cannoli, featuring a sweet, crispy cookie cup filled with a creamy, ricotta-mascarpone filling. These bite-sized treats are perfect for parties or as a fun dessert option.
Ingredients
Cookie Cups:
- 1 1/4 cups all-purpose flour
- 1/2 teaspoon baking soda
- 1/4 teaspoon salt
- 1/2 cup unsalted butter, softened
- 1/2 cup granulated sugar
- 1/4 cup light brown sugar
- 1 large egg
- 1 teaspoon vanilla extract
- 1/2 cup mini chocolate chips (plus more for garnish)
Ricotta Filling:
- 1 1/2 cups whole milk ricotta cheese
- 1/2 cup mascarpone cheese
- 1/2 cup powdered sugar
- 1/2 teaspoon vanilla extract
- 1/4 teaspoon ground cinnamon
- Optional: chopped pistachios for garnish
Instructions
- Preheat the oven: Preheat the oven to 350°F (175°C) and lightly grease a mini muffin pan.
- Make the Cookie Cups: Whisk together flour, baking soda, and salt. Cream butter and sugars, then beat in egg and vanilla. Gradually add dry ingredients and fold in chocolate chips. Press dough into muffin cavities to form cups and bake until golden.
- Prepare the Filling: Mix ricotta, mascarpone, powdered sugar, vanilla, and cinnamon until smooth. Fill cooled cookie cups with the ricotta mixture.
- Garnish and Chill: Top with chocolate chips or pistachios, then chill until ready to serve.
Notes
- For best results, drain the ricotta overnight in a cheesecloth-lined strainer to remove excess moisture.
- The cookie cups and filling can be made a day ahead and assembled before serving.
- Prep Time: 20 minutes
- Cook Time: 12 minutes
- Category: Dessert
- Method: Baking
- Cuisine: Italian-American
Nutrition
- Serving Size: 1 cookie cup
- Calories: 140
- Sugar: 10 g
- Sodium: 55 mg
- Fat: 8 g
- Saturated Fat: 5 g
- Unsaturated Fat: 2.5 g
- Trans Fat: 0 g
- Carbohydrates: 15 g
- Fiber: 0.5 g
- Protein: 2 g
- Cholesterol: 20 mg