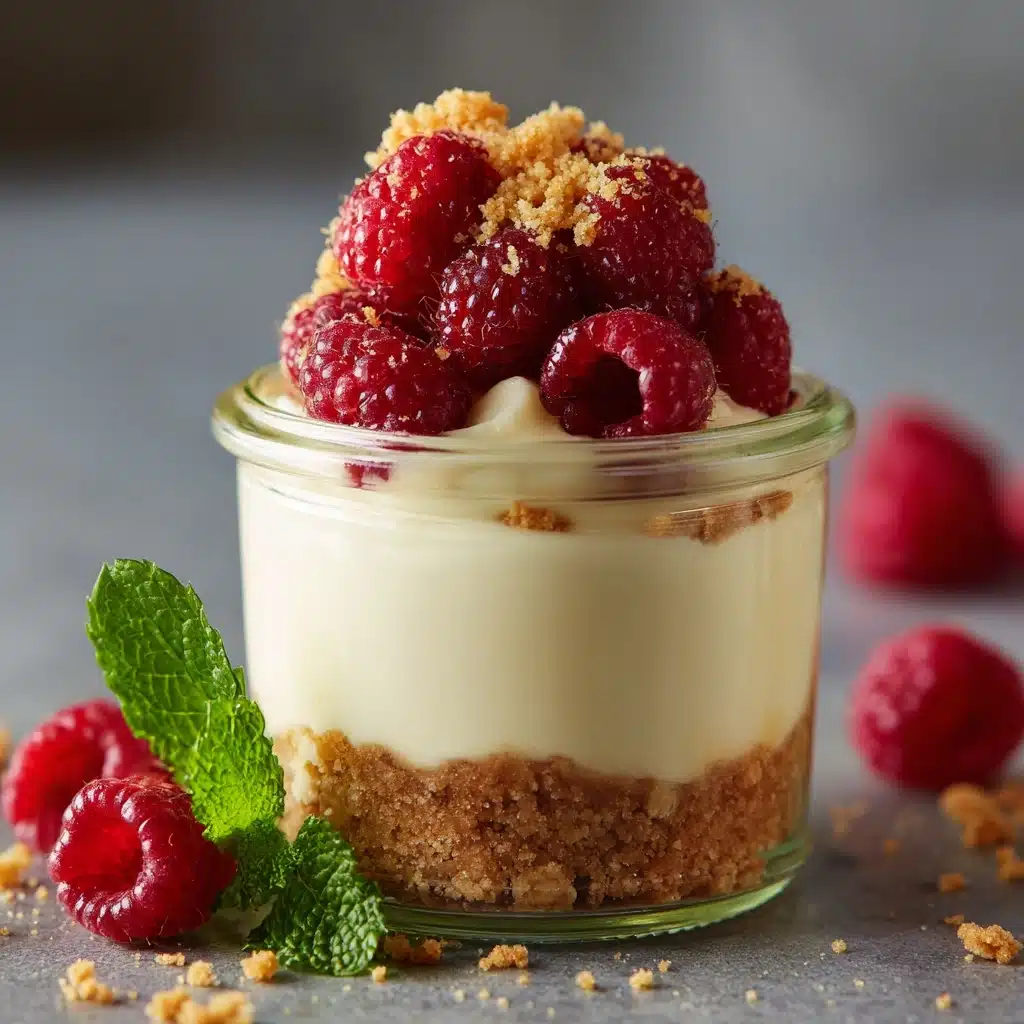
If you crave a creamy, dreamy dessert that actually supports your nutrition goals, these High-Protein Cheesecake Jars are about to be your new favorite treat. Perfectly portioned and loaded with rich flavor, every spoonful blends the tangy creaminess of Greek yogurt and cream cheese with the natural sweetness of honey and a burst of fresh berries on top. Not only are they deliciously satisfying, but these no-bake jars are also a breeze to whip up, making them a clever choice for both dessert and a wholesome snack.
Ingredients You’ll Need
Ingredients You’ll Need
Gathering the essentials for these High-Protein Cheesecake Jars is refreshingly straightforward—each item brings something important to the table, from creaminess to crunch, gentle sweetness, and vibrant color. Don’t underestimate these simple ingredients; their combined magic creates a truly irresistible dessert experience!
- Nonfat Greek yogurt: Packs a protein punch while adding a balanced tanginess and light texture to the cheesecake base.
- Reduced-fat cream cheese (softened): Delivers creaminess and classic rich cheesecake flavor without being heavy.
- Vanilla protein powder: Boosts the protein content and adds gentle vanilla notes—choose your favorite brand for best results.
- Honey or sugar-free sweetener: Sweetens the mix naturally or keep it low-sugar based on your preferences.
- Vanilla extract: A splash enhances the overall aroma and brings that unmistakable cheesecake warmth.
- Graham cracker crumbs (or almond flour): Form the classic, crave-worthy crust, or swap for almond flour to keep things low-carb and nutty!
- Unsalted butter (melted): Helps the crust hold together beautifully while adding a touch of richness.
- Fresh berries (your choice): Lifts everything with a pop of color, fresh flavor, and a little juicy sweetness on top.
How to Make High-Protein Cheesecake Jars
Step 1: Prepare the Crust
Start things off by combining the graham cracker crumbs (or almond flour) with the melted butter in a medium bowl. Mix until all the crumbs are evenly coated, transforming them into a sandy, buttery base. Spoon about 2 tablespoons into the bottom of each small jar or cup, then gently press the mixture down—just enough so it holds together but isn’t too packed. This gives you that delightful, sturdy foundation every cheesecake deserves!
Step 2: Blend the Creamy Filling
In a large bowl, beat the softened cream cheese until it’s completely smooth and fluffy—this step is key to a silky cheesecake texture. Next, add the Greek yogurt, vanilla protein powder, honey (or your chosen sweetener), and vanilla extract. Mix everything together until perfectly creamy and unified. At this point, the aroma alone will have your taste buds on high alert for what’s coming next!
Step 3: Assemble the Jars
Divide the luscious cheesecake filling evenly among your jars, carefully spooning it over the crust. Aim for a thick, generous layer so each jar feels truly indulgent. Lightly smooth out the tops for a pretty finish—there’s something so satisfying about seeing those clean, distinct layers through the glass.
Step 4: Top with Fresh Berries
Crown each jar with a mound of fresh berries—pick your favorites or mix things up for a colorful burst. The fruit adds brightness and a juicy contrast to the creamy, rich filling beneath. Sneak a few extra berries if you’re feeling generous; that fresh pop is hard to resist!
Step 5: Chill and Set
Cover the jars with lids or plastic wrap, then pop them in the refrigerator for at least 2 hours. Letting them chill gives the flavors time to meld and the filling time to firm up, creating that classic, sliceable cheesecake texture—only in the cutest portable form!
How to Serve High-Protein Cheesecake Jars
Garnishes
A little extra flair elevates these High-Protein Cheesecake Jars into something truly special. Sprinkle with a bit of granola for crunch, add a mint sprig for color, or drizzle with a swirl of warmed nut butter for a decadent touch. You could also grate a little dark chocolate or add a twist of lemon zest on top for extra allure.
Side Dishes
While these jars easily stand alone as a dessert or snack, you can serve them alongside fruit salad or a platter of crunchy nuts for a balanced brunch spread. Pairing with a cup of espresso or iced coffee highlights their creamy richness and makes for a delightful afternoon treat.
Creative Ways to Present
High-Protein Cheesecake Jars look fantastic in mini mason jars or clear glasses, allowing those beautiful layers to shine. For parties, serve them in shot glasses for perfect bite-sized nibbles. You could even layer the ingredients parfait-style in a tall glass for an elegant twist, or personalize each jar with a hand-written tag for gifting.
Make Ahead and Storage
Storing Leftovers
Once assembled, these jars keep brilliantly covered in the refrigerator for up to 4 days. The flavors deepen as they chill, making them even more irresistible after that first day. Just make sure they’re well-sealed to keep them tasting fresh and creamy.
Freezing
If you’d like to make a bigger batch to freeze, simply assemble the High-Protein Cheesecake Jars without the fresh berries on top. Store them tightly wrapped in the freezer for up to a month. Thaw overnight in the fridge and add fresh berries before serving for the best flavor and texture.
Reheating
These cheesecake jars are best enjoyed chilled straight from the fridge, so no reheating is needed! If frozen, just allow them to thaw in the refrigerator before indulging. Avoid microwaving, as it can alter the creamy texture and separate the layers.
FAQs
How can I make High-Protein Cheesecake Jars lower in sugar?
You can easily substitute honey with a sugar-free sweetener or a low-calorie syrup. Adding vanilla protein powder already brings sweetness to the filling, so taste as you go and adjust the amount to suit your preference without overdoing the sugar.
Can I use other types of fruit for the topping?
Absolutely! While berries are classic, High-Protein Cheesecake Jars taste fantastic with sliced kiwi, mango, pomegranate seeds, or a small spoonful of homemade fruit compote. Feel free to mix and match based on what’s in season or your fruit cravings.
Is there a dairy-free option for this recipe?
Yes, swap the Greek yogurt and cream cheese for dairy-free alternatives like almond- or coconut-based versions. Just make sure to use a plant-based protein powder as well. The result will be a creamy, protein-packed dessert everyone can enjoy.
What’s the best way to pack these jars for on-the-go snacks?
Choose jars with tight-fitting lids. Layer the crust and filling, but add the berries just before serving to keep them fresh. They make the perfect meal prep snack or lunchbox treat, and you’ll love opening the fridge to see them ready to grab!
Can I double the batch for a crowd?
Definitely! Simply double each ingredient and prepare as directed. The recipe scales beautifully. You can even set up a “cheesecake jar bar” with lots of toppings and let guests build their own at your next gathering.
Final Thoughts
There’s just something irresistible about the rich, creamy simplicity of High-Protein Cheesecake Jars. Whether you’re meal prepping healthier treats or dazzling friends at your next get-together, these jars always hit the spot. Don’t wait—whip up a batch and see why they’re bound to become your new go-to dessert or snack!
Print
High-Protein Cheesecake Jars Recipe
- Total Time: 2 hours 15 minutes (including chilling)
- Yield: 6 jars 1x
- Diet: Non-Vegetarian
Description
Indulge in these High-Protein Cheesecake Jars for a guilt-free treat that’s creamy, delicious, and packed with protein. Perfect for satisfying your sweet cravings while keeping you on track with your health goals.
Ingredients
Graham Cracker Crust:
- 1 cup graham cracker crumbs or almond flour for low-carb
- 3 tablespoons unsalted butter, melted
Cheesecake Filling:
- 1 1/2 cups nonfat Greek yogurt
- 8 ounces reduced-fat cream cheese, softened
- 1/3 cup vanilla protein powder
- 1/4 cup honey or sugar-free sweetener
- 1 teaspoon vanilla extract
Toppings:
- 1 cup fresh berries (strawberries, blueberries, or raspberries)
Instructions
- Graham Cracker Crust: In a medium bowl, mix graham cracker crumbs with melted butter until evenly coated. Spoon about 2 tablespoons of the mixture into the bottom of 6 small jars or cups and press down lightly to form the crust.
- Cheesecake Filling: In a large bowl, beat cream cheese until smooth. Add Greek yogurt, protein powder, honey (or sweetener), and vanilla extract. Mix until creamy and well combined. Spoon the cheesecake mixture evenly over the crusts.
- Toppings: Top with fresh berries. Cover and refrigerate for at least 2 hours before serving to allow the flavors to set.
Notes
- For extra crunch, add a sprinkle of granola on top just before serving.
- You can swap honey with maple syrup or a sugar-free syrup to adjust sweetness.
- These jars can be stored in the refrigerator for up to 4 days, making them perfect for meal prep.
- Prep Time: 15 minutes
- Cook Time: 0 minutes
- Category: Dessert, Snack
- Method: No-Bake, Chilling
- Cuisine: American
Nutrition
- Serving Size: 1 jar
- Calories: 210
- Sugar: 11 g
- Sodium: 190 mg
- Fat: 9 g
- Saturated Fat: 5 g
- Unsaturated Fat: 3 g
- Trans Fat: 0 g
- Carbohydrates: 18 g
- Fiber: 1 g
- Protein: 14 g
- Cholesterol: 25 mg