
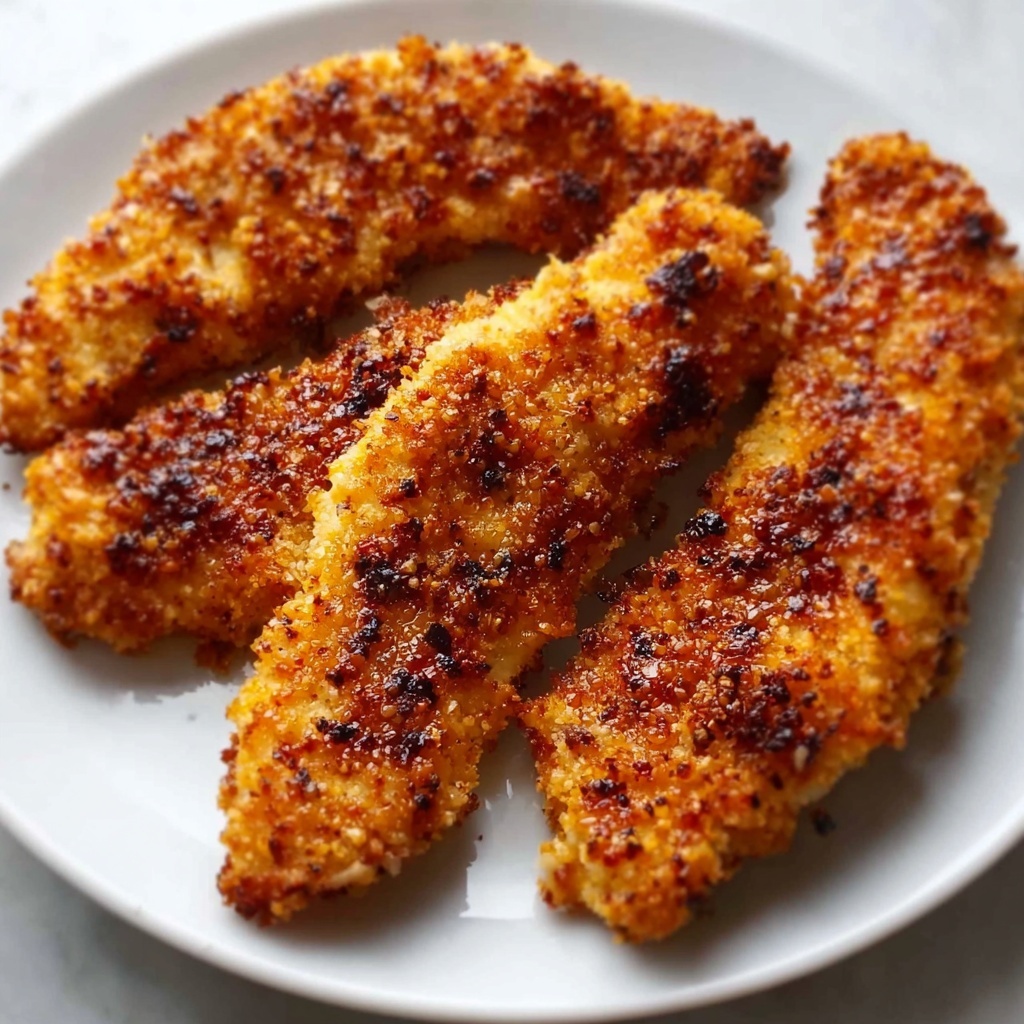
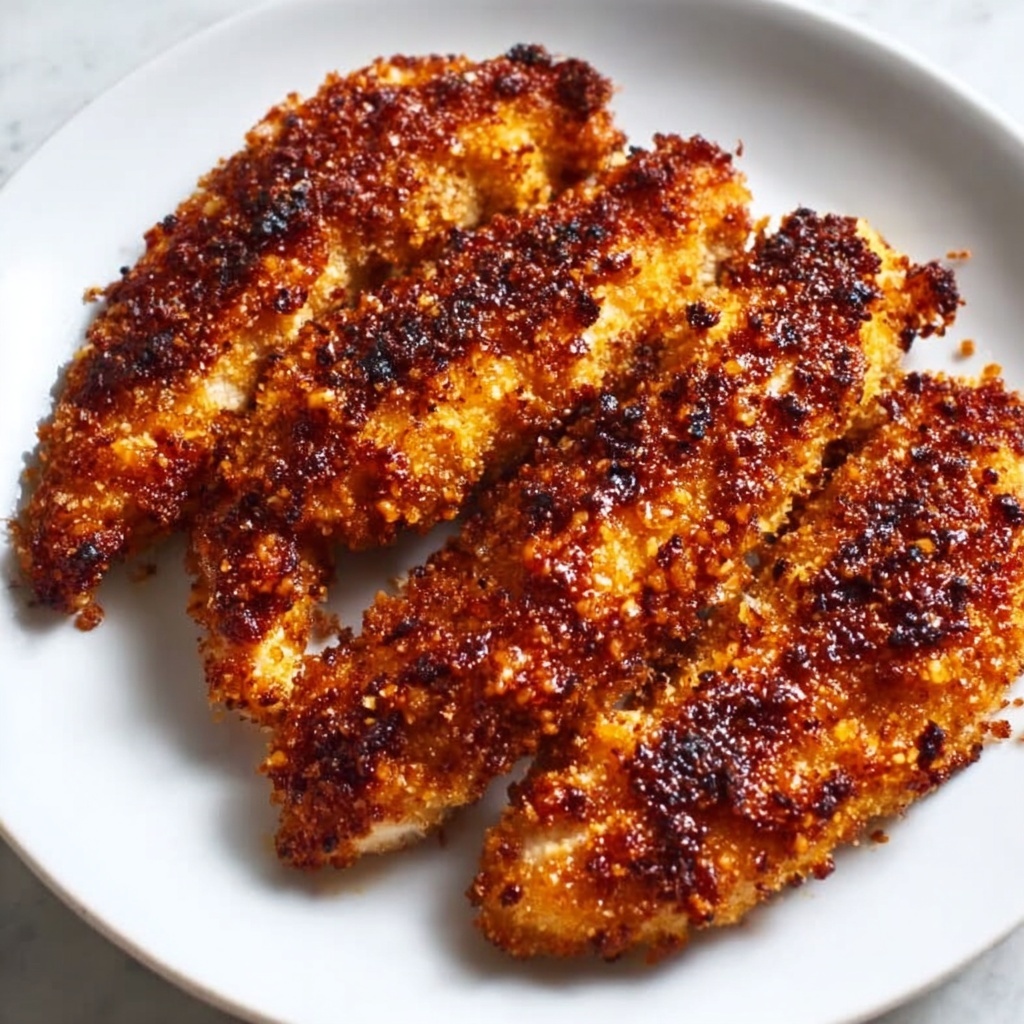
If you’re craving a snack that hits all the right notes—crispy on the outside, tender and juicy on the inside—then this Crispy Baked Chicken Tenders Recipe is going to be your new go-to. It’s a lighter, oven-baked take on the beloved classic, delivering that irresistible crunch without the guilt of deep frying. Whether you’re feeding the family or need a quick fix for unexpected guests, these chicken tenders burst with flavor thanks to a perfectly seasoned breadcrumb coating and a quick bake that keeps everything juicy and delicious.
Ingredients You’ll Need
The magic of this Crispy Baked Chicken Tenders Recipe starts with simple, everyday pantry staples that come together effortlessly. Each ingredient plays a key role—flour creates the perfect base layer to help the coating stick, eggs act as a binder, and the seasoned breadcrumbs deliver a golden, crunchy crust with bold flavor.
- Chicken breast strips: The lean protein base that stays juicy after baking.
- All-purpose flour: Helps the egg coating adhere smoothly to the chicken.
- Large eggs: Binds the breadcrumb mixture firmly onto the chicken strips.
- Breadcrumbs: Creates that signature crunchy texture with every bite.
- Garlic powder: Adds a deep, savory aroma that complements the chicken beautifully.
- Paprika: Offers warmth and subtle smokiness to the coating.
- Salt: Enhances every flavor to keep the tenders perfectly seasoned.
- Black pepper: Adds a hint of sharpness that balances the spices.
- Olive oil: Drizzled on top to promote even browning and crispiness while baking.
How to Make Crispy Baked Chicken Tenders Recipe
Step 1: Prep Your Oven and Chicken
Start by preheating your oven to 200°C (400°F) so it’s nice and hot for baking. Meanwhile, pat the chicken breast strips dry with paper towels—this little step is crucial because removing excess moisture helps the breading stick better and ensures the chicken crisps up perfectly.
Step 2: Set Up Your Breading Station
Arrange three shallow bowls: one with the flour, the next with beaten eggs, and the third with a mixture of breadcrumbs, garlic powder, paprika, salt, and black pepper. This triptych of coatings guarantees a crunchy, flavorful crust that locks in moisture.
Step 3: Coat the Chicken Strips
Time for the triple dip: first, coat each chicken strip in flour, shaking off the excess; then dip into the beaten eggs—think of this as the glue; finally, press the strips into the breadcrumb mixture, ensuring every nook and cranny is covered. This layering creates that incredibly satisfying crunch you crave.
Step 4: Arrange and Drizzle
Place all your breaded chicken tenders on a lined baking sheet in a single layer so they cook evenly. Drizzle the olive oil over the top—this little touch helps develop a gorgeous golden color and crisp texture without all the frying mess.
Step 5: Bake to Perfection
Pop the tray into your preheated oven and bake for about 20 to 25 minutes. Remember to flip the tenders halfway through cooking to ensure both sides get equally crispy. Once they’re done, they’ll be golden, crunchy, and so inviting.
Step 6: Cool and Serve
After baking, let your chicken tenders rest for a couple of minutes to lock in the juices before serving. This makes every bite tender inside while keeping that perfect crispy crust intact.
How to Serve Crispy Baked Chicken Tenders Recipe
Garnishes
Sprinkling fresh chopped parsley or chives over your chicken tenders adds a pop of color and a hint of herbal freshness that brightens each bite. For an extra zing, a squeeze of fresh lemon juice can elevate the dish beautifully.
Side Dishes
This Crispy Baked Chicken Tenders Recipe pairs wonderfully with classic sides like creamy mashed potatoes, crisp garden salads, or crunchy coleslaw. For something lighter, roasted veggies or steamed green beans provide a nutritious and colorful contrast.
Creative Ways to Present
Turn these tenders into a fun meal by serving them as sliders with mini buns, crisp lettuce, and your favorite sauces. Or, chop them up for a crunchy topping on fresh green salads or tossed into wraps for a casual, handheld dinner. The options are endless and endlessly delicious!
Make Ahead and Storage
Storing Leftovers
If you have any leftovers, store the tenders in an airtight container in the refrigerator. They’ll stay fresh for up to 3 days, making for a perfect quick snack or lunch option the next day.
Freezing
These chicken tenders freeze beautifully. Arrange them in a single layer on a baking sheet and freeze until solid, then transfer them to a freezer-safe bag. They’ll keep well for up to 2 months, ready to be reheated whenever you want a convenient crispy treat.
Reheating
The best way to reheat your baked chicken tenders is in the oven or an air fryer. This method revives the crispy crust without drying out the chicken. Avoid the microwave if you want to maintain that perfect crunch.
FAQs
Can I use chicken thighs instead of breast strips?
Absolutely! Chicken thighs are juicier and can add more flavor, though the cooking time might slightly vary depending on thickness. Just keep an eye on them to avoid overcooking.
Is it necessary to pat the chicken dry before breading?
Yes, patting the chicken dry helps the flour and breading adhere better, which results in a crispier, more evenly coated tender.
Can I make this recipe gluten-free?
Definitely! Substitute the all-purpose flour and breadcrumbs with gluten-free alternatives, and you’ll still enjoy a deliciously crisp and flavorful dish.
What dipping sauces pair best with these chicken tenders?
Ranch, honey mustard, barbecue sauce, or even a spicy sriracha mayo all complement these crispy tenders beautifully, offering a range of flavors from tangy to smoky to spicy.
How can I make these tenders extra crispy?
Using panko breadcrumbs instead of regular ones or adding a bit of grated Parmesan to the breading mixture can boost crispiness. Also, make sure not to overcrowd the baking sheet so air can circulate freely while baking.
Final Thoughts
There’s something truly comforting about homemade crispy chicken tenders, especially when you know they’re baked and packed with flavor instead of fried. This Crispy Baked Chicken Tenders Recipe is perfect for weeknight dinners, casual get-togethers, or any time you want a golden, crunchy bite of happiness. Give it a try—you might just find your new favorite way to enjoy chicken!
Print
Crispy Baked Chicken Tenders Recipe
- Prep Time: 15 minutes
- Cook Time: 25 minutes
- Total Time: 40 minutes
- Yield: 4 servings
- Category: Main Course
- Method: Baking
- Cuisine: American
Description
These crispy baked chicken tenders are a healthier take on classic fried chicken strips, offering a crunchy, flavorful coating without deep frying. Perfectly seasoned with garlic powder, paprika, salt, and black pepper, then baked to golden perfection with a drizzle of olive oil. An easy, family-friendly recipe ready in just 40 minutes.
Ingredients
Chicken
- 500 grams (1 pound) chicken breast strips
Breading
- 100 grams (1 cup) all-purpose flour
- 2 large eggs
- 150 grams (1.5 cups) breadcrumbs
- 1 teaspoon garlic powder
- 1 teaspoon paprika
- 1 teaspoon salt
- 1/2 teaspoon black pepper
Other
- 2 tablespoons olive oil
Instructions
- Preheat the oven: Preheat your oven to 200°C (400°F) to ensure it’s hot and ready for baking the chicken tenders to a crispy finish.
- Prepare the chicken: Pat the chicken breast strips dry with paper towels to help the coating adhere better and promote crispiness while baking.
- Set up breading station: Arrange three shallow bowls—one with all-purpose flour, one with beaten eggs, and one with breadcrumbs mixed with garlic powder, paprika, salt, and black pepper. This setup streamlines the breading process.
- Bread the chicken strips: Coat each chicken strip first with the flour, then dip it into the beaten eggs, and finally press it into the seasoned breadcrumb mixture to evenly cover all sides.
- Prepare for baking: Lay the coated chicken tenders on a baking sheet lined with parchment paper or a silicone mat. Drizzle the olive oil evenly over the tenders to promote browning and crisp texture during baking.
- Bake the chicken tenders: Place the baking sheet in the preheated oven and bake for 20-25 minutes, flipping the tenders halfway through the cooking time to ensure even browning and crispiness on both sides.
- Serve: Remove the tenders from the oven and let them cool slightly before serving. Pair with your favorite dipping sauces for a delicious meal.
Notes
- Patting the chicken dry helps the breading stick better for a crispier result.
- Flipping the tenders halfway through baking ensures they cook evenly and brown nicely on all sides.
- You can substitute olive oil with avocado oil for a different flavor and health benefits.
- For an extra crunch, use panko breadcrumbs instead of regular breadcrumbs.
- Leftover chicken tenders can be refrigerated in an airtight container for up to 3 days.

