
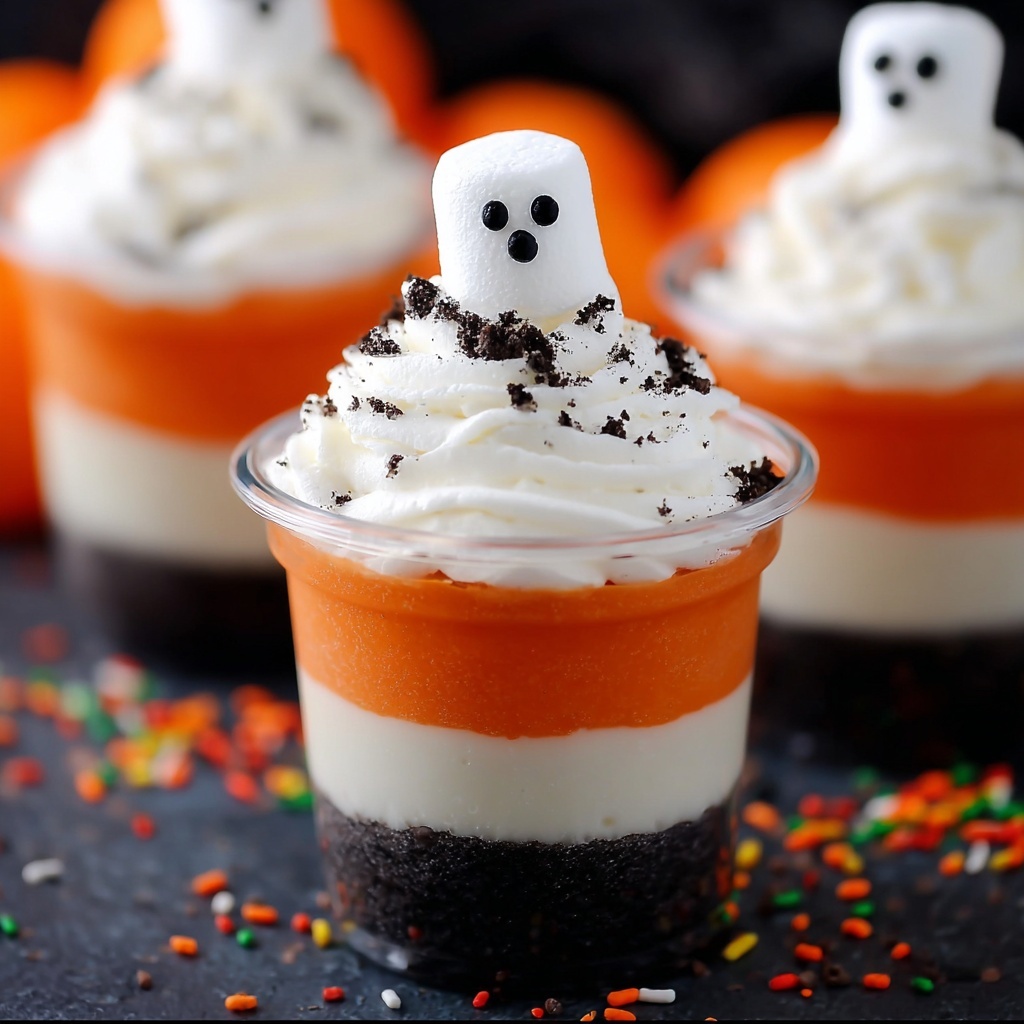
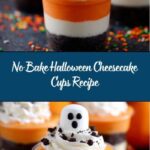
If you’re searching for a delightfully spooky yet irresistibly creamy dessert, this No Bake Halloween Cheesecake Cups Recipe hits all the right notes. Combining the rich tang of classic cheesecake with the fun and festive spirit of Halloween, these cups are loaded with Oreo cookie crunch, luscious cream cheese filling, and playful orange and white layers. Best of all, there’s no oven required, making this an ideal treat to whip up quickly for parties, family gatherings, or simply when you want to share some seasonal sweetness with friends and loved ones.
Ingredients You’ll Need
Ingredients You’ll Need
These ingredients are wonderfully simple but powerful in creating the perfect balance of flavors and textures. Each component plays a starring role: the Oreos provide crunch and chocolatey depth, cream cheese ensures silky richness, and the Cool Whip adds airy lightness and volume. Plus, the orange gel coloring and festive toppings bring that unmistakable Halloween vibe right into every bite.
- Oreo cookies: Using 14 cookies split between crushed layers gives you a crunchy chocolate base and middle to keep each cup exciting.
- Cream cheese (2 – 8 oz packages, softened): This is the star cheesecake flavor, so make sure it’s softened for smooth mixing.
- Powdered sugar (1/2 cup): Adds subtle sweetness and blends seamlessly into the cream cheese without grit.
- Vanilla extract (2 teaspoons): Enhances all flavors and adds a comforting warmth to the mixture.
- Cool Whip (1 – 8 oz container, thawed and divided): For lightness and creamy texture; divided so you can create layered variations.
- Orange gel coloring: Brings a vivid Halloween look to one part of the cheesecake filling.
- Toppings: Ghost Peeps, Halloween sprinkles, and candy pumpkins provide whimsical, festive decoration and an extra burst of sweetness.
How to Make No Bake Halloween Cheesecake Cups Recipe
Step 1: Prepare the Oreo Cookie Crust
Start by crushing 7 Oreo cookies into fine crumbs. Divide these crumbs evenly into seven 5-ounce cups to create the crunchy, chocolatey base that beautifully supports the creamy cheesecake layers above.
Step 2: Mix the Cheesecake Base
In a mixing bowl, beat together the softened cream cheese, powdered sugar, and vanilla extract until you achieve a luxuriously smooth and creamy texture. This luscious base is where the magic begins, blending sweet and tangy flavors perfectly.
Step 3: Fold in Cool Whip
Add 2 cups of Cool Whip gently into the cream cheese mixture. Folding instead of stirring maintains the airy, fluffy texture that makes these cheesecake cups so delightfully light and dreamy.
Step 4: Divide and Color the Cheesecake
Split the cheesecake mixture evenly into two bowls. Tint one batch with orange gel coloring to capture that iconic Halloween hue, while leaving the other bowl as classic white for a striking contrast that will make each layer pop.
Step 5: Add the First Cheesecake Layer
Spoon or pipe the white cheesecake mixture evenly over the Oreo base in each cup. This creamy layer acts as a smooth counterpoint to the crunchy crust and prepares the palate for the orange surprise coming next.
Step 6: Add the Middle Oreo Crumbs
Crush the remaining 7 Oreo cookies and distribute these crumbs evenly on top of the white cheesecake layer in each cup. This middle layer adds texture and a touch of deep chocolate flavor, making every bite exciting.
Step 7: Add the Colored Cheesecake Layer
Next, spoon or pipe the orange cheesecake mixture over the Oreo crumbs in the cups. The vibrant orange color and creamy texture bring festive cheer and delicious flavor to the forefront.
Step 8: Top with Whipped Cream Swirl
Using a piping bag with a 1M icing tip, swirl the remaining Cool Whip on top of each cheesecake cup. This elegant finishing touch adds a fluffy cloud of sweetness and balances the rich cheesecake layers below.
Step 9: Add Festive Halloween Toppings
Decorate each cup with Ghost Peeps, Halloween sprinkles, and candy pumpkins just before serving. These whimsical toppings add playful charm and extra bursts of sugary joy, making these cups irresistible to kids and adults alike.
How to Serve No Bake Halloween Cheesecake Cups Recipe
Garnishes
The finishing touches truly bring this dessert to life. Whimsical Ghost Peeps give the cups an adorable Halloween personality, while sprinkles add texture and colorful sparkle. Candy pumpkins offer a traditional seasonal flair and satisfy a sweet tooth all in one bite.
Side Dishes
Pairing these No Bake Halloween Cheesecake Cups with something light and fresh like sliced apples or clementine segments can balance their rich sweetness. For an extra indulgent spread, consider serving alongside hot apple cider or pumpkin spice latte to keep the festive spirit flowing.
Creative Ways to Present
For a show-stopping Halloween party centerpiece, serve the cheesecake cups in clear mason jars decorated with Halloween-themed ribbons or stickers. Alternatively, arrange them on a tiered dessert stand surrounded by mini pumpkins and autumn leaves for a charming seasonal display that will wow your guests. Using festive paper straws or themed cupcake liners can add a personalized touch too!
Make Ahead and Storage
Storing Leftovers
Keep any leftovers refrigerated in airtight containers to preserve freshness. These cheesecake cups maintain their creamy texture and layered crunch well for up to four days, making them a convenient treat to enjoy throughout the week.
Freezing
While best enjoyed fresh, you can freeze the prepared cheesecake cups by wrapping them tightly in plastic wrap and placing them in freezer-safe containers. Thaw in the refrigerator overnight before serving to maintain the creamy consistency.
Reheating
Since this dessert is served chilled, there’s no need to reheat. Simply take the cups out of the fridge about 10 minutes before serving to take the chill off slightly, allowing the flavors to shine through beautifully.
FAQs
Can I use another type of cookie instead of Oreos?
Absolutely! While Oreos add a classic chocolate crunch, you can experiment with chocolate graham crackers, gingersnaps, or even crushed chocolate chip cookies to give your cups a unique twist that suits your taste.
Is it possible to make these cups vegan or dairy-free?
Yes, with some ingredient swaps! Use dairy-free cream cheese and whipped topping alternatives in place of regular cream cheese and Cool Whip. Just keep in mind the texture and flavor might vary slightly.
How far in advance can I prepare the cheesecake cups?
You can make the cups up to 24 hours before serving. This gives the flavors time to meld and the layers to set perfectly. Just add toppings like Peeps and sprinkles right before serving to keep them fresh.
Can I make these in larger containers instead of individual cups?
Definitely! This recipe works great as a layered trifle or in a large glass bowl for sharing. Just adjust the layering carefully and increase quantities accordingly.
What if I don’t have orange gel coloring?
In a pinch, you can use orange food coloring liquid, but gel provides the best vibrant color with minimal impact on texture. If neither is available, try natural colorings like carrot juice concentrate for a subtle orange tint.
Final Thoughts
There is something truly special about sharing a dessert that’s as fun to make as it is to eat, and this No Bake Halloween Cheesecake Cups Recipe fits the bill perfectly. From its simple ingredients to its layered textures and festive look, it’s a guaranteed crowd-pleaser that’s sure to brighten any Halloween celebration. So go ahead, give it a try, and enjoy the smiles and sweet moments that come with every creamy, crunchy spoonful!
Print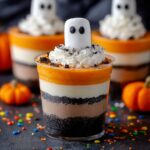
No Bake Halloween Cheesecake Cups Recipe
- Prep Time: 15 minutes
- Cook Time: 0 minutes
- Total Time: 15 minutes
- Yield: 7 servings
- Category: Dessert
- Method: No-Cook
- Cuisine: American
Description
These No Bake Halloween Cheesecake Cups are a festive and fun dessert perfect for Halloween gatherings. Combining crushed Oreo cookie crust, creamy no-bake cheesecake layers tinted with orange gel coloring, and topped with spooky ghost Peeps, sprinkles, and candy pumpkins, these cheesecake cups are easy to prepare in just 15 minutes with no oven needed.
Ingredients
Crust
- 14 Oreo cookies
Cheesecake Filling
- 2 (8 ounce) packages cream cheese, softened
- 1/2 cup powdered sugar
- 2 teaspoons vanilla extract
- 1 (8 ounce) container Cool Whip, thawed and divided
- Orange Gel Food Coloring
Toppings
- Ghost Peeps
- Halloween sprinkles
- Candy pumpkins
Instructions
- Prepare the crust: Crush 7 Oreo cookies into fine crumbs and evenly distribute them into seven 5-ounce cups, forming the base layer for each cheesecake cup.
- Make the cheesecake mixture: In a large mixing bowl, beat the softened cream cheese, powdered sugar, and vanilla extract until smooth and creamy. Then, gently fold in 2 cups of thawed Cool Whip, combining until light and fluffy.
- Divide the filling: Separate the cheesecake mixture evenly into two bowls. Tint one bowl of the cheesecake filling with orange gel food coloring and leave the other bowl white.
- Add the white cheesecake layer: Spoon or pipe the white cheesecake mixture evenly on top of the Oreo crumbs in each cup, creating the first cheesecake layer.
- Add the middle crust layer: Crush the remaining 7 Oreo cookies and evenly add the crumbs as the middle crust layer on top of the white cheesecake layer in each cup.
- Add the orange cheesecake layer: Spoon or pipe the tinted orange cheesecake mixture evenly on top of the Oreo crumb layer, forming the final cheesecake layer.
- Top with Cool Whip: Using a piping bag fitted with a 1M icing tip, swirl the remaining Cool Whip on top of each parfait for a decorative and creamy finish.
- Garnish and serve: Decorate each cheesecake cup with ghost Peeps, Halloween sprinkles, and candy pumpkins right before serving to keep toppings fresh and festive.
Notes
- Use softened cream cheese to ensure a smooth cheesecake mixture.
- Tint the cheesecake mixture gradually with gel coloring to achieve your desired shade of orange.
- Chill the cheesecake cups in the refrigerator for at least 1 hour to allow them to set and flavors to meld, if time allows.
- Prepare these in disposable or reusable clear cups for an attractive presentation.
- For an extra crunch, freeze crushed Oreos for 10 minutes before layering.
