
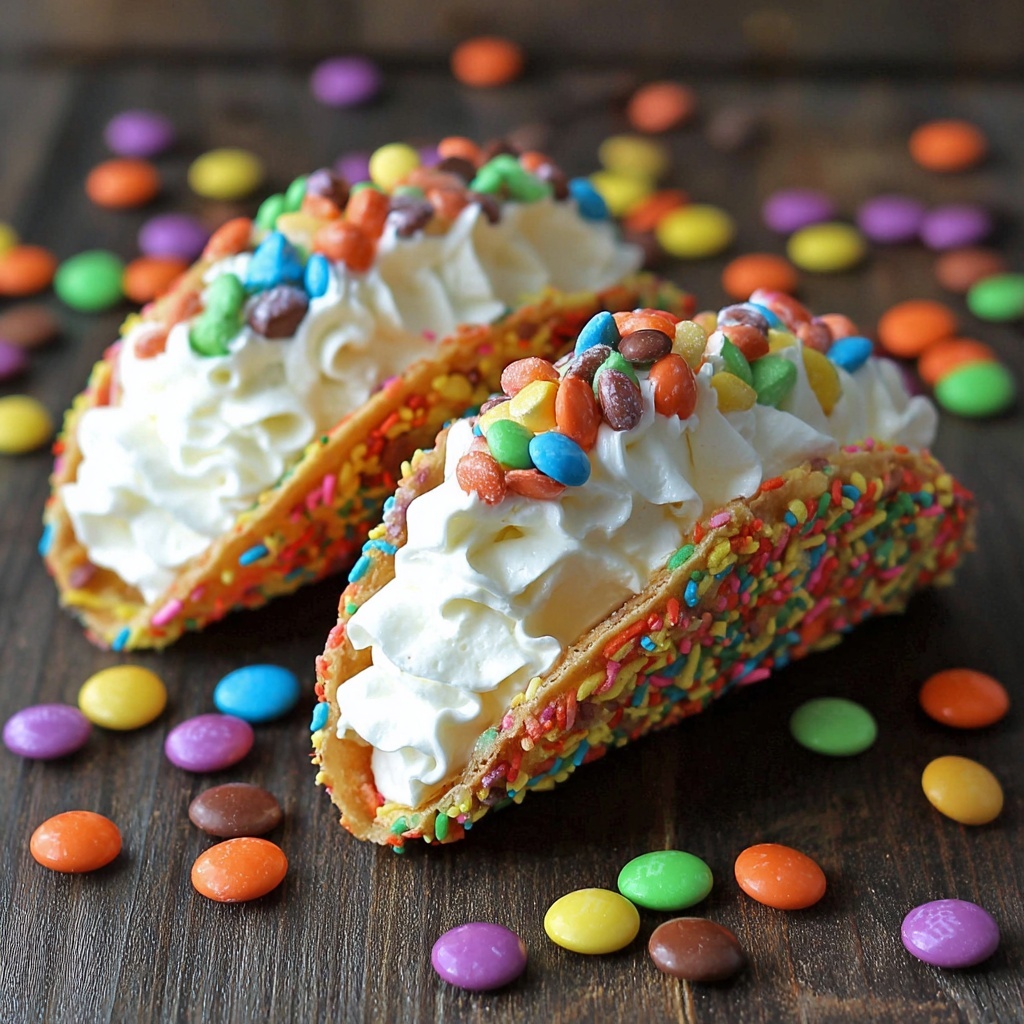
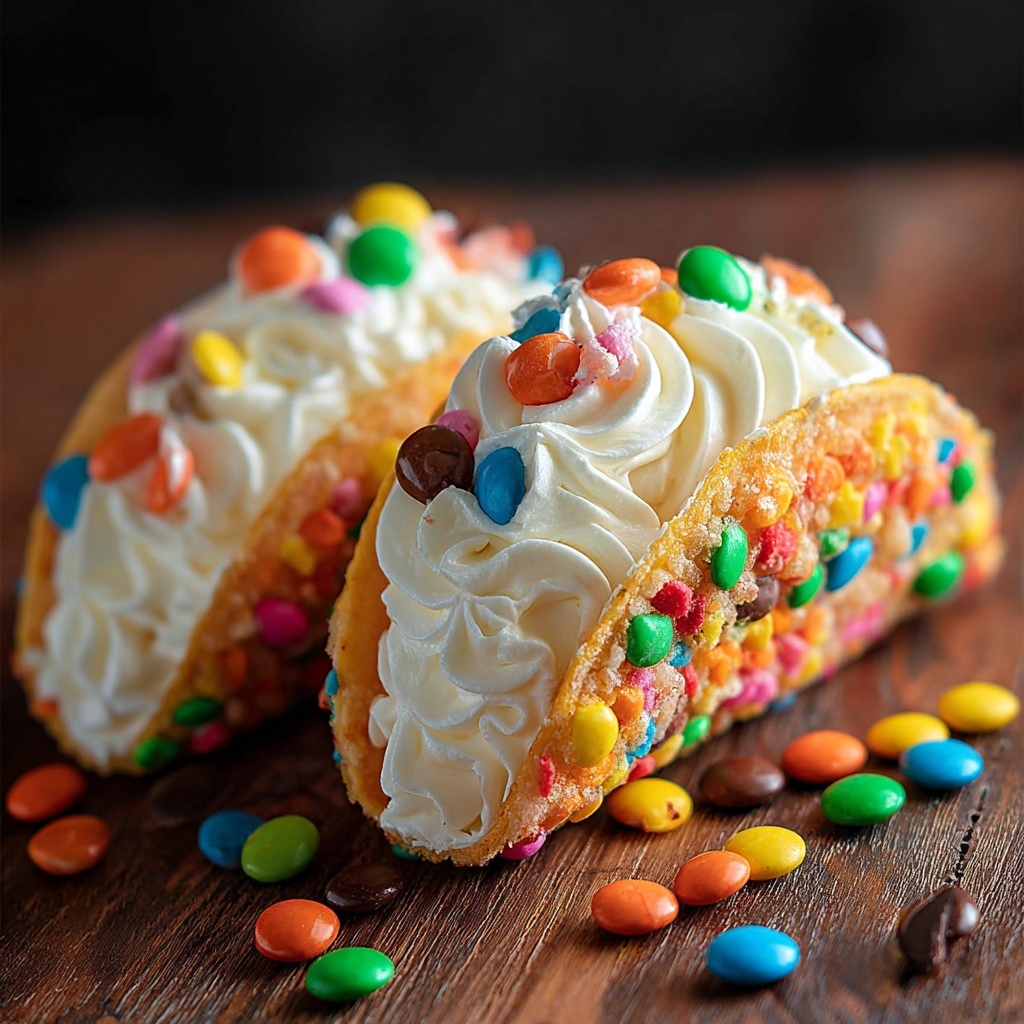
There is something truly magical about merging childhood favorites with classic desserts, and the Fruity Pebbles Cheesecake Tacos Recipe does exactly that in the most delightful way. Imagine crunchy, colorful Fruity Pebbles cereal transformed into crisp taco shells, filled with a luscious, fluffy cheesecake mixture that’s sweet, tangy, and downright irresistible. This treat is a showstopper at any gathering, perfectly blending vibrant colors, playful textures, and creamy goodness into one unforgettable bite. If you’re looking to wow your family or friends with a dessert that feels like a celebration in every mouthful, this recipe is your golden ticket.
Ingredients You’ll Need
These ingredients might seem simple at first glance, but each one plays a starring role in building the character of the Fruity Pebbles Cheesecake Tacos. From the buttery crunch of the cereal shells to the smooth richness of the cheesecake filling, every component adds a layer of flavor, color, and texture that makes this dessert so charming and delicious.
- 3 cups colorful Fruity Pebbles cereal: The vibrant, crispy base that forms the taco shell and adds fun texture.
- ½ cup unsalted butter, melted: Provides richness and helps the cereal stick together into a sturdy shell.
- 8 oz cream cheese, softened: The creamy hero that gives the filling its signature tang and fluffiness.
- ½ cup powdered sugar, sifted: Sweetens the cheesecake filling evenly without any graininess.
- 1 tsp pure vanilla extract: Adds a warm, comforting depth of flavor to the cheesecake filling.
- 1 cup whipped cream: Lightens the cheesecake mixture, making it airy and dreamy.
- Additional Fruity Pebbles cereal for garnish: A final colorful crunch that makes the tacos visually pop and adds extra texture.
How to Make Fruity Pebbles Cheesecake Tacos Recipe
Step 1: Prepare the Fruity Pebbles Taco Shells
Start by combining the Fruity Pebbles cereal with melted butter in a large bowl, making sure every colorful piece gets coated. This buttery layer is crucial because it acts like glue to form the shells. Then, firmly press this mixture into taco-shaped molds or a muffin tin to create that fun, handheld shape. Aim for about a quarter-inch thickness so your shells are sturdy but still delicate. Chill them in the fridge for at least 30 minutes. Patience here pays off, as the shells solidify into crispy, vibrant taco cups.
Step 2: Make the Cheesecake Filling
Next, turn your attention to the dreamy cheesecake filling. Beat the softened cream cheese on medium speed for about two minutes until it becomes smooth and fluffy. This step is essential because good aeration creates that melt-in-your-mouth texture. Slowly add the sifted powdered sugar along with the vanilla extract, scraping down the sides to ensure everything is perfectly mixed. The result should be a sweet, tangy cream that’s versatile and luscious.
Step 3: Fold in the Whipped Cream
Now comes the magic touch: gently folding in the whipped cream. This step lightens the dense cream cheese mixture and keeps your filling airy and fresh. Be careful not to overmix – you want to maintain those soft peaks and fluffy texture. This balance between cream cheese richness and whipped lightness is what takes the filling to that next-level deliciousness everyone will talk about.
Step 4: Fill the Taco Shells
With the shells chilled and filling ready, spoon or pipe the cheesecake mixture generously into each taco shell. Don’t be shy here — let it overflow slightly for a look that’s as indulgent as it tastes. This filling-to-shell ratio is key; it ensures every bite has the perfect harmony of crunchy and creamy.
Step 5: Garnish and Chill Before Serving
Top each taco with a sprinkle of extra Fruity Pebbles, pressing them lightly into the cheesecake filling so they stay put. This final flourish adds extra color and a satisfying crunch with every bite. Serve them immediately for the freshest texture, or refrigerate for up to two hours if you want to prepare ahead. Either way, these tacos will brighten any dessert table.
How to Serve Fruity Pebbles Cheesecake Tacos Recipe
Garnishes
Enhance your Fruity Pebbles Cheesecake Tacos Recipe by adding a few playful garnishes. Fresh berries such as strawberries or blueberries complement the fruity notes perfectly, while a light drizzle of white chocolate sauce can add a creamy sweetness that ties everything together beautifully. A small mint leaf on top of each taco adds a touch of freshness and color contrast that’s pleasing to the eye and palate.
Side Dishes
These cheesecake tacos stand out on their own but pairing them with light, fresh sides amplifies the experience. Consider a simple fruit salad to echo the brightness of the cereal or a scoop of vanilla bean ice cream for a cool, creamy contrast. If you want to keep things simple yet elegant, a mint-infused sparkling lemonade makes a refreshing drink companion, balancing sweetness with zesty notes.
Creative Ways to Present
Presentation is part of the fun with the Fruity Pebbles Cheesecake Tacos Recipe. Serve them in colorful taco holders or arrange them on a bright platter for a festive touch. You could also try making mini versions using small tart pans for bite-sized party treats. For a playful twist, set up a DIY taco bar with various toppings and let guests assemble their own personalized cheesecake tacos. This interactive element always gets smiles and sparks conversation!
Make Ahead and Storage
Storing Leftovers
If you have any leftovers (which might be hard!), store them in an airtight container in the refrigerator. Because the shells are cereal-based, they may lose some crunchiness over time, but the cheesecake filling will remain creamy and delicious. For best results, enjoy them within 24 hours to retain that delightful textural contrast.
Freezing
Freezing cheesecake tacos is possible, but keep in mind the texture of the Fruity Pebbles shells might soften upon thawing due to their delicate nature. If you want to freeze, wrap each taco tightly in plastic wrap and place them in a freezer-safe container. Thaw in the fridge overnight before serving, but consider that the fresh crunch may be reduced.
Reheating
Since these tacos are best served chilled to preserve the crisp taco shell and creamy filling, reheating is generally not recommended. If you prefer a slightly less cold dessert, allow them to sit at room temperature for about 10 minutes before eating. This approach keeps the integrity of textures intact, giving you the best experience.
FAQs
Can I use a different cereal instead of Fruity Pebbles?
You absolutely can, though Fruity Pebbles have the perfect crisp texture and vibrant colors that make these tacos so special. Cereals like Rice Krispies or Cocoa Pebbles could work but might change the flavor profile and crunchiness slightly.
How long do the taco shells stay crisp?
The taco shells are crispiest right after chilling and filling. Once filled, they’re best enjoyed within a couple of hours because the cream can soften the cereal shell over time.
Can I make the cheesecake filling dairy-free?
Yes, by using dairy-free cream cheese alternatives and whipped coconut cream, you can create a similar texture and flavor while keeping it vegan-friendly. The key is to ensure the substitutes have a comparable consistency.
Is the Fruity Pebbles Cheesecake Tacos Recipe kid-friendly?
Definitely! Kids love the bright colors and fun taco shape, plus the creamy filling is mild and sweet. This dessert often becomes a favorite for birthday parties or special treats.
Can I prepare this dessert ahead for a party?
You can prepare the taco shells up to 24 hours in advance and keep them refrigerated. Assemble the cheesecake filling and make the tacos just a couple of hours before serving to keep textures perfect and flavors fresh.
Final Thoughts
If you’ve been searching for a dessert that combines nostalgia, vibrant fun, and indulgent flavor all in one, the Fruity Pebbles Cheesecake Tacos Recipe is your ultimate new favorite. It’s a joy to make and an even bigger joy to eat – every colorful bite brings smiles and sweet satisfaction. Don’t hesitate to whip up a batch and share the happiness; I promise this playful dessert will become a cherished classic in your recipe rotation!
Print
Fruity Pebbles Cheesecake Tacos Recipe
- Prep Time: 15 minutes
- Cook Time: 0 minutes
- Total Time: 55 minutes
- Yield: 6 servings
- Category: Dessert
- Method: No-Cook
- Cuisine: American
Description
These Fruity Pebbles Cheesecake Tacos are a whimsical, no-bake dessert featuring colorful Fruity Pebbles cereal shells filled with a creamy, fluffy cheesecake filling. Perfectly portioned and vibrant, these tacos are a fun twist on traditional cheesecake that are quick to prepare and sure to delight both kids and adults.
Ingredients
For the Cereal Shells
- 3 cups colorful Fruity Pebbles cereal
- ½ cup unsalted butter, melted
For the Cheesecake Filling
- 8 oz cream cheese, softened
- ½ cup powdered sugar, sifted
- 1 tsp pure vanilla extract
- 1 cup whipped cream
For Garnish
- Additional Fruity Pebbles cereal for garnish
Instructions
- Prepare Cereal Shells: In a large bowl, combine the Fruity Pebbles cereal with the melted butter, ensuring every piece of cereal is fully coated for better binding and flavor.
- Mold and Chill Shells: Firmly press the cereal mixture into taco-shaped molds or a muffin tin, aiming for an even thickness of about ¼ inch. Place them in the refrigerator to chill for at least 30 minutes until they harden and hold their shape.
- Make Cheesecake Filling: Beat the softened cream cheese using an electric mixer for about 2 minutes until smooth and fluffy. Gradually add the sifted powdered sugar and the vanilla extract, mixing until well incorporated while scraping down the bowl as needed.
- Fold in Whipped Cream: Gently fold the whipped cream into the cream cheese mixture to maintain a light and airy texture without deflating.
- Fill the Shells: Spoon or pipe the smooth cheesecake filling into the chilled cereal taco shells, filling them generously so the filling slightly overflows, creating an inviting look.
- Garnish and Serve: Top each filled taco with a few extra Fruity Pebbles, pressing them gently into the filling so they adhere well. Serve immediately for best texture or refrigerate for up to 2 hours before serving to set the filling further.
Notes
- Ensure the cream cheese is fully softened for a smooth filling without lumps.
- Use cookie or taco molds to shape the cereal shells perfectly without breaking.
- Do not leave the filled tacos unrefrigerated for too long to maintain their texture.
- These tacos are best enjoyed within 2 hours for optimal crispness of shells and freshness of filling.
- For a sweeter or richer variation, you may add a tablespoon of honey or maple syrup to the filling.

