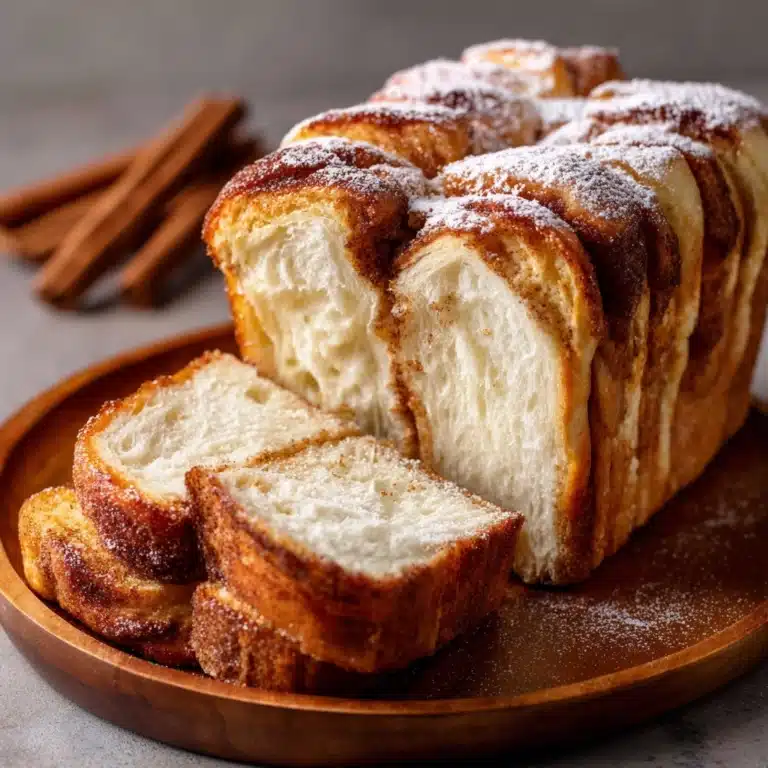
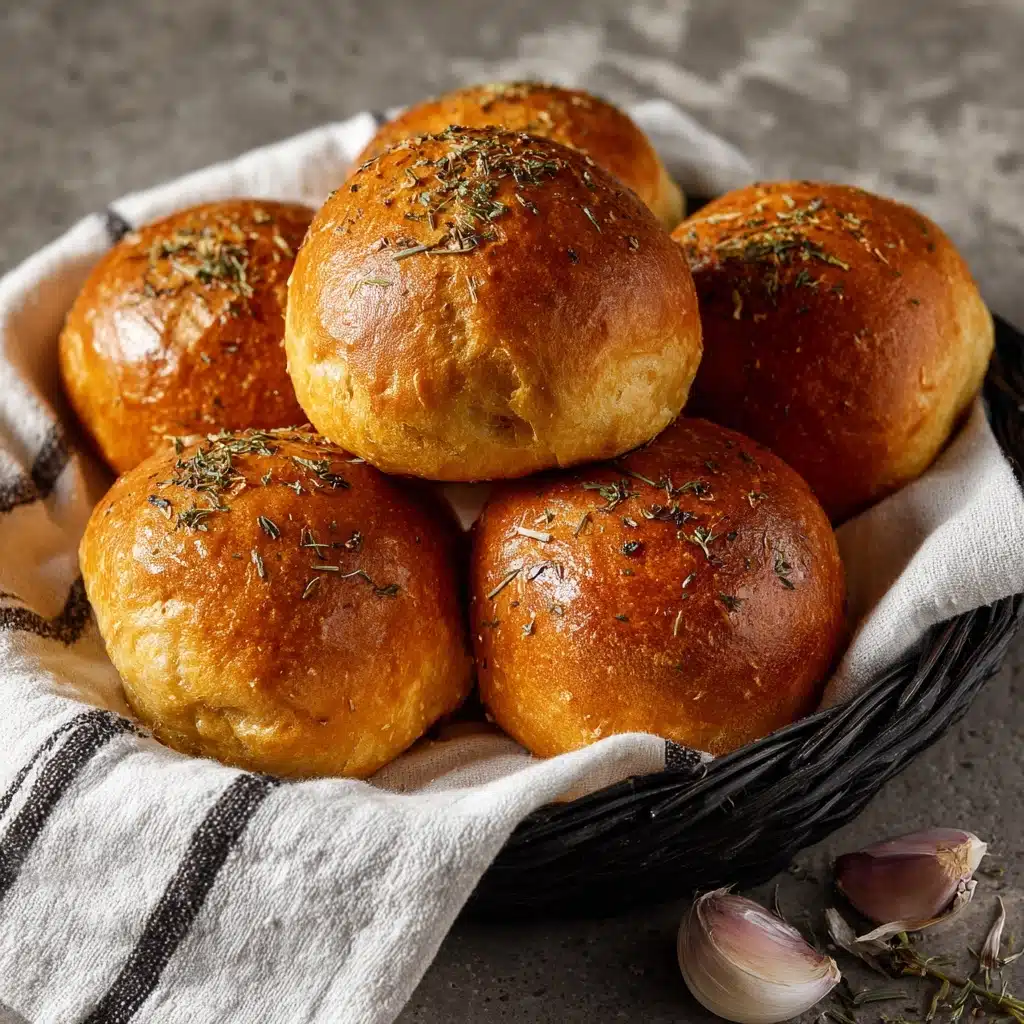
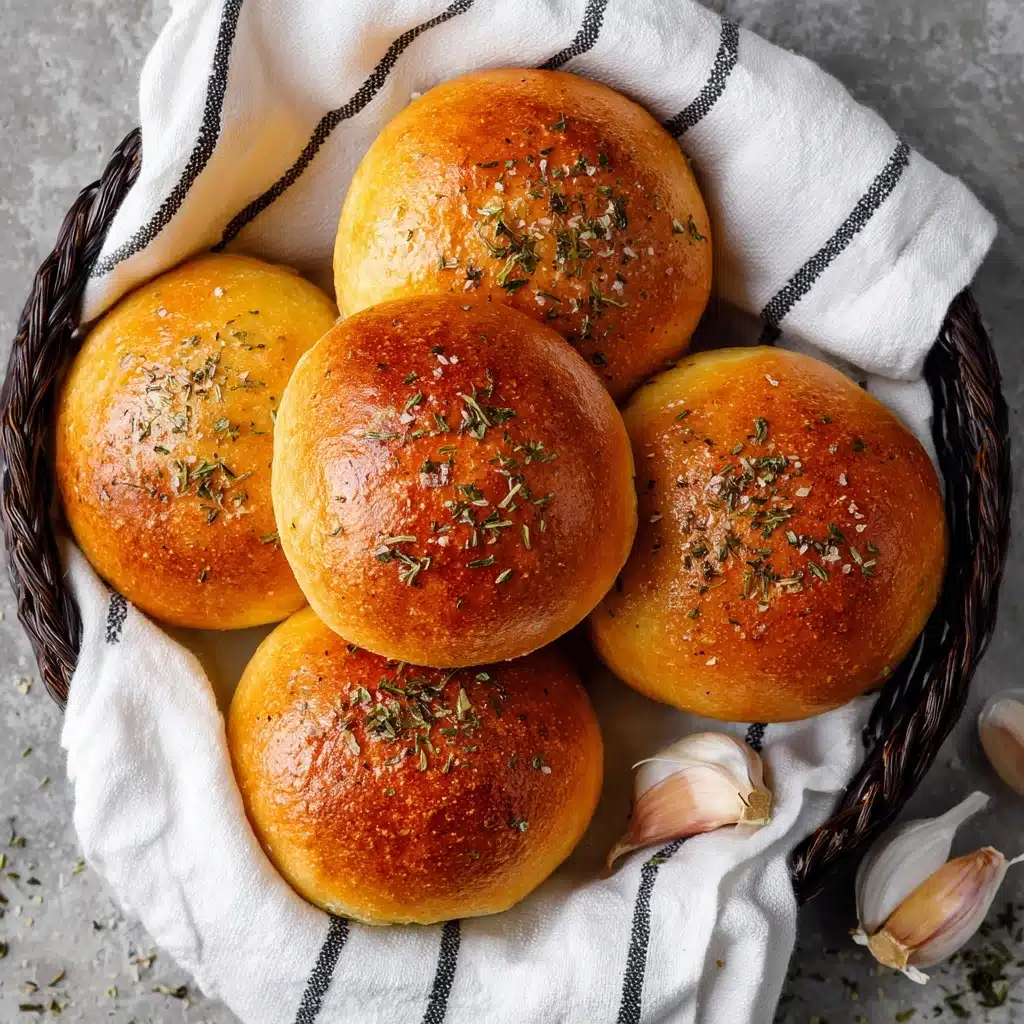
Garlic Rolls are one of those dishes that instantly bring warmth, comfort, and a tantalizing aroma to your kitchen. These pillowy-soft rolls get swirled in a rich garlic butter that seeps into every golden crevice, making each bite a melt-in-your-mouth experience. Whether you’re hosting friends for dinner or treating yourself on a cozy night in, Garlic Rolls make any meal feel truly special. This recipe is a family favorite, bursting with flavor, and surprisingly easy to pull off—even if you’re new to homemade bread!
Ingredients You’ll Need
Making remarkable Garlic Rolls is all about a handful of staple ingredients, each playing its own crucial role in delivering softness inside and irresistible golden crust outside. Let’s break down why you’ll love these simple building blocks!
- Active dry yeast: The secret to fluffy, light rolls, this brings that irresistible lift and texture to your bake.
- Warm water (110°F/45°C): Perfectly warm water awakens the yeast—if it’s too hot, you might hurt the yeast, too cool, and it won’t rise as much.
- Sugar: A little sweetness to feed the yeast and round out the flavor of the dough.
- All-purpose flour: The essential backbone for soft, tender rolls. Use unbleached for the best flavor.
- Salt: Just enough to perk up every bite and balance those rich, buttery notes.
- Olive oil: Adds moisture and a hint of earthiness—plus it keeps the dough rich and supple.
- Egg: Binds everything together while bringing softness and a beautiful hint of richness.
- Milk, warm: Adds a delightful tenderness and slightly sweet flavor to the crumb of Garlic Rolls.
- Unsalted butter, melted: The foundation of your decadent garlic butter glaze—don’t skimp on this good stuff.
- Garlic, minced: The star of the show! Use fresh garlic cloves for the most vibrant kick.
- Fresh parsley, chopped: A pop of color and freshness that makes every roll irresistible.
- Extra salt (for butter): Enhances the savory, garlicky edge in the butter topping.
How to Make Garlic Rolls
Step 1: Bloom the Yeast
Begin your Garlic Rolls by combining warm water, sugar, and yeast in a small bowl. Stir it gently, then let this sit for about 5 minutes until it’s frothy and bubbly. This step is like a science experiment and ensures your rolls will rise to fluffy perfection!
Step 2: Mix the Dough
In a large mixing bowl, whisk together the flour and salt. Create a well in the center, then pour in your yeast mixture, olive oil, egg, and warm milk. Stir with a wooden spoon or spatula until the mixture comes together into a shaggy dough. Don’t be afraid to get a little messy here—it’s totally worth it!
Step 3: Knead to Smoothness
Tip the dough onto a floured countertop and knead for 5 to 7 minutes. You’re looking for a silky, elastic dough that springs back gently when poked. If it feels sticky, sprinkle a touch more flour, but try not to overdo it; this is key to that cloud-like bite we all crave in Garlic Rolls.
Step 4: First Rise
Place the dough in a greased bowl, cover with a damp towel, and tuck it into a warm spot. Let it rise for 1 to 1.5 hours, until it doubles in size. This is your time to let the magic happen—be patient, the payoff is huge!
Step 5: Shape the Rolls
Once your dough has risen, punch it down gently to release the air bubbles. Divide into 12 equal portions, rolling each into a smooth ball. Arrange these balls snugly in a greased 9×13-inch baking dish—the close quarters help them bake up with those soft pull-apart sides that define great Garlic Rolls.
Step 6: Final Rise
Cover the baking dish with a towel and let your rolls rise one more time for 30 minutes. This second rise gives your Garlic Rolls that signature feathery lightness.
Step 7: Make the Garlic Butter
While the dough is rising, stir together melted butter, minced garlic, chopped parsley, and a sprinkle of salt in a small bowl. This golden mixture will infuse the entire batch of Garlic Rolls with bold, mouthwatering flavor.
Step 8: Top and Bake
Preheat your oven to 375°F (190°C). Once the rolls are puffy, brush them generously with the prepared garlic butter. Bake for 18 to 20 minutes, until the tops are deeply golden and your kitchen smells irresistible.
Step 9: Finish with More Butter
When the Garlic Rolls are fresh from the oven, brush them again with a final swirl of garlic butter. This last step makes them glossy, extra fragrant, and completely irresistible. Serve warm and watch them disappear!
How to Serve Garlic Rolls
Garnishes
Right before serving, I love to sprinkle a little extra fresh parsley or even a touch of flaky salt over the warm Garlic Rolls for extra visual flair and punchy flavor. Sometimes, an extra dusting of parmesan takes them totally over the top!
Side Dishes
Garlic Rolls shine alongside so many dishes. Pair them with classic pasta bowls, baked ziti, hearty soups, or Sunday roast chicken. They’re a natural match for anything with a rich sauce or hearty broth, ensuring nothing tasty is left behind.
Creative Ways to Present
For a fun spin, bake the Garlic Rolls in a cast iron skillet or arrange them in a wreath for a festive table centerpiece. You can also slice and stuff them with cheese or deli meats for a delicious party pull-apart. The possibilities are as limitless as your imagination!
Make Ahead and Storage
Storing Leftovers
Leftover Garlic Rolls store beautifully! Place cooled rolls in an airtight container at room temperature for up to 2 days. If you know you’ll keep them longer, move them to the fridge to maintain freshness—just bring them to room temperature before serving for best texture.
Freezing
To freeze, let your rolls cool completely after baking. Wrap them tightly in foil and transfer to a freezer bag. Savvy meal-preppers will love that these Garlic Rolls keep their quality for up to three months in the freezer.
Reheating
To revive that fresh-baked magic, wrap leftover Garlic Rolls in foil and warm them at 300°F (150°C) in the oven for 10 to 12 minutes. You can even give them a quick brush of melted garlic butter before reheating to refresh their shine and flavor.
FAQs
Can I use instant yeast instead of active dry yeast?
Absolutely! If using instant yeast, you can skip the blooming step and add it directly to your dry ingredients. Your Garlic Rolls will rise a bit faster, so keep an eye on them during proofing.
Can I make the dough ahead of time?
Yes, you can prepare the dough the night before. Let it rise once, then shape the Garlic Rolls, cover tightly, and refrigerate overnight. The next day, allow them about 30 minutes at room temperature before baking.
What if I don’t have fresh parsley?
No problem! Dried parsley works well, or you can substitute with a little chopped chives or basil for a twist. While fresh is best for color and vibrancy, your Garlic Rolls will still be delicious with what you have.
How do I add a cheesy topping?
During the last 5 minutes of baking, sprinkle shredded mozzarella, parmesan, or your favorite cheese over the tops of the rolls. This transforms your Garlic Rolls into an ooey-gooey treat perfect for cheese lovers!
Can I make this recipe vegan?
Definitely! Substitute the milk with your favorite unsweetened plant-based milk, use olive oil or vegan butter in place of regular butter, and swap the egg with a flaxseed or chia egg. The results will still be soft, fluffy, and packed with garlicky goodness.
Final Thoughts
There’s just something magical about bringing a basket of homemade Garlic Rolls to the table—watching everyone reach for seconds is pure joy! I hope this recipe brings as much happiness and flavor to your kitchen as it has to mine. Give these a try and let your home fill with the unbeatable scent of fresh-baked garlic bread. Happy baking!
Print
Garlic Rolls Recipe
- Total Time: 2 hours 35 minutes (including rising time)
- Yield: 12 rolls 1x
- Diet: Vegetarian
Description
These homemade Garlic Rolls are soft, fluffy dinner rolls brushed with a savory garlic butter mixture. Perfect as a side dish for any meal!
Ingredients
For the dough:
- 2 1/4 teaspoons active dry yeast
- 1/2 cup warm water (110°F/45°C)
- 1 tablespoon sugar
- 3 1/2 cups all-purpose flour
- 1 teaspoon salt
- 1/4 cup olive oil
- 1 large egg
- 1/2 cup warm milk
For the garlic butter:
- 1/2 cup unsalted butter, melted
- 4 cloves garlic, minced
- 1 tablespoon fresh parsley, chopped
- 1/2 teaspoon salt
Instructions
- In a small bowl, combine the warm water, sugar, and yeast. Let it sit for about 5 minutes, or until it becomes frothy.
- In a large bowl, combine the flour and salt. Make a well in the center and pour in the yeast mixture, olive oil, egg, and warm milk. Mix until a dough forms.
- Turn the dough out onto a floured surface and knead for about 5-7 minutes, or until smooth and elastic.
- Place the dough in a greased bowl, cover with a damp towel, and let it rise in a warm place for 1-1.5 hours, or until doubled in size.
- Preheat the oven to 375°F (190°C).
- Punch down the dough and divide it into 12 equal pieces. Roll each piece into a ball and place them in a greased 9×13-inch baking dish, arranging them closely together.
- Cover the rolls with a towel and let them rise for another 30 minutes.
- While the rolls are rising, prepare the garlic butter: In a small bowl, combine the melted butter, minced garlic, parsley, and salt.
- Once the rolls have risen, brush the garlic butter generously over the top of the dough balls.
- Bake the rolls for 18-20 minutes, or until golden brown.
- Brush the rolls with more garlic butter after baking, if desired, and serve warm.
Notes
- These rolls can be made ahead of time and stored in an airtight container for up to 2 days. To reheat, wrap in foil and warm in the oven.
- For a cheesy twist, you can sprinkle shredded mozzarella cheese on top of the rolls during the last 5 minutes of baking.
- You can freeze the rolls after baking for up to 3 months. Reheat in the oven before serving.
- Prep Time: 15 minutes
- Cook Time: 20 minutes
- Category: Side Dish
- Method: Baking
- Cuisine: American
Nutrition
- Serving Size: 1 roll
- Calories: 220
- Sugar: 2g
- Sodium: 330mg
- Fat: 12g
- Saturated Fat: 7g
- Unsaturated Fat: 5g
- Trans Fat: 0g
- Carbohydrates: 26g
- Fiber: 1g
- Protein: 4g
- Cholesterol: 30mg