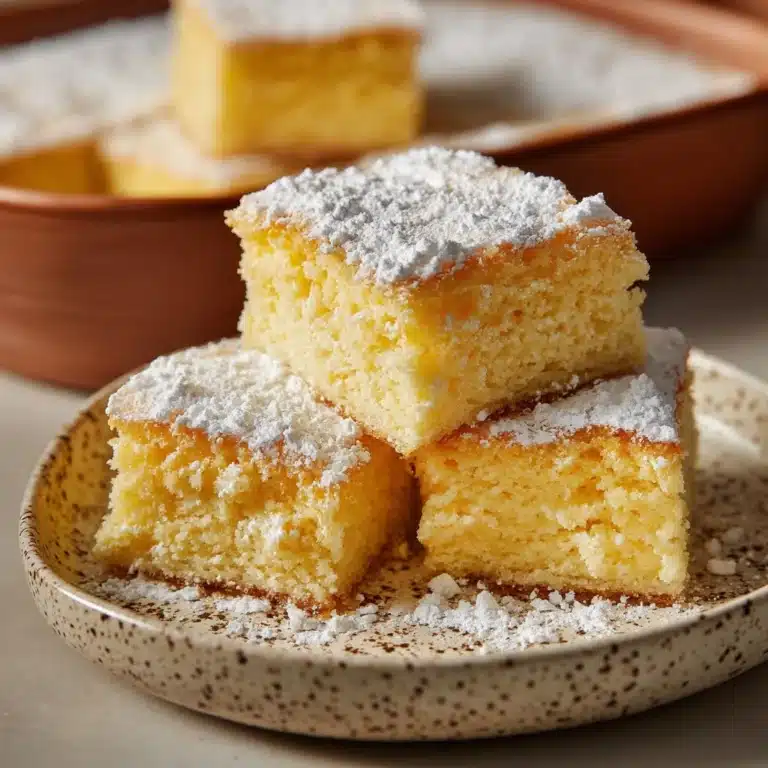
Get ready to fall head over heels for these Key Lime Pie Bars—a perfectly tart, sweet, and creamy treat that delivers all the fresh flavor of classic key lime pie in an easy-to-share bar form. With a buttery graham cracker crust, a luscious, lime-packed filling, and a cloud of fresh whipped cream on top, every bite tastes like pure sunshine. They’re a guaranteed crowd-pleaser and my go-to dessert when I want something bright, refreshing, and irresistibly delicious.

Ingredients You’ll Need
Key Lime Pie Bars come together with a handful of pantry–and fridge-friendly staples, plus a burst of fresh lime. Each ingredient does its part in layering delicate crunch, creamy zest, and that iconic tangy-sweet harmony that makes this dessert so special.
- Graham cracker crumbs: These form the golden, crunchy base and provide the perfect contrast to the creamy filling.
- Granulated sugar: Adds sweetness and helps bind the crust for a satisfying texture.
- Ground cinnamon (optional): Gives a subtle warmth and complexity to the crust—try it if you love a hint of spice.
- Unsalted butter, melted: Ensures a rich, cohesive crust that holds together after slicing.
- Sweetened condensed milk: Delivers silky, decadent sweetness and provides structure in the filling.
- Fresh lime juice: You’ll get the very best bright, tart flavor using freshly squeezed juice; bottled just doesn’t compare.
- Large eggs: These help set the filling and lend a custardy smoothness to each bar.
- Lime zest: Packs an extra burst of citrus aroma and punch, making the flavor extra vibrant.
- Heavy cream: Whipped into airy peaks, this makes the luscious topping that crowns every bite.
- Powdered sugar: Sweetens and stabilizes the whipped cream, keeping it pillowy and light.
- Vanilla extract: Adds a hint of warmth and rounds out the tartness with mellow sweetness.
How to Make Key Lime Pie Bars
Step 1: Prep Your Pan
Preheat the oven to 350°F (175°C). Line an 8×8-inch baking pan with parchment paper, letting some hang over the sides for easy lifting when it’s time to slice. This step saves you from messy bar removal and gives those bars perfect, clean edges.
Step 2: Make the Crust
In a medium bowl, stir together graham cracker crumbs, sugar, and if using, the cinnamon. Pour in the melted butter and mix until you’ve got a sandy, evenly moistened crumble. Press this mixture firmly into the pan—use the bottom of a glass or measuring cup to smooth it down and help the crust set up crisp and solid. Bake for 8-10 minutes, just until it turns lightly golden and fragrant. Let it cool briefly while you prep the filling.
Step 3: Whip Up the Key Lime Filling
In a large bowl, vigorously whisk the sweetened condensed milk, fresh lime juice, eggs, and lime zest together. Make sure everything is thoroughly blended—that’s where the creamy magic happens. This filling is naturally thick and glossy, thanks to the eggs and condensed milk getting cozy together.
Step 4: Assemble and Bake
Pour your luscious lime filling right over the slightly cooled crust, spreading it evenly to every edge of the pan. Pop it back in the oven for 15-18 minutes. You’ll know it’s done when the center is set but still has a gentle wobble—think of it like a good cheesecake. Don’t worry, it will set up perfectly as it cools.
Step 5: Chill Until Dreamy
Once baked, let your bars cool to room temperature. Then, pop them in the fridge for at least 3 hours (or longer if you have time). This relaxes the filling into a perfectly sliceable, creamy treat. Only patience stands between you and dessert greatness!
Step 6: Make the Whipped Cream Topping
Right before serving, whisk together the heavy cream, powdered sugar, and vanilla extract using a stand or hand mixer. Beat just until stiff peaks form—don’t over-mix or you’ll make butter! This cloudlike topping is the finishing touch for your Key Lime Pie Bars.
Step 7: Top, Slice, and Serve
Spread the whipped cream in a generous, swoopy layer over your chilled bars. Lift them from the pan, cut into neat squares, and, if you like, add a sprinkle of fresh lime zest or a mini wedge of lime to each piece. Serve chilled, and watch them disappear faster than you can say “Key Lime Pie Bars.”
How to Serve Key Lime Pie Bars

Garnishes
The simplest way to make Key Lime Pie Bars look extra tempting is with a flourish of fresh lime zest over the whipped cream—instant color, aroma, and a pop of flavor. You can also tuck a tiny lime wedge or twist into each bar for a festive finishing touch. If you want extra glam, add a sprinkle of toasted coconut or a dusting of graham cracker crumbs on top.
Side Dishes
Although these bright citrus bars really shine on their own, you can pair them with fresh berries or a vibrant fruit salad for an easy, refreshing match. I also like serving them with a cup of strong coffee or a pot of hot tea after a meal for a simple but elegant finale.
Creative Ways to Present
For parties, try cutting your Key Lime Pie Bars into bite-sized squares and arranging them on a pretty platter—perfect for finger food at a gathering. If you’re feeling fancy, layer crumbled bars and whipped cream in little jars or glasses for individual “pie parfaits.” You can even use them as a base for an over-the-top ice cream sundae with fruity sorbet.
Make Ahead and Storage
Storing Leftovers
Place any leftover bars in an airtight container and refrigerate. They’ll stay creamy, fresh, and delicious for up to 4 days—meaning you can make them in advance or enjoy a treat all week long. Just make sure the whipped cream layer is covered so it doesn’t dry out.
Freezing
You can absolutely freeze Key Lime Pie Bars (minus the whipped cream topping). Cut the chilled, plain bars, wrap each tightly in plastic, and store in a zip-top freezer bag. They’ll keep for up to 2 months. When ready to enjoy, thaw them overnight in the fridge and top with fresh whipped cream before serving.
Reheating
No reheating needed with these bars—they’re meant to be enjoyed ice cold, straight from the fridge! If you’ve frozen them, allow them to thaw before adding the whipped cream so everything stays silky and fresh.
FAQs
Can I use bottled lime juice instead of fresh?
Fresh lime juice truly gives the best, most vibrant flavor in Key Lime Pie Bars. While bottled juice will work in a pinch, it won’t deliver quite the same zesty punch. If possible, opt for fresh-squeezed every time!
Can I double this recipe for a larger crowd?
Absolutely! Just double all the ingredients and use a 9×13-inch baking pan. The bars will bake up beautifully and be a hit at any party or potluck.
My bars seem too soft after chilling. What went wrong?
If your bars are too soft, they may need more chill time to set up properly. Also, double-check that you baked the filling until it was set but still just slightly wobbly in the center before chilling.
Can I make Key Lime Pie Bars gluten-free?
Yes! Simply swap in gluten-free graham crackers for the crust. Everything else in the recipe is naturally gluten-free, so your bars will be just as delicious.
Can I use lemons instead of limes?
Absolutely—while not traditional, using lemons creates a bright and slightly different citrus bar that’s still wonderful. Or try a blend of lemon and lime juice for a unique twist!
Final Thoughts
Every time I make these Key Lime Pie Bars, I’m reminded just how easy it is to bring a little sunshine into my kitchen. With their bold citrus zing and creamy texture, they’re destined to become a favorite in your dessert lineup, too. Give them a try—you might just find yourself craving another batch before the first one disappears!
Print
Key Lime Pie Bars Recipe
- Total Time: 4 hours 40 minutes
- Yield: 12 servings 1x
- Diet: Non-Vegetarian
Description
Indulge in the refreshing and tangy flavors of these Key Lime Pie Bars. A buttery graham cracker crust holds a luscious key lime filling, topped with billowy whipped cream. Perfect for citrus lovers and a delightful treat for any occasion.
Ingredients
For the crust:
- 1 1/2 cups graham cracker crumbs
- 1/4 cup granulated sugar
- 1/2 teaspoon ground cinnamon (optional)
- 1/2 cup unsalted butter, melted
For the filling:
- 2 (14-ounce) cans sweetened condensed milk
- 1/2 cup fresh lime juice (about 4–5 limes)
- 2 large eggs
- 1 tablespoon lime zest
For the topping:
- 1 cup heavy cream
- 2 tablespoons powdered sugar
- 1/2 teaspoon vanilla extract
Instructions
- Preheat the oven: Preheat the oven to 350°F (175°C). Line an 8×8-inch baking pan with parchment paper, leaving an overhang for easy removal.
- Make the crust: Combine graham cracker crumbs, sugar, and cinnamon. Stir in melted butter. Press into pan and bake.
- Prepare the filling: Whisk together condensed milk, lime juice, eggs, and zest. Pour over crust and bake.
- Chill: Let the bars cool, then refrigerate for at least 3 hours.
- Make the topping: Whip cream with sugar and vanilla until stiff peaks form. Spread on chilled bars.
- Serve: Cut into squares and garnish with lime zest or wedges.
Notes
- Use fresh lime juice for optimal flavor.
- You can adjust the crust thickness by adding more graham cracker crumbs.
- Bars can be refrigerated for up to 4 days.
- Prep Time: 15 minutes
- Cook Time: 25 minutes
- Category: Dessert
- Method: Baking
- Cuisine: American
Nutrition
- Serving Size: 1 bar
- Calories: 280
- Sugar: 27g
- Sodium: 150mg
- Fat: 18g
- Saturated Fat: 11g
- Unsaturated Fat: 6g
- Trans Fat: 0g
- Carbohydrates: 30g
- Fiber: 1g
- Protein: 3g
- Cholesterol: 75mg