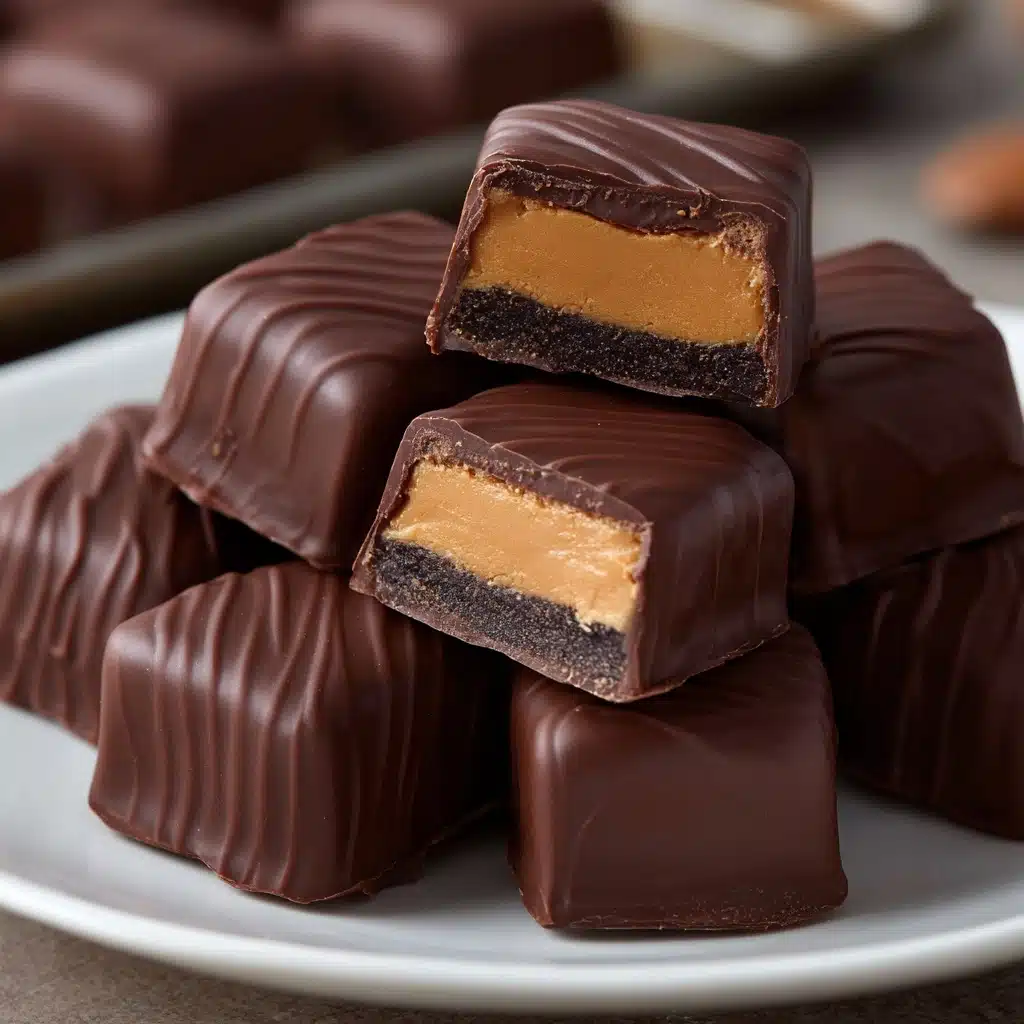
If you’ve ever dreamed of a homemade treat that’s equal parts decadent, nostalgic, and undeniably easy to make, then you’re about to fall head over heels in love with these Chocolate Peanut Butter Candies. Imagine creamy, sweet-salty peanut butter filling wrapped in a silky chocolate shell — each bite delivers pure dessert bliss that feels right at home at a holiday gathering, tucked into a lunchbox, or whenever you need a little pick-me-up. These candies don’t just taste amazing, they’re also incredibly simple to throw together, and they’re guaranteed to delight both kids and grown-ups alike.
Ingredients You’ll Need
The beauty of Chocolate Peanut Butter Candies lies in their simplicity. Each ingredient plays a crucial role in achieving the perfect bite: rich peanut butter brings creaminess, a touch of butter adds depth, and smooth chocolate creates the ideal snap. Here’s what you’ll need (along with a quick tip for each):
- Peanut Butter (1 cup, creamy): Use your favorite brand — classic creamy guarantees a smooth center, but crunchy also works if you like a little extra texture.
- Unsalted Butter (1/4 cup, softened): Softened butter blends easily with peanut butter, adding a rich base to your filling.
- Salt (1/4 teaspoon): A dash of salt sharpens and balances the sweetness, making every bite more irresistible.
- Vanilla Extract (1/2 teaspoon): Vanilla enhances the flavor and gives the filling a lovely, aromatic depth.
- Powdered Sugar (2 cups): This is what gives the filling its structure and just the right level of sweetness — sift for a lump-free mixture.
- Semi-Sweet or Milk Chocolate Chips (2 cups): Both work beautifully; semi-sweet gives a classic dark edge, while milk chocolate brings an extra creamy touch.
- Coconut Oil or Shortening (1 tablespoon, optional): Adding a little helps the melted chocolate become perfectly glossy and easy to work with.
How to Make Chocolate Peanut Butter Candies
Step 1: Blend the Peanut Butter Filling
Start by mixing the creamy peanut butter, softened unsalted butter, salt, and vanilla extract together in a medium bowl. Stir until everything becomes wonderfully smooth and completely combined — this is the creamy, luscious base for your Chocolate Peanut Butter Candies. Don’t rush; a little extra stirring ensures all the flavors mingle beautifully.
Step 2: Add the Powdered Sugar
Gradually incorporate the powdered sugar into the mixture. Go slowly, adding a little at a time, so you can mix thoroughly and keep the filling from becoming too stiff. You’re aiming for a thick, dough-like consistency that you can roll with your hands. If the dough feels too sticky, don’t be shy about dusting your hands with extra powdered sugar.
Step 3: Shape the Candies
Once your peanut butter mixture is ready, use a small cookie scoop or spoon to portion it out and roll it between your palms to form 1-inch balls. Arrange them on a parchment-lined baking sheet, spacing them out so they don’t stick together. Pop them into the fridge for at least 30 minutes, or until firm — this makes dipping them in chocolate a breeze later on.
Step 4: Melt the Chocolate
While your peanut butter centers are chilling, add the chocolate chips (and coconut oil or shortening, if using) to a microwave-safe bowl. Heat in 30-second bursts, stirring after each, until the mixture is completely melted and smooth. If you prefer, you can also melt the chocolate gently in a double boiler on the stove for extra control over the process.
Step 5: Dip and Set
Remove the peanut butter balls from the fridge and use a fork or candy dipper to dip each one into the melted chocolate. Gently tap off any excess and return each candy to the parchment-lined baking sheet. Once you’ve dipped them all, slide the sheet back into the refrigerator for another 15 to 20 minutes to let the chocolate shell set up perfectly. And that’s it — your Chocolate Peanut Butter Candies are ready for the spotlight!
How to Serve Chocolate Peanut Butter Candies
Garnishes
A sprinkle of flaky sea salt, a drizzle of white chocolate, or even a dusting of crushed peanuts on top will make your Chocolate Peanut Butter Candies look bakery-worthy. These tiny touches not only add a pop of flavor and crunch but also make each candy look special and inviting.
Side Dishes
For a full dessert spread, pair your candies with fresh berries, a cup of coffee, or a scoop of vanilla ice cream. The bright tartness from fruit and the smoothness of ice cream are both wonderful complements to the rich, nutty profile of your candies.
Creative Ways to Present
Line a pretty box with parchment and arrange your Chocolate Peanut Butter Candies in neat rows for a homemade gift, or tuck them into cupcake liners for a playful, bite-sized party tray. For a fun twist, stack them up as the centerpiece on a dessert board surrounded by cookies and fresh fruit — instant party magic.
Make Ahead and Storage
Storing Leftovers
To keep your candies tasting fresh, store them in an airtight container in the refrigerator. They’ll stay perfect for up to 2 weeks. Pro tip: layering parchment paper between each row keeps them from sticking together and preserves their smooth chocolate finish.
Freezing
If you want to get ahead (or just stash some for a rainy day), these candies freeze beautifully! Place them in a single layer on a baking sheet, freeze until solid, then transfer to an airtight container. They’ll keep in the freezer for up to 3 months and make a sweet, speedy treat straight from the freezer — just let them thaw for 5–10 minutes before enjoying.
Reheating
These are best enjoyed cold or at room temperature, but if you want to soften the chocolate shell just a touch, leave your candies out on the counter for 10–15 minutes before serving. Avoid microwaving, as it may melt the chocolate unevenly or make the peanut butter filling too gooey.
FAQs
Can I use natural peanut butter for these candies?
Yes, you can, but be aware that natural peanut butter often has more oil and a thinner consistency, which might make the mixture wetter. Stir it very well first and be prepared to add extra powdered sugar to reach the right dough-like texture for rolling.
What’s the best chocolate to use for coating?
Either milk or semi-sweet chocolate chips will work, depending on how sweet you like your candies. For a more luxurious finish, you can use high-quality baking chocolate, which melts even silkier and gives a glossier shell to the Chocolate Peanut Butter Candies.
Can I make these candies vegan?
Absolutely! Swap the butter for a vegan buttery spread and choose dairy-free chocolate chips. Double-check your peanut butter and other ingredients to ensure they’re vegan-friendly, and follow the same steps for rich, plant-based treats.
How do I prevent the chocolate from seizing or becoming grainy?
The key is to make sure that no water gets into your melted chocolate and to use gentle, short bursts in the microwave. If using a double boiler on the stove, make sure the bowl doesn’t touch the hot water — slow and steady wins every time for Chocolate Peanut Butter Candies!
Can I add anything extra to the peanut butter center?
You bet! Try folding in crisped rice, mini chocolate chips, or even a pinch of cinnamon into the filling for an extra flavor twist. Just be careful not to add too much, or it might be tricky to dip neatly.
Final Thoughts
When you’re craving a crowd-pleaser that’s easy enough for a weeknight but special enough for celebration, there’s just nothing like homemade Chocolate Peanut Butter Candies. With minimal, pantry-friendly ingredients and limitless possibilities for serving or gifting, these little gems will quickly become a staple in your sweets repertoire. Give them a try — you’ll be amazed at how fast they disappear!
Print
Chocolate Peanut Butter Candies Recipe
- Total Time: 1 hour (includes chilling)
- Yield: 30 candies 1x
- Diet: Vegetarian
Description
Indulge in these decadent Chocolate Peanut Butter Candies that are perfect for satisfying your sweet tooth. Creamy peanut butter centers are coated in rich chocolate for a delightful treat.
Ingredients
Peanut Butter Filling:
- 1 cup creamy peanut butter
- 1/4 cup unsalted butter, softened
- 1/4 teaspoon salt
- 1/2 teaspoon vanilla extract
- 2 cups powdered sugar
Chocolate Coating:
- 2 cups semi-sweet or milk chocolate chips
- 1 tablespoon coconut oil or shortening (optional, for smoother coating)
Instructions
- Prepare Peanut Butter Filling: In a medium bowl, mix together peanut butter, softened butter, salt, and vanilla extract until smooth. Gradually stir in powdered sugar to form a stiff dough.
- Shape and Chill: Roll mixture into 1-inch balls and place on a parchment-lined baking sheet. Chill in the refrigerator for at least 30 minutes until firm.
- Coat with Chocolate: Melt chocolate chips and coconut oil in the microwave in 30-second intervals. Dip chilled peanut butter balls into the melted chocolate using a fork, tapping off excess. Place on parchment paper and repeat with remaining candies.
- Set and Serve: Refrigerate dipped candies for 15–20 minutes until set. Enjoy!
Notes
- Store candies in an airtight container in the fridge for up to 2 weeks or freeze for longer storage.
- You can use crunchy peanut butter for added texture.
- Prep Time: 25 minutes
- Cook Time: 5 minutes (for melting chocolate)
- Category: Dessert
- Method: No-Bake
- Cuisine: American
Nutrition
- Serving Size: 1 candy
- Calories: 130
- Sugar: 11g
- Sodium: 60mg
- Fat: 8g
- Saturated Fat: 4g
- Unsaturated Fat: 3g
- Trans Fat: 0g
- Carbohydrates: 14g
- Fiber: 1g
- Protein: 2g
- Cholesterol: 5mg