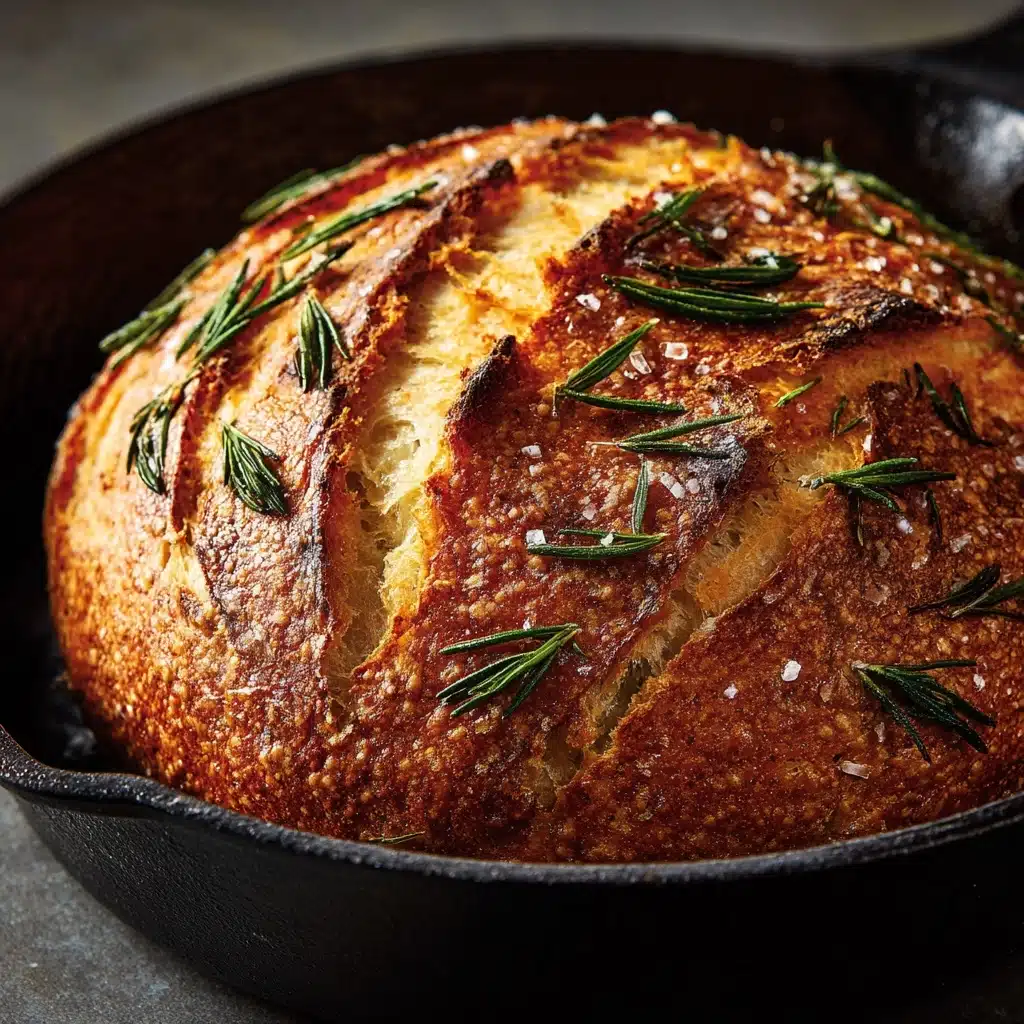
If there was ever a bread that could capture the cozy warmth of a kitchen filled with laughter, it would be Rustic No-Knead Rosemary Garlic Bread. Imagine a crust that crackles as you tear it open, revealing a soft, aromatic center flecked with rosemary and roasted garlic. This recipe is a true celebration of simple ingredients, patient timing, and the rustic joy that homemade bread brings to every meal. Whether you pair it with your favorite soup or simply savor it warm from the oven with a drizzle of olive oil, every bite promises a little moment of comfort and delight.
Ingredients You’ll Need
Ingredients You’ll Need
With just a handful of pantry staples, you can create Rustic No-Knead Rosemary Garlic Bread that impresses every time. The magic lies in how each ingredient works together to add flavor, fragrance, and the perfect crumb.
- All-purpose flour: Reliable and versatile, this forms the backbone of your bread and keeps the crumb tender.
- Salt: Don’t underestimate this small addition—it heightens the flavors and balances the garlic and herbs.
- Instant yeast: A little goes a long way to create the beautiful rise and airy texture of the loaf.
- Warm water: The gentle heat helps kickstart the yeast and creates a stretchy, hydrated dough.
- Chopped fresh rosemary: This brings earthy, piney notes that make the bread taste unmistakably homemade.
- Minced garlic: Adds intensity, warmth, and the savory magic that makes each bite irresistible.
- Olive oil: Infuses a subtle richness and helps keep the loaf moist and flavorful.
- Cornmeal or flour for dusting: Prevents sticking and adds a delightful touch of rustic texture to the crust.
How to Make Rustic No-Knead Rosemary Garlic Bread
Step 1: Mix Up the Dough
Start by grabbing a large bowl—this is where all the magic happens. Combine your flour, salt, and instant yeast first so everything mixes evenly. Stir in the fresh rosemary and garlic (and trust me, the aroma already hints at how delicious this will be). Pour in the warm water and olive oil, then use a wooden spoon to mix everything together until a shaggy, sticky dough forms. It will look messy, but that’s exactly what you want for Rustic No-Knead Rosemary Garlic Bread.
Step 2: Let It Rest (Patience is the Secret!)
Cover your bowl with plastic wrap or a clean towel and let the dough rest at room temperature for 12 to 18 hours. This long, slow fermentation gives Rustic No-Knead Rosemary Garlic Bread its signature depth of flavor and gorgeous texture. By the end, your dough will have doubled in size and be covered in tiny bubbles—proof that all that time paid off!
Step 3: Shape and Rest
Once your dough is ready, turn it out onto a well-floured surface. Gently shape it into a round loaf; there’s no kneading involved, just coax it into a circle with floured hands. Let it rest, covered loosely with a towel, for another 30 minutes while you preheat your oven and the Dutch oven inside. This final rest helps develop just the right crumb.
Step 4: Preheat and Prepare
While your dough rests, set your oven to 450°F (230°C) and place your Dutch oven (with its lid) inside. Allowing the Dutch oven to heat up ensures the bread will rise quickly and form that iconic rustic crust. When you’re ready, carefully transfer your shaped loaf onto a piece of parchment paper, sprinkle with extra rosemary, and prepare for the bake.
Step 5: Bake to Golden Perfection
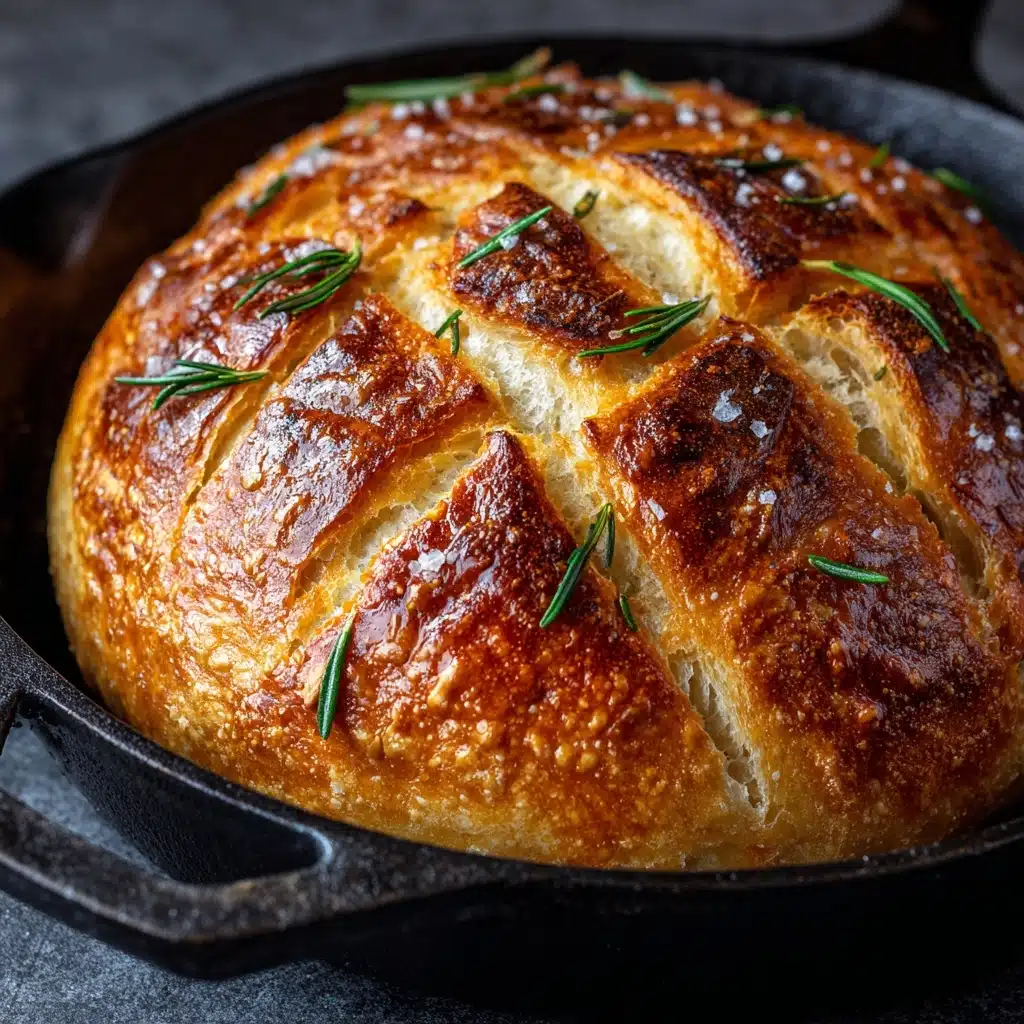
Using oven mitts, remove the hot Dutch oven and gently lift the parchment and dough into it. Cover and bake for 30 minutes. Afterward, take off the lid and let the bread bake for another 10 to 15 minutes, unveiling a loaf that’s beautifully golden and crisp. Cool it on a wire rack (if you can wait!) before slicing—the aromas filling your kitchen will be almost impossible to resist.
How to Serve Rustic No-Knead Rosemary Garlic Bread
Garnishes
A sprinkle of flaky sea salt, another dash of chopped fresh rosemary, or a swirl of extra-virgin olive oil can take each slice from incredible to unforgettable. If you’re feeling adventurous, rub a cut garlic clove on the warm crust for another hit of garlicky goodness.
Side Dishes
Rustic No-Knead Rosemary Garlic Bread pairs like a charm with so many cozy dishes. Serve it alongside hearty vegetable soups, lentil stew, or creamy tomato basil soup for a satisfying meal. It’s also a dream with salads—think tangy vinaigrette and leafy greens—or as a base for open-faced sandwiches.
Creative Ways to Present
Slice and toast it for savory crostini, or cut into rustic chunks for a stunning bread basket at brunch. You can even turn leftovers into homemade croutons or breadcrumbs to add flavor to soups and salads. Displaying the golden loaf whole on the table always brings a wow factor, and lets everyone break off warm pieces together.
Make Ahead and Storage
Storing Leftovers
To keep your Rustic No-Knead Rosemary Garlic Bread fresh, wrap any remaining slices tightly in foil or store in an airtight bag at room temperature. It’s best enjoyed within two days, as its rustic crumb can dry out quickly.
Freezing
This bread freezes beautifully! Slice it before freezing so you can easily grab just what you need. Wrap the slices well in plastic wrap and then foil, or use a freezer-safe bag. It will keep for up to three months, making it handy for last-minute meals or unexpected guests.
Reheating
To refresh, pop slices in a toaster or rewarm the whole loaf in the oven at 350°F (175°C) for 8–10 minutes. This revives the crust and brings back that just-baked flavor. For a softer reheating method, wrap slices in foil and heat gently until warm.
FAQs
Can I use dried rosemary instead of fresh?
Absolutely! If you use dried rosemary, reduce the amount to 1 teaspoon since dried herbs are more concentrated. The flavor will be slightly different, but still delicious in your Rustic No-Knead Rosemary Garlic Bread.
What if I don’t have a Dutch oven?
A heavy, oven-safe pot with a lid is the best alternative. The goal is to trap steam during baking to create that signature crust. Otherwise, bake on a preheated baking stone or sheet, but the crust will be less crackly.
How do I know when my bread is done?
The crust should be golden brown and crisp, and the loaf should sound hollow when tapped on the bottom. For extra precision, an internal temperature of 200–210°F means your Rustic No-Knead Rosemary Garlic Bread is ready.
Can I add cheese or other herbs?
Definitely! Fold in a handful of grated parmesan or asiago, or experiment with thyme or oregano for a different twist. Just keep add-ins modest so the bread rises properly.
Is Rustic No-Knead Rosemary Garlic Bread vegan?
Yes, the basic recipe is completely vegan, with no dairy or eggs. Just be sure to check your bread pairs and toppings if you’re serving vegan guests.
Final Thoughts
Once you try making Rustic No-Knead Rosemary Garlic Bread at home, it’s bound to become a favorite for cozy weekends, special occasions, or just those days when you crave something wholesome and soul-satisfying. Invite your friends or family to gather round and enjoy the unmistakable aroma of fresh-baked bread—you might just spark a tradition.
Print
Rustic No-Knead Rosemary Garlic Bread Recipe
- Total Time: 13 hours (including resting time)
- Yield: 1 loaf (about 10 servings) 1x
- Diet: Vegan
Description
Enjoy the rustic charm of this flavorful no-knead rosemary garlic bread that requires minimal effort for maximum taste. The aromatic blend of rosemary and garlic in a crusty loaf is perfect for any occasion.
Ingredients
Dough:
- 3 cups all-purpose flour
- 1¾ teaspoons salt
- ½ teaspoon instant yeast
- 1½ cups warm water
Additional:
- 1 tablespoon chopped fresh rosemary (plus extra for topping)
- 3 cloves garlic, minced
- 1 tablespoon olive oil
- Cornmeal or flour for dusting
Instructions
- Mix Dry Ingredients: In a large bowl, combine flour, salt, and instant yeast. Add rosemary and garlic. Stir.
- Add Wet Ingredients: Pour in warm water and olive oil. Stir with a wooden spoon until a sticky dough forms.
- Let it Rise: Cover and let the dough sit at room temperature for 12-18 hours until doubled.
- Shape and Bake: Turn out dough, shape into a loaf, rest for 30 mins. Preheat oven with Dutch oven. Bake covered, then uncovered until golden.
- Cool and Serve: Cool on a wire rack before slicing.
Notes
- For extra flavor, consider roasting the garlic before adding it to the dough.
- This bread pairs wonderfully with olive oil for dipping or as a side to soups and stews.
- Prep Time: 10 minutes (plus 12–18 hours rest)
- Cook Time: 45 minutes
- Category: Bread
- Method: Baking
- Cuisine: American
Nutrition
- Serving Size: 1 slice
- Calories: 160
- Sugar: 0g
- Sodium: 340mg
- Fat: 3g
- Saturated Fat: 0.5g
- Unsaturated Fat: 2.5g
- Trans Fat: 0g
- Carbohydrates: 29g
- Fiber: 1g
- Protein: 4g
- Cholesterol: 0mg