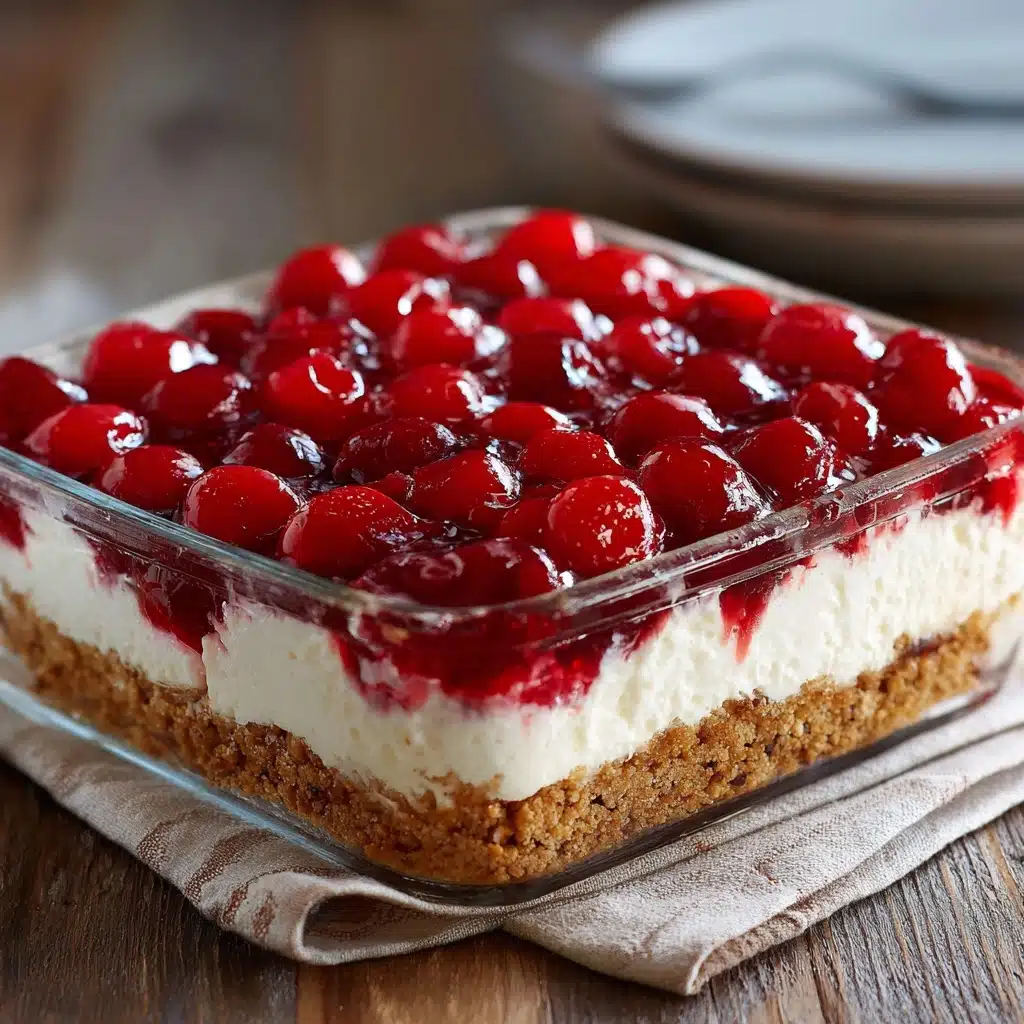
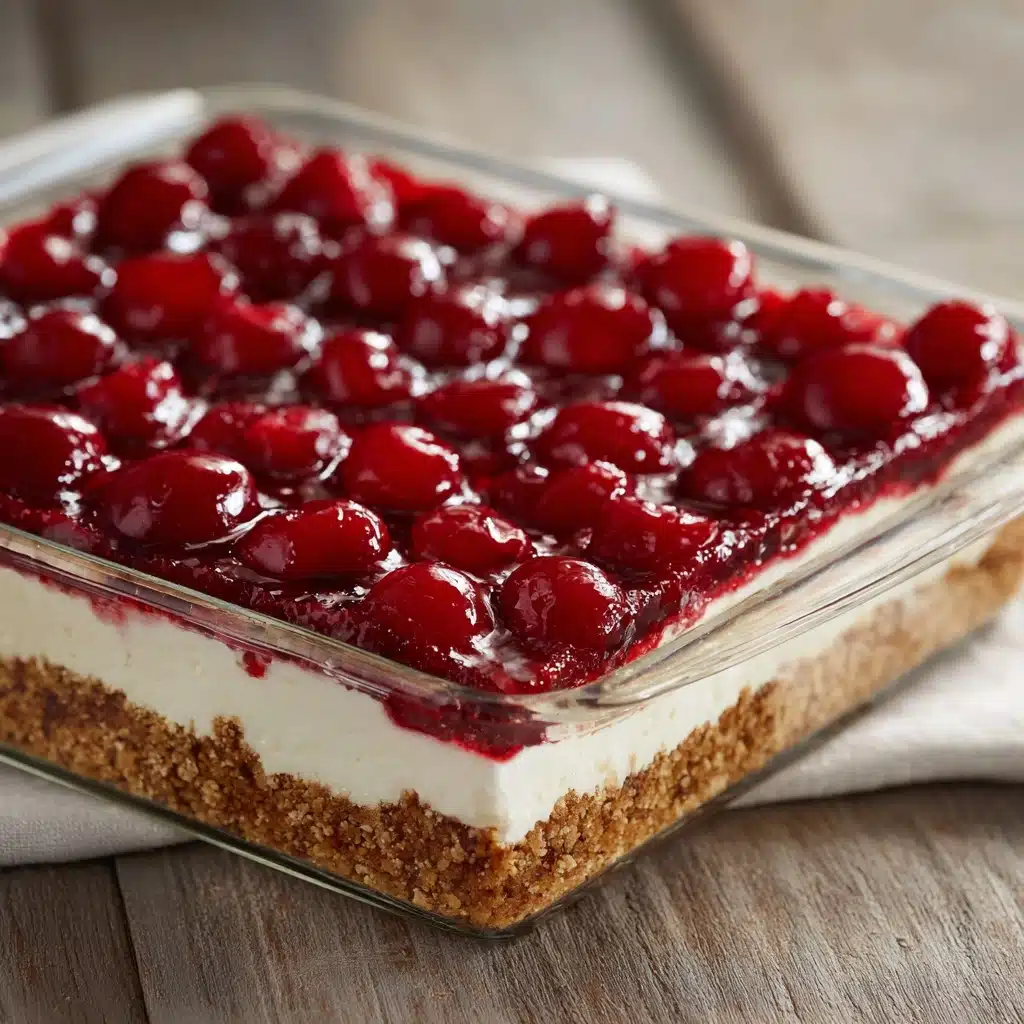
If you’re looking for a dessert that hits every nostalgic note of summer sweetness and creamy comfort, Classic Cherry Delight is about to become your new favorite treat. This cherished no-bake recipe delivers luscious layers: a buttery graham cracker crust, a dreamy cream cheese filling, and a luscious crown of glossy cherry pie filling. With its impressive presentation and practically effortless prep, Classic Cherry Delight is guaranteed to light up your next gathering, family supper, or quiet night in—it truly has a delightful way of transforming any moment into something special.
Ingredients You’ll Need
Classic Cherry Delight stays true to its crowd-pleasing roots by relying on just a handful of timeless ingredients. Each one plays a crucial role in creating that perfect balance of crunchy, creamy, and fruity layers that make this dessert so memorable.
- Graham cracker crumbs: These create the sturdy, lightly sweet base that holds everything together.
- Granulated sugar: Adds the just-right touch of sweetness to the crust, making it impossible to resist.
- Unsalted butter (melted): Melted butter binds your crumbs, giving the crust its delicious golden richness.
- Cream cheese (softened): The heart of the creamy layer, softened cream cheese makes blending a breeze and ensures velvety smoothness.
- Powdered sugar: This dissolves beautifully into the cream cheese, creating a dreamy, cloudlike filling.
- Vanilla extract: Adds an aromatic depth and enhances all the other flavors in every bite.
- Whipped topping (thawed): Folded in for a light, airy texture that contrasts the crust and cherries so perfectly.
- Cherry pie filling: The ruby-red finishing touch that brings juicy, festive flair and that unmistakable cherry flavor.
How to Make Classic Cherry Delight
Step 1: Prepare the Crust
Start by combining your graham cracker crumbs, granulated sugar, and melted unsalted butter in a medium bowl. Stir everything together until the mixture looks like damp sand—that’s your signal it’s ready to mold. Press this mixture firmly and evenly into the bottom of a 9×9-inch baking dish, using the flat bottom of a measuring cup for a super smooth finish. The crust sets the stage for every creamy, cherry-laden forkful to come.
Step 2: Whip Up the Cream Cheese Filling
In a large bowl, beat the softened cream cheese until it turns completely smooth and creamy. Slowly add in the powdered sugar and vanilla extract, continuing to beat until it’s all velvety and well-combined. Now, gently fold in the thawed whipped topping. You’ll see the filling become light, fluffy, and cloudlike—just the dreamy consistency that makes Classic Cherry Delight so irresistible.
Step 3: Assemble the Layers
Spread the cream cheese mixture evenly over your prepared crust, making sure to reach all the corners for maximum creaminess in every bite. Use a spatula to smooth out the top for that signature bakery look. Next, pour the cherry pie filling right over the creamy layer, then gently spread it out to cover every inch. The red cherries don’t just taste spectacular—they make this dessert truly pop on the table.
Step 4: Chill Until Set
Once assembled, cover your Classic Cherry Delight and slide it into the refrigerator. Let it chill for at least 4 hours (or overnight, if you have the patience!). This time in the fridge allows all the layers to set and mingle, resulting in that perfect sliceable texture when you’re ready to serve.
How to Serve Classic Cherry Delight

Garnishes
For a finishing flourish, consider adding a sprinkle of graham crumbs, a dollop of extra whipped topping, or a scatter of toasted chopped nuts just before serving. A fresh mint leaf or a zest of lemon brightens each square and looks eye-catching against the cherries.
Side Dishes
While Classic Cherry Delight is striking enough to stand alone, it’s wonderful alongside a scoop of vanilla ice cream or a light fruit salad. Serve it with fresh coffee, cold milk, or sparkling lemonade for a classic, summery dessert spread.
Creative Ways to Present
If you want to make your Classic Cherry Delight pop even more, try layering individual servings in mason jars or parfait glasses for picnics and potlucks. For festive occasions, cut the chilled delight into bite-size bars and arrange them on a pretty platter, or use cookie cutters to shape the crust before layering for a playful twist.
Make Ahead and Storage
Storing Leftovers
Keep any leftover Classic Cherry Delight covered in the refrigerator for up to 3 days—the flavors and textures hold up beautifully. Just be sure it’s well-sealed to prevent the creamy layer from absorbing any other fridge aromas.
Freezing
Classic Cherry Delight can be frozen for longer storage. Chill until fully set, then wrap tightly and store in an airtight container for up to one month. Thaw overnight in the refrigerator before serving—the texture remains remarkably smooth and satisfying.
Reheating
This dessert is meant to be served chilled, so there’s no need for reheating. In fact, a little extra fridge time often makes the flavors even more harmoniously delicious!
FAQs
Can I make Classic Cherry Delight in advance?
Absolutely! This dessert is perfect for make-ahead entertaining. Prepare and assemble up to a day ahead, cover, and refrigerate until you’re ready to serve. It actually tastes even better after a chill.
Can I use homemade whipped cream instead of store-bought topping?
Yes, you can substitute freshly whipped cream. Whip 1 cup of heavy cream with a little powdered sugar until stiff peaks form, then fold it into the cream cheese filling just as you would with store-bought whipped topping.
Is it possible to make this dessert with other fruit fillings?
Definitely! While Classic Cherry Delight is beloved for its tart-sweet cherry crown, feel free to swap in blueberry, strawberry, or even peach pie filling for a fun twist. Just be sure to use about the same quantity for proper layering.
What’s the best way to get clean slices?
For picture-perfect squares, chill your Classic Cherry Delight thoroughly and use a sharp knife dipped in hot water (wiping between cuts). This trick helps you slice cleanly through the creamy and fruity layers.
Can I make this dessert gluten-free?
Absolutely—simply substitute gluten-free graham crackers in the crust. The rest of the recipe is already gluten-free, so everyone can enjoy a slice!
Final Thoughts
Classic Cherry Delight has a way of turning every day into an occasion. It’s simple enough for any skill level, yet special enough to impress at any event. I encourage you to whip this up, share with loved ones, and let Classic Cherry Delight bring a burst of cheerful flavor to your table—one dreamy, cherry-topped bite at a time!
Print
Classic Cherry Delight Recipe
- Total Time: 4 hours 15 minutes
- Yield: 9 servings 1x
- Diet: Non-Vegetarian
Description
Indulge in the creamy and luscious Classic Cherry Delight, a no-bake dessert that’s perfect for any occasion. With a buttery graham cracker crust, a velvety cream cheese layer, and a topping of sweet cherry pie filling, this treat is sure to delight your taste buds.
Ingredients
Graham Cracker Crust:
- 1 1/2 cups graham cracker crumbs
- 1/3 cup granulated sugar
- 1/2 cup unsalted butter, melted
Creamy Filling:
- 1 package (8 ounces) cream cheese, softened
- 1 cup powdered sugar
- 1 teaspoon vanilla extract
- 1 container (8 ounces) whipped topping, thawed
Topping:
- 1 can (21 ounces) cherry pie filling
Instructions
- Graham Cracker Crust: In a medium bowl, combine graham cracker crumbs, granulated sugar, and melted butter. Press mixture into a 9×9-inch baking dish.
- Creamy Filling: Beat cream cheese until smooth. Add powdered sugar and vanilla; beat until creamy. Fold in whipped topping.
- Assembly: Spread cream cheese mixture over crust. Top with cherry pie filling.
- Chill: Refrigerate for at least 4 hours or overnight. Slice and serve chilled.
Notes
- For added crunch, consider adding chopped pecans or walnuts to the graham cracker crust.
- This dessert can be prepared a day in advance and stored covered in the refrigerator.
- Prep Time: 15 minutes
- Cook Time: 0 minutes
- Category: Dessert
- Method: No-Bake
- Cuisine: American
Nutrition
- Serving Size: 1 square
- Calories: 340
- Sugar: 25g
- Sodium: 200mg
- Fat: 20g
- Saturated Fat: 12g
- Unsaturated Fat: 6g
- Trans Fat: 0g
- Carbohydrates: 35g
- Fiber: 1g
- Protein: 3g
- Cholesterol: 40mg