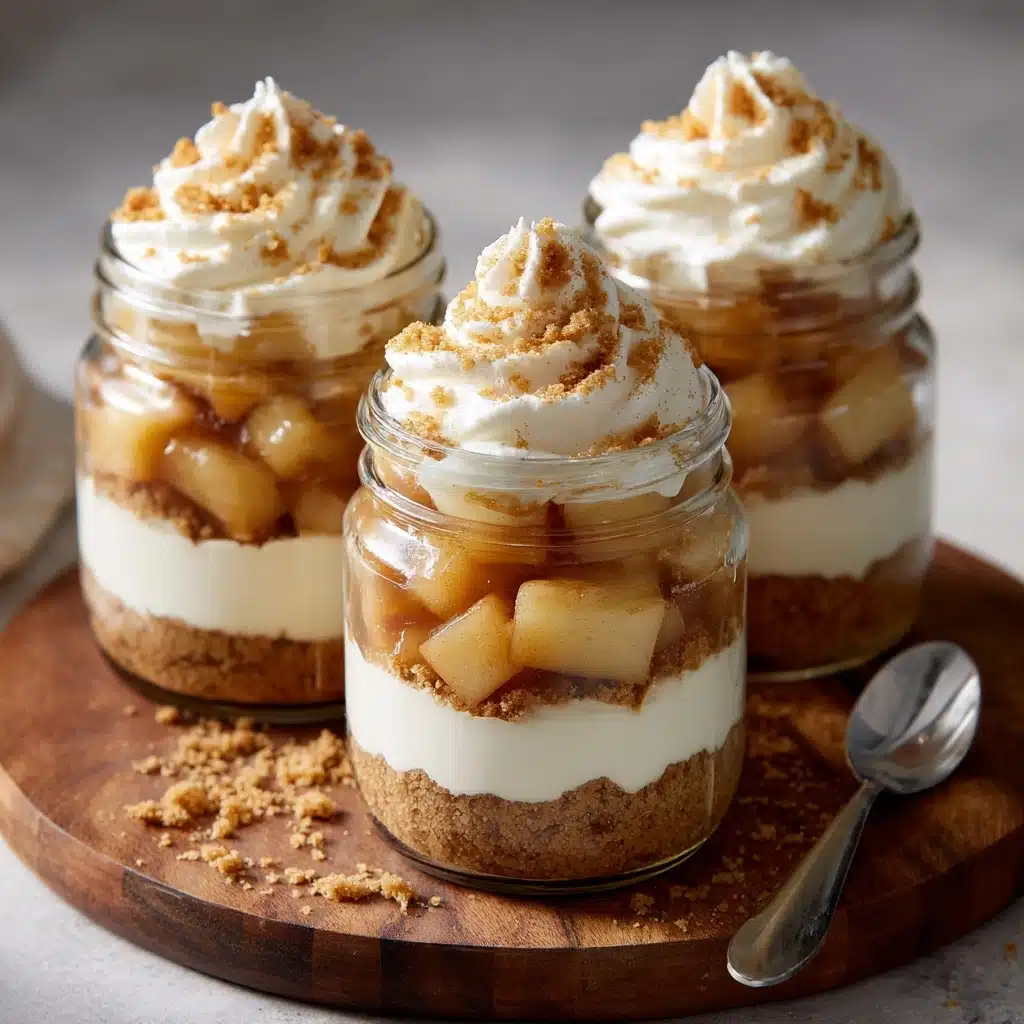
If there’s one dessert I wish I could hand directly to every friend who visits my kitchen, it’s these No-Bake Apple Cheesecake Jars. Imagine all the homey comfort of apple pie paired with the creamy indulgence of cheesecake, delivered in a perfectly portioned glass—no oven, no hassle. Whether you’re prepping for a fall gathering or just looking for a sweet treat to brighten a weeknight, these jars make it effortless to wow your tastebuds. Each spoonful is a dreamy mix of spiced apples, fluffy cream cheese filling, and buttery graham cracker crust. Trust me, once you try this easy favorite, you’ll want to keep those jars at the front of your fridge all season long.
Ingredients You’ll Need
What makes these jars so irresistibly good? It’s the handful of simple ingredients that work together to create delicious texture, flavor, and color. Each component adds its own magic, from the crunch of the crust to the spiced apple topping and the silky cheesecake layer in between.
- Graham cracker crumbs: The nutty, lightly sweet foundation that gives every bite a lovely, nostalgic crunch.
- Unsalted butter (melted): Holds the crust together while adding rich, buttery flavor.
- Granulated sugar: Just a hint, to sweeten up the base and balance the tang of the filling.
- Cream cheese (softened): The heart of the cheesecake layer for maximum creaminess and tang.
- Powdered sugar: Blends smoothly into the cream cheese, making the filling sweet and airy.
- Vanilla extract: Just a teaspoon perfumes the whole dessert and brings everything together.
- Heavy whipping cream (cold): When whipped, this creates the airy, fluffy texture that gives the filling its signature lightness.
- Apple pie filling (chopped): Use homemade or store-bought for a quick apple topping—each bite bursts with spiced autumn flavor.
- Ground cinnamon (optional): For that classic warm kick, sprinkled over the top to finish.
How to Make No-Bake Apple Cheesecake Jars
Step 1: Make the Graham Cracker Crust
Grab a small bowl and combine your graham cracker crumbs, melted butter, and granulated sugar. Mix everything together until the crumbs are evenly moistened—think wet sand. This is the crispy, buttery base that holds up to the creamy filling and juicy apples you’ll add later. Set aside while you whip up the rest.
Step 2: Prepare the Cheesecake Filling
In a large mixing bowl, add the softened cream cheese, powdered sugar, and vanilla extract. Using an electric mixer if you have one, beat these together until the mixture is sumptuously smooth and lump-free. This ensures your cheesecake layer is creamy, dreamy, and perfectly sweet.
Step 3: Whip the Cream and Fold In
Pour the cold heavy whipping cream into a separate bowl and whip until stiff peaks form—it will look thick and cloud-like. Gently fold the whipped cream into the cream cheese mixture with a spatula. Go slow and careful to keep everything light and fluffy, just how a good cheesecake filling should be.
Step 4: Chop Your Apples
If your apple pie filling comes in large slices, give them a quick chop so every bite in your No-Bake Apple Cheesecake Jars is loaded with sweet, cinnamon-kissed apple bits. This ensures the topping spreads evenly and layers beautifully.
Step 5: Assemble the Jars
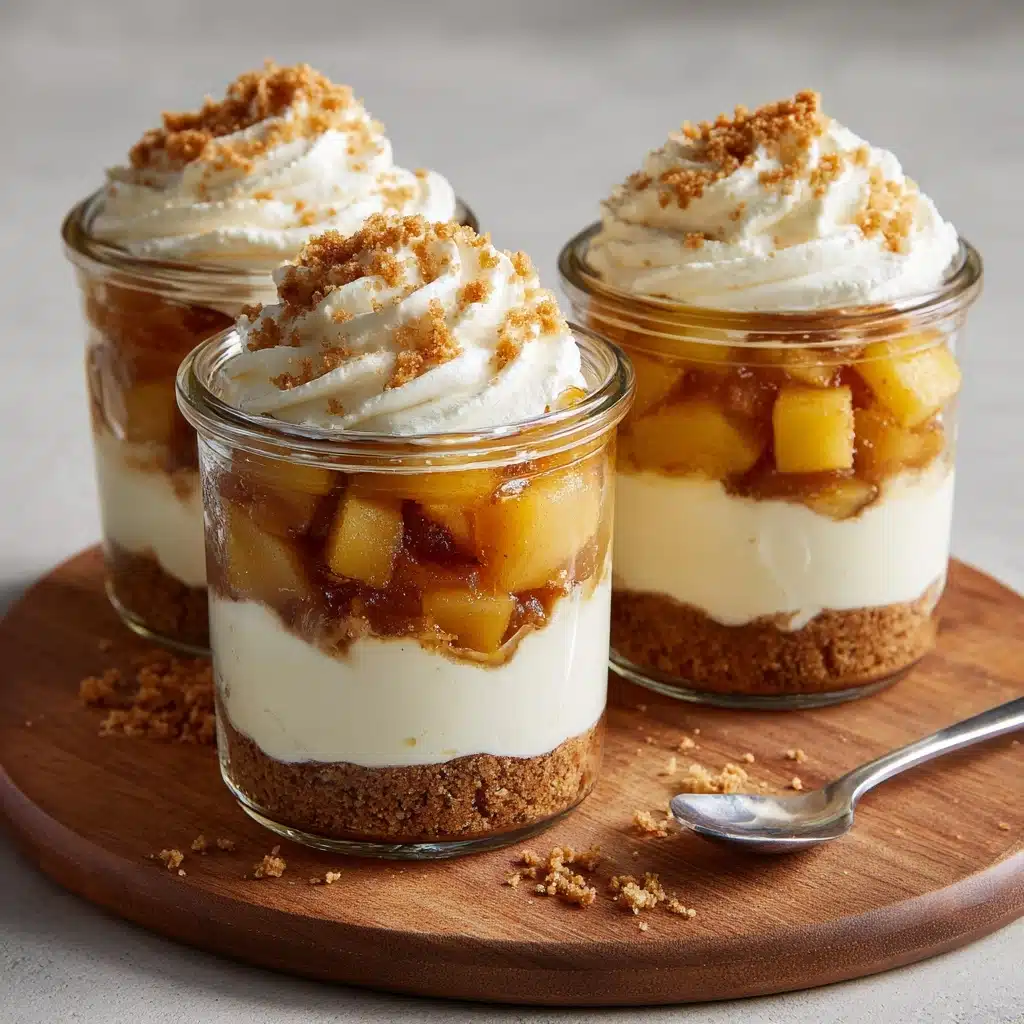
Spoon a layer of graham cracker crust into the bottom of each jar or glass. Next, add a dollop of that fluffy cheesecake filling. Top with a spoonful (generous, always!) of chopped apple pie filling. If your jars allow, repeat each layer for extra decadence. Finish with a pinch of ground cinnamon over the top.
Step 6: Chill and Serve
Cover the jars and let them chill in the refrigerator for at least 2 hours. This helps the flavors meld and gives the filling time to set up. When you’re ready to serve, you’ll have No-Bake Apple Cheesecake Jars that taste as wonderful as they look!
How to Serve No-Bake Apple Cheesecake Jars

Garnishes
A finishing touch can elevate these jars from simple to unforgettable. Sprinkle a little extra ground cinnamon for warmth or add a few chopped pecans or granola for crunch. A swirl of whipped cream and a drizzle of caramel sauce make them feel like dessert at your favorite bistro.
Side Dishes
Pair your No-Bake Apple Cheesecake Jars with a hot cup of coffee, chai tea, or spiced apple cider. For a brunch or special gathering, serve them alongside fresh berries or a light fruit salad to balance the richness of the cheesecake filling.
Creative Ways to Present
Play with presentation to wow your guests: layer the jars in clear glassware for a showstopper look, or use small mason jars for easy, portable treats. For a buffet-style party, set out all the jar components and let guests build their own, customizing each layer and topping to taste.
Make Ahead and Storage
Storing Leftovers
If you have any jars left (unlikely, but possible!), simply cover them tightly and store in the fridge. They stay ultra-fresh for up to 3 days and the flavors just keep getting better as they mingle overnight. No-Bake Apple Cheesecake Jars are perfect for make-ahead desserts when your schedule is busy.
Freezing
For longer storage, you can freeze your assembled jars. Cover them tightly with lids or plastic wrap, and freeze for up to one month. Thaw overnight in the refrigerator before serving. The texture may change slightly but the flavor remains spot-on.
Reheating
No need to reheat these beauties! Since No-Bake Apple Cheesecake Jars are best served cold, simply remove from the fridge, garnish if desired, and enjoy straight away. If frozen, allow them to fully thaw in the refrigerator before digging in.
FAQs
Can I use homemade apple pie filling instead of store-bought?
Absolutely! Homemade apple pie filling brings extra flavor and lets you control the sweetness and spices. Just be sure it’s fully cool before adding to your jars to keep the cheesecake layer stable.
What type Dessert
Any small glass jars, dessert glasses, or even mini mason jars work beautifully. Just look for containers that hold about 1 cup for perfectly portioned desserts. Even clear plastic cups work for parties and on-the-go treats!
How do I make this recipe gluten-free?
Just swap out the regular graham cracker crumbs for your favorite gluten-free version. Most other ingredients are naturally gluten-free, so this switch keeps your No-Bake Apple Cheesecake Jars safe for anyone with gluten sensitivities.
Can I make these ahead for a party?
Yes! In fact, these jars actually taste even better when made ahead because the flavors meld as they chill. Prepare and assemble the jars up to two days before your event, then garnish just before serving.
Is it possible to lighten this recipe?
You can make a lighter version by using reduced-fat cream cheese and swapping out some of the heavy whipping cream for Greek yogurt. The result is still creamy and satisfying, but a bit lighter on calories and fat.
Final Thoughts
No-Bake Apple Cheesecake Jars are the kind of dessert that makes any day feel cozy, special, and a little bit magical. Whether you’re serving a crowd or savoring one all to yourself, you’re in for a real treat—go ahead and give them a try, and don’t be surprised if they become your new go-to favorite!
Print
No-Bake Apple Cheesecake Jars Recipe
- Total Time: 2 hours 20 minutes (including chilling)
- Yield: 6 jars 1x
- Diet: Non-Vegetarian
Description
These delightful No-Bake Apple Cheesecake Jars are a perfect dessert for any occasion. Layers of creamy cheesecake filling, crunchy graham cracker crust, and sweet apple pie filling come together in individual jars for a charming and delicious treat.
Ingredients
Graham Cracker Crust:
- 1 cup graham cracker crumbs
- 3 tablespoons unsalted butter, melted
- 2 tablespoons granulated sugar
Cheesecake Filling:
- 8 ounces cream cheese, softened
- 1/4 cup powdered sugar
- 1 teaspoon vanilla extract
- 1 cup heavy whipping cream, cold
Apple Pie Filling:
- 1 1/2 cups apple pie filling, chopped
- 1/2 teaspoon ground cinnamon (optional)
Instructions
- Graham Cracker Crust: In a small bowl, combine graham cracker crumbs, melted butter, and granulated sugar until moistened. Set aside.
- Cheesecake Filling: Beat cream cheese, powdered sugar, and vanilla until smooth. Whip cold heavy cream until stiff peaks form, then fold into cream cheese mixture.
- Assembly: Layer graham cracker crust, cheesecake filling, and apple pie filling in jars. Repeat layers if desired. Sprinkle cinnamon on top. Refrigerate for at least 2 hours before serving.
Notes
- Use homemade or store-bought apple pie filling.
- For extra crunch, add chopped pecans or granola before serving.
- Prep Time: 20 minutes
- Cook Time: 0 minutes
- Category: Dessert
- Method: No-Bake
- Cuisine: American
Nutrition
- Serving Size: 1 jar
- Calories: 390
- Sugar: 21g
- Sodium: 210mg
- Fat: 28g
- Saturated Fat: 17g
- Unsaturated Fat: 10g
- Trans Fat: 0g
- Carbohydrates: 32g
- Fiber: 1g
- Protein: 4g
- Cholesterol: 90mg