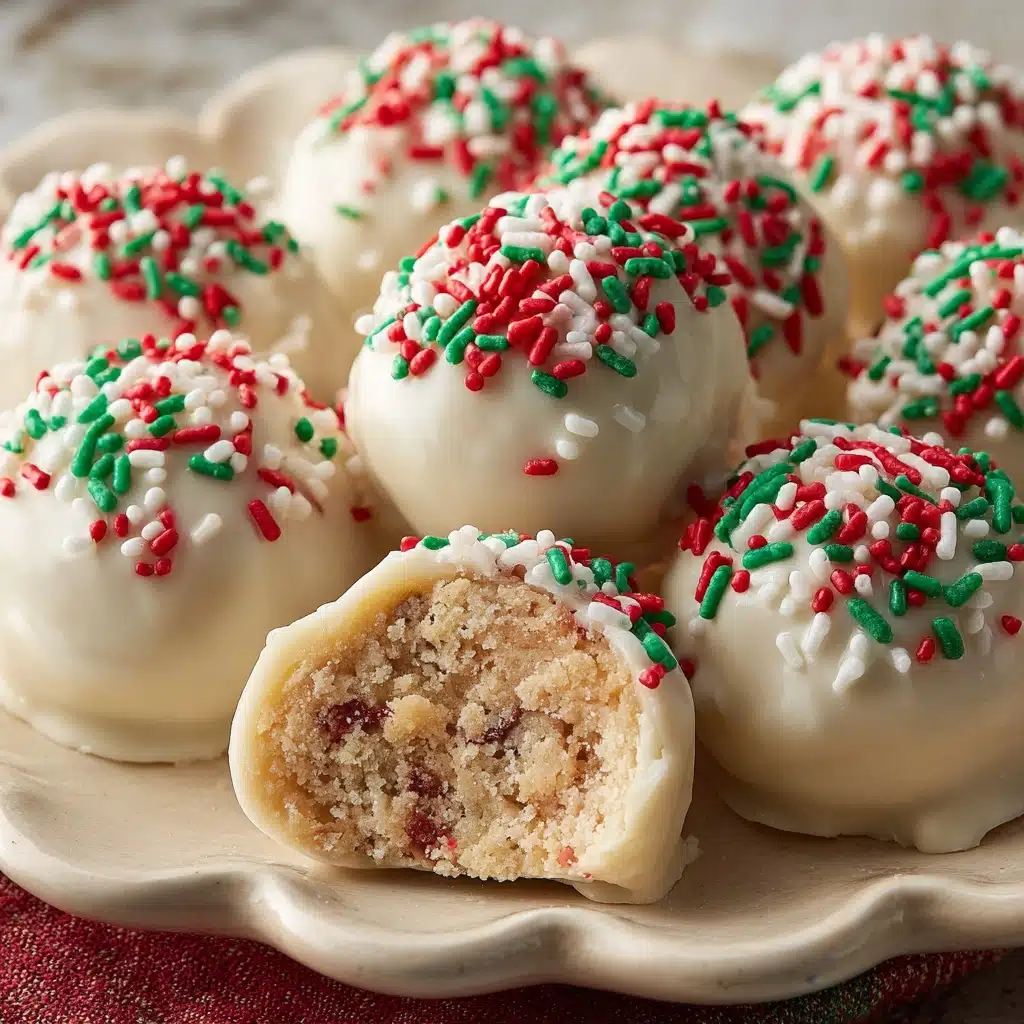
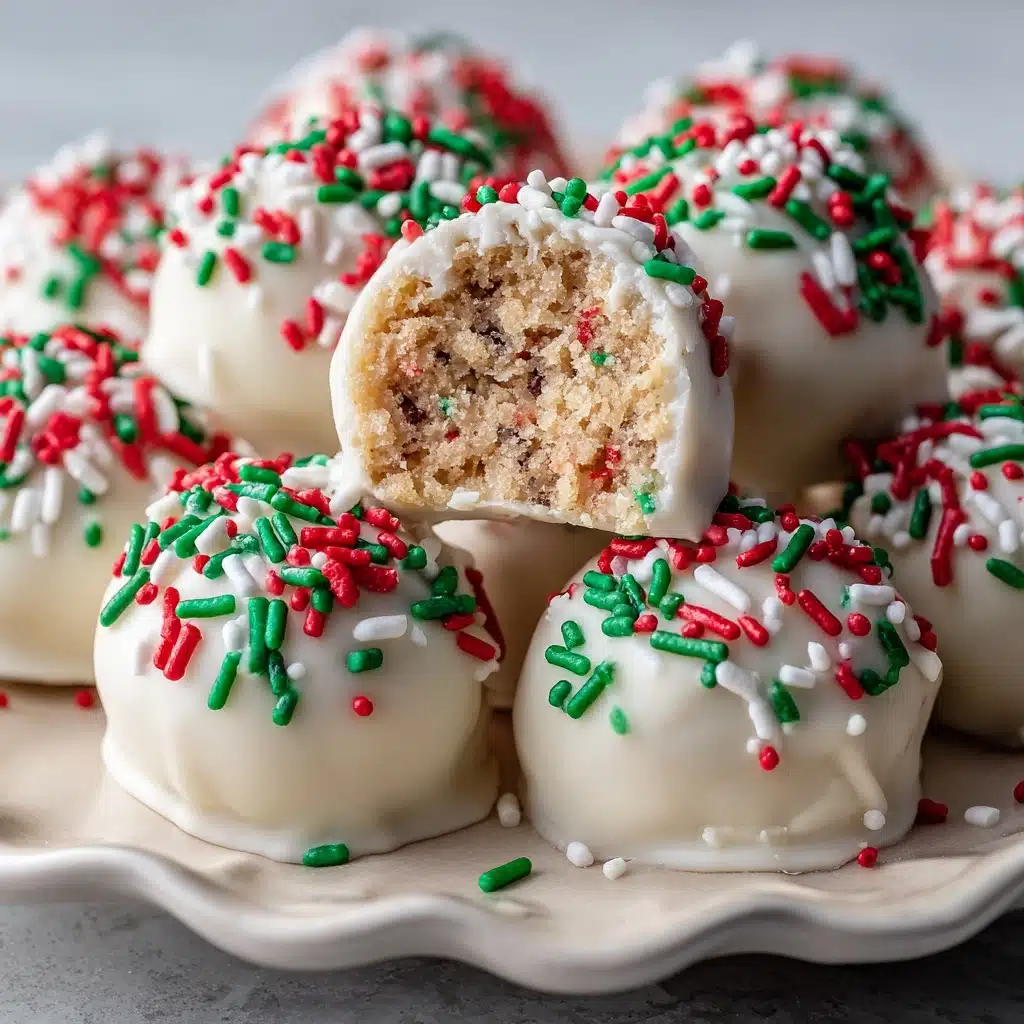
If you’re looking for the ultimate festive treat that’s equal parts nostalgic, wow-worthy, and incredibly easy to make, Little Debbie Christmas Cake Balls are truly about to become your new holiday favorite. Imagine those iconic Christmas Tree Cakes you loved as a kid, transformed into luscious, creamy cake balls, then dipped in a sweet white chocolate shell and adorned with cheerful sprinkles. They’re just as magical on your holiday table as they are as a midnight snack, and believe me, nobody will guess how effortless they are to put together!
Ingredients You’ll Need
Every ingredient in these Little Debbie Christmas Cake Balls plays a starring role, and the best part is, there are only a handful! These simple staples combine for irresistible flavor, creamy texture, and that signature festive flair.
- Little Debbie Christmas Tree Cakes: These classic cakes provide the soft, spongy base and nostalgic flavor that makes this treat irresistible.
- Cream cheese (softened): The secret weapon for a creamy, rich texture that binds the cake balls together.
- Vanilla extract: Just a dash deepens the flavor, making every bite taste homemade and special.
- White chocolate melting wafers or almond bark: These melt smoothly and set quickly, creating that glossy, candy-like shell.
- Holiday sprinkles: A little sprinkle magic adds festive color and crunch, making your cake balls look as good as they taste!
How to Make Little Debbie Christmas Cake Balls
Step 1: Crumble the Cakes
Begin by unwrapping the Little Debbie Christmas Tree Cakes and placing them in a large mixing bowl. Use your hands or a fork to break them down into fine, even crumbs. This step is a bit messy, but it’s wonderfully satisfying and ensures the cake balls won’t be lumpy.
Step 2: Mix with Cream Cheese and Vanilla
Add the softened cream cheese and vanilla extract directly to your bowl of crumbs. With a spoon or your (clean) hands, blend everything together until the mixture is fully combined and starts to hold its shape. It should look like thick, festive cookie dough!
Step 3: Shape Into Balls
Using a small cookie scoop or tablespoon, portion the mixture out and roll it between your hands to form smooth 1-inch balls. Set each one on a parchment-lined baking sheet. You should end up with about 24 cake balls, all ready for their chocolate bath.
Step 4: Chill the Cake Balls
Pop the tray of cake balls into the freezer for 20 to 30 minutes. Chilling them makes dipping super easy and helps the chocolate set fast, giving your Little Debbie Christmas Cake Balls that flawless bakery finish.
Step 5: Melt and Dip
Melt the white chocolate melting wafers or almond bark following the package directions, either in the microwave or a double boiler. Working one at a time, dip each chilled cake ball into the melted chocolate, gently turning to coat. Let any excess drip off before returning to the parchment, then immediately shower with holiday sprinkles for a glitzy winter look.
Step 6: Let Set and Enjoy
Allow the coated cake balls to set at room temperature, or pop them in the fridge for a speedy finish. Once the chocolate shell is firm, your Little Debbie Christmas Cake Balls are ready to be devoured—or gifted, if you can bear to share!
How to Serve Little Debbie Christmas Cake Balls

Garnishes
A generous sprinkle of extra holiday sprinkles right after dipping is essential for that festive sparkle, but you can also use edible glitter, gold dust, or a light drizzle of contrasting chocolate for extra flair. These vibrant toppings make every cake ball look like it belongs at a holiday bakery!
Side Dishes
Set your Little Debbie Christmas Cake Balls on a platter alongside mugs of hot cocoa, a spicy chai, or dark roast coffee—the creamy sweetness is a perfect pairing with a steamy winter drink. For dessert tables, add fresh berries or a bowl of peppermint bark to complete your spread.
Creative Ways to Present
Show off your Little Debbie Christmas Cake Balls nestled in festive mini cupcake liners or piled onto a tiered dessert stand for height and drama. For a charming gift, tuck a few into clear cellophane bags tied with ribbon, or stack them in a decorative holiday tin layered with parchment. Presentation is half the fun, so let your creativity shine!
Make Ahead and Storage
Storing Leftovers
Keep any leftovers fresh by transferring your Little Debbie Christmas Cake Balls to an airtight container and storing them in the refrigerator. They’ll stay fabulous for up to five days, making them a great make-ahead option for busy holiday gatherings or sweet snacks whenever the craving strikes.
Freezing
If you want to get a jump start on your holiday baking, these cake balls freeze beautifully! Arrange them in a single layer in an airtight container (separate layers with parchment paper) and freeze for up to two months. Just let them thaw in the fridge before serving for the best texture.
Reheating
You don’t need to reheat Little Debbie Christmas Cake Balls, as they’re served chilled or at room temperature. If they’ve been in the freezer, simply transfer them to the refrigerator a few hours before you plan to eat and they’ll be perfectly creamy and ready to serve.
FAQs
Can I use other flavors of Little Debbie cakes for this recipe?
Absolutely! While the Christmas Tree Cakes give that festive look and classic flavor, you can swap in your favorite Little Debbie snack cakes for different occasions or try different seasonal variations. It’s a super versatile treat!
What can I use if I don’t have white chocolate melting wafers?
No wafers? No problem! Almond bark or regular white chocolate chips melted with a bit of coconut oil will work too. Just make sure whatever you use is designed for melting and dipping for the smoothest finish.
How do I keep the cake balls from falling apart when dipping?
Be sure to freeze the cake balls for at least 20 minutes before dipping—this helps them hold together firmly and keeps everything neat during the dip. If your mixture seems too soft beforehand, chill it a little longer before shaping.
Are Little Debbie Christmas Cake Balls kid-friendly?
Definitely! The process is simple and safe for little helpers, plus kids absolutely adore both making and eating these cheerful treats. Just supervise the chocolate dipping step since melted chocolate can be a bit hot.
Can I make these gluten-free?
Unfortunately, Little Debbie Christmas Tree Cakes are not gluten-free. However, you could use a gluten-free snack cake or homemade gluten-free cake to create your own delicious variation for those with dietary needs.
Final Thoughts
You truly can’t go wrong with Little Debbie Christmas Cake Balls—festive, nostalgic, and so much fun to make and eat. Whether you’re surprising family, bringing cheer to a cookie exchange, or just treating yourself, these merry cake balls always deliver big holiday joy in every bite. Don’t wait until Christmas to try them; once you do, they’ll become a new classic at your celebrations!
Print
Little Debbie Christmas Cake Balls Recipe
- Total Time: 1 hour (including chilling)
- Yield: 24 cake balls 1x
- Diet: Vegetarian
Description
Learn how to make delicious Little Debbie Christmas Cake Balls with this easy recipe. These festive treats are perfect for the holiday season!
Ingredients
Ingredients:
- 1 box Little Debbie Christmas Tree Cakes (5 cakes)
- 4 ounces cream cheese, softened
- 1/2 teaspoon vanilla extract
- 10 ounces white chocolate melting wafers or almond bark
- 2 tablespoons holiday sprinkles
Instructions
- Crush and Mix: Crumble the Little Debbie Christmas Tree Cakes into fine crumbs. Add cream cheese and vanilla, mix until combined.
- Shape: Roll mixture into 1-inch balls using a cookie scoop. Place on a lined sheet and freeze.
- Dip: Melt white chocolate, coat each ball, top with sprinkles.
- Set: Let coating firm up at room temp or chill. Enjoy!
Notes
- Chill cake balls before dipping for quick chocolate setting.
- Experiment with different chocolate coatings for variety.
- Prep Time: 30 minutes
- Cook Time: 0 minutes
- Category: Dessert
- Method: No-Bake
- Cuisine: American
Nutrition
- Serving Size: 1 cake ball
- Calories: 140
- Sugar: 12g
- Sodium: 50mg
- Fat: 7g
- Saturated Fat: 4g
- Unsaturated Fat: 2g
- Trans Fat: 0g
- Carbohydrates: 17g
- Fiber: 0g
- Protein: 1g
- Cholesterol: 10mg