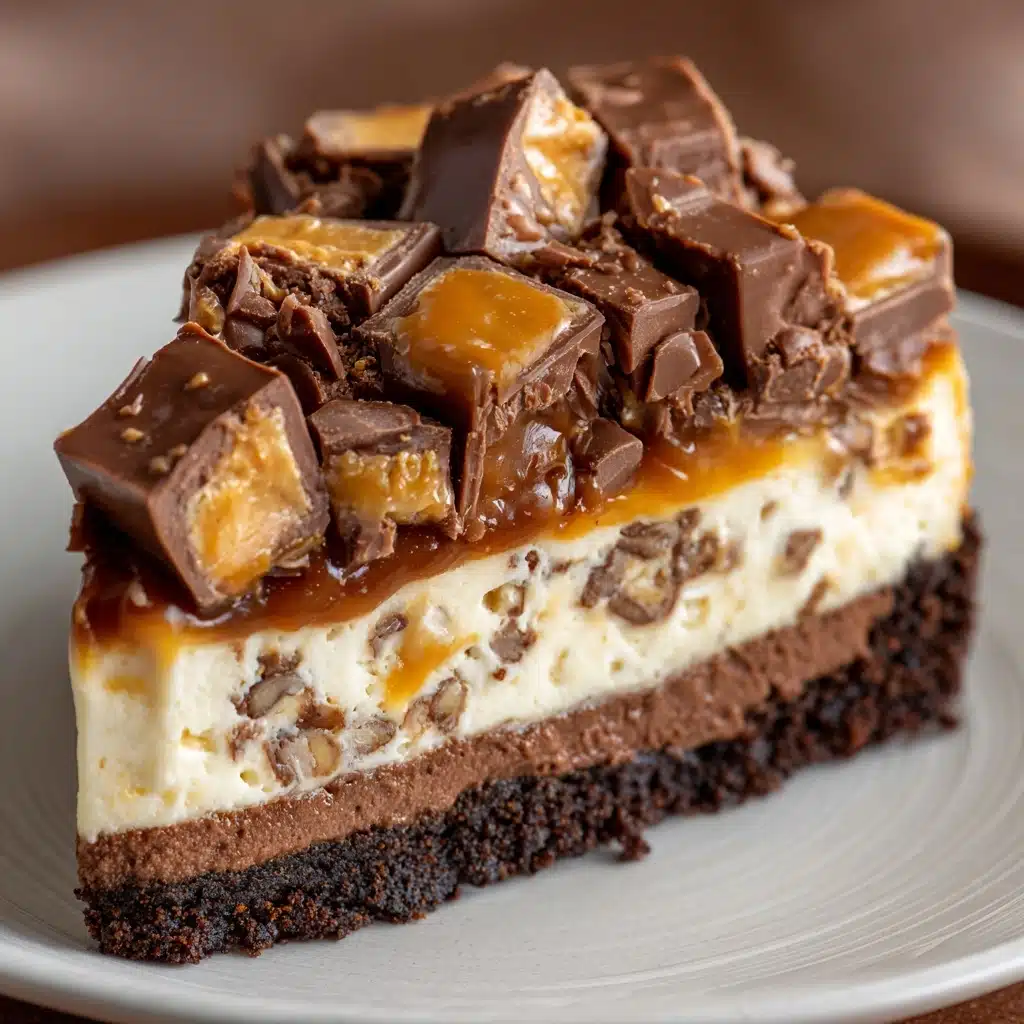
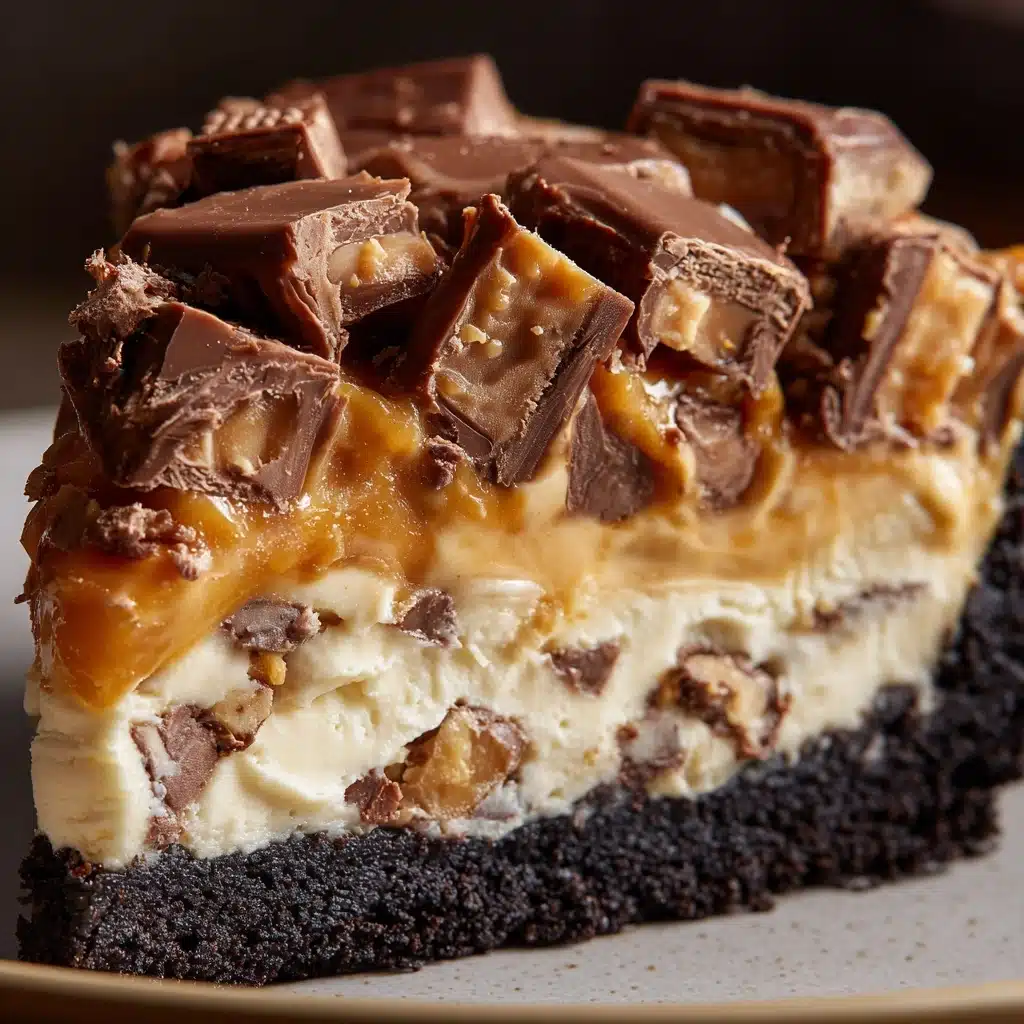
Imagine a pie that brings together everything you love in a sweet treat: creamy peanut butter, tangy cream cheese, luscious whipped topping, and inside every bite, the unmistakable crispity-crunchity pieces of Butterfinger candy. That’s what makes Butterfinger Pie (No-Bake) a true showstopper. There’s no oven, no tricky steps, just layer upon layer of irresistible flavors and textures perfect for any occasion—whether you’re looking to wow a crowd at a party or indulge with your family on a relaxed weekend.
Ingredients You’ll Need
Creating this Butterfinger Pie (No-Bake) is so straightforward, thanks to a handful of tried-and-true ingredients that each play a pivotal role. Every component brings something unique to the table—whether it’s velvety smoothness, a pop of crunch, or that beloved Butterfinger zing.
- Pie crust (9-inch, chocolate or graham cracker): A ready-made crust means extra convenience and a delicious, sturdy base for all the creamy filling.
- Cream cheese (8 oz, softened): This gives the pie its iconic tang and silkiness, so be sure it’s nice and soft for easy mixing!
- Creamy peanut butter (1/2 cup): Adds that delightful nutty richness which pairs perfectly with Butterfinger pieces.
- Powdered sugar (1/2 cup): Sweetens the filling while keeping things ultra-smooth—no graininess allowed!
- Whipped topping (8 oz, thawed): Brings airy lightness and helps everything whip up into fluffy perfection.
- Crushed Butterfinger candy bars (1 1/2 cups, divided): These treats deliver bold peanut buttery crunch and that caramelized magic only Butterfingers can offer.
- Optional extra whipped topping and crushed Butterfinger for garnish: For next-level presentation and even more of that signature flavor in every bite.
How to Make Butterfinger Pie (No-Bake)
Step 1: Beat the Base Ingredients
In a spacious bowl, combine the softened cream cheese, creamy peanut butter, and powdered sugar. Using an electric mixer, beat the trio until the mixture turns silky and gorgeously uniform. This is your flavor foundation—rich, smooth, and brimming with creamy peanut goodness. Don’t rush it; the more blended, the creamier your final slice!
Step 2: Fold in the Whipped Magic and Butterfinger Crunch
Gently fold in your whipped topping and one cup of the crushed Butterfinger candy bars. Folding (not mixing) keeps the filling light and fluffy, while the Butterfinger ensures little bursts of crunch in every bite. You’ll see flecks of chocolate and caramel weaving through the creamy base, promising big flavor ahead.
Step 3: Fill and Smooth
Spoon the sumptuous mixture into your prepared pie crust. Carefully smooth the top with a spatula—this step always feels a bit like artistry because you get to see how luscious the filling looks before it’s crowned with toppings!
Step 4: Add the Final Butterfinger Layer
Sprinkle the remaining 1/2 cup of crushed Butterfinger candy evenly across the top of the pie. This layer guarantees a golden, crunchy finish and makes sure every slice looks as fun as it tastes.
Step 5: Chill to Set
Cover your pie (a simple layer of foil or plastic wrap works well) and slide it into the refrigerator. Let it chill for at least 4 hours, or overnight if you’re planning ahead. This crucial rest time melds the flavors and ensures every slice holds together beautifully when served.
How to Serve Butterfinger Pie (No-Bake)
Garnishes
The sky’s the limit here! Pile on extra whipped topping and a sprinkle of additional crushed Butterfinger for drama. A light dusting of cocoa powder or a drizzle of warm chocolate sauce can add elegance if you’re feeling a little fancy.
Side Dishes
Since Butterfinger Pie (No-Bake) is a rich, sweet treat, it pairs nicely with something refreshing. Try serving it alongside fresh strawberries or raspberries, or a small scoop of vanilla ice cream for contrast. Even a glass of cold milk or hot coffee will let the candy pie flavors shine.
Creative Ways to Present
Don’t be afraid to think outside the pie plate! You can portion the filling into individual dessert cups for a party, or layer it in a trifle dish for a spectacular centerpiece. Mini pies in mason jars or clear glasses are super cute for showers and picnics too.
Make Ahead and Storage
Storing Leftovers
If you have any leftovers (a big “if” with this pie!), just cover your Butterfinger Pie (No-Bake) with plastic wrap and keep it in the fridge. It will stay fresh and fab for up to 4 days—though the enticing texture might tempt you sooner.
Freezing
This pie actually freezes like a dream. Wrap your whole pie, or individual slices, tightly in both plastic wrap and foil. When you’re ready for a treat, thaw it in the refrigerator for a few hours. Frozen slices also make a cool summertime treat, almost like ice cream pie!
Reheating
No reheating required here! Butterfinger Pie (No-Bake) is meant to be enjoyed straight from the fridge. If serving from frozen, just let it stand at room temperature for 10–15 minutes before slicing for the perfect consistency.
FAQs
Can I use homemade whipped cream instead of store-bought whipped topping?
Absolutely! Freshly whipped cream (about 3 cups, lightly sweetened) can be used in place of the pre-made topping. It will make the pie even more luscious—just ensure it’s whipped to soft peaks so your filling stays nice and airy.
Can I make Butterfinger Pie (No-Bake) gluten-free?
Yes, you sure can. Simply use a certified gluten-free pie crust—ready-made graham-style or even a chocolate cookie crust will work beautifully. Butterfinger candy bars are gluten-free according to the manufacturer, but always double-check the packaging.
What’s the best way to crush Butterfinger bars?
For crumbly, chunky pieces, place the candy bars in a zip-top bag and gently whack them with a rolling pin or meat mallet—fun and stress-relieving! Larger chunks give texture, while finer pieces distribute flavor more evenly. Mix both for the best bite.
Can I make this Butterfinger Pie (No-Bake) ahead of time?
Butterfinger Pie (No-Bake) is an ideal make-ahead dessert. Prepare it up to 24 hours in advance and keep it chilled in the fridge. This lets the flavors meld perfectly and makes entertaining a total breeze.
How do I get clean slices when serving?
The secret is letting the pie chill thoroughly before slicing, and using a sharp, thin knife wiped clean between cuts. For an extra pro tip, dip your knife in warm water and dry it off before each slice—showstopper presentation!
Final Thoughts
If you’ve never made a Butterfinger Pie (No-Bake) before, now’s the time to give it a whirl! It’s a showy, crowd-pleasing treat that’s shockingly simple for how much joy it brings. Whip one up for your next gathering and get ready for rave reviews—you’re in for an unforgettable indulgence.
Print
Butterfinger Pie (No-Bake) Recipe
- Total Time: 4 hours 15 minutes (including chilling)
- Yield: 8 servings 1x
- Diet: Non-Vegetarian
Description
Indulge in the creamy, peanut buttery goodness of this no-bake Butterfinger Pie. With a buttery crust, a luscious filling loaded with crushed Butterfinger candy bars, and a light whipped topping, this dessert is a delightful treat for any occasion.
Ingredients
Pie Crust:
- 1 (9-inch) chocolate or graham cracker pie crust
Filling:
- 1 (8 oz) package cream cheese, softened
- 1/2 cup creamy peanut butter
- 1/2 cup powdered sugar
- 1 (8 oz) tub whipped topping, thawed
- 1 1/2 cups crushed Butterfinger candy bars, divided
Garnish (Optional):
- Extra whipped topping and crushed Butterfinger
Instructions
- In a large bowl, beat the cream cheese, peanut butter, and powdered sugar until smooth and creamy.
- Fold in the whipped topping and 1 cup of the crushed Butterfinger candy bars until evenly combined.
- Spoon the mixture into the prepared pie crust and smooth the top.
- Sprinkle the remaining 1/2 cup of crushed Butterfinger over the pie.
- Cover and refrigerate for at least 4 hours or until firm.
- Garnish with additional whipped topping and candy pieces before serving, if desired.
Notes
- This pie can be made a day in advance and kept chilled.
- For extra crunch, use mini Butterfinger bites and chop them coarsely.
- Prep Time: 15 minutes
- Cook Time: 0 minutes
- Category: Dessert
- Method: No-Bake
- Cuisine: American
Nutrition
- Serving Size: 1 slice
- Calories: 430
- Sugar: 30g
- Sodium: 280mg
- Fat: 28g
- Saturated Fat: 11g
- Unsaturated Fat: 14g
- Trans Fat: 0g
- Carbohydrates: 38g
- Fiber: 1g
- Protein: 6g
- Cholesterol: 35mg