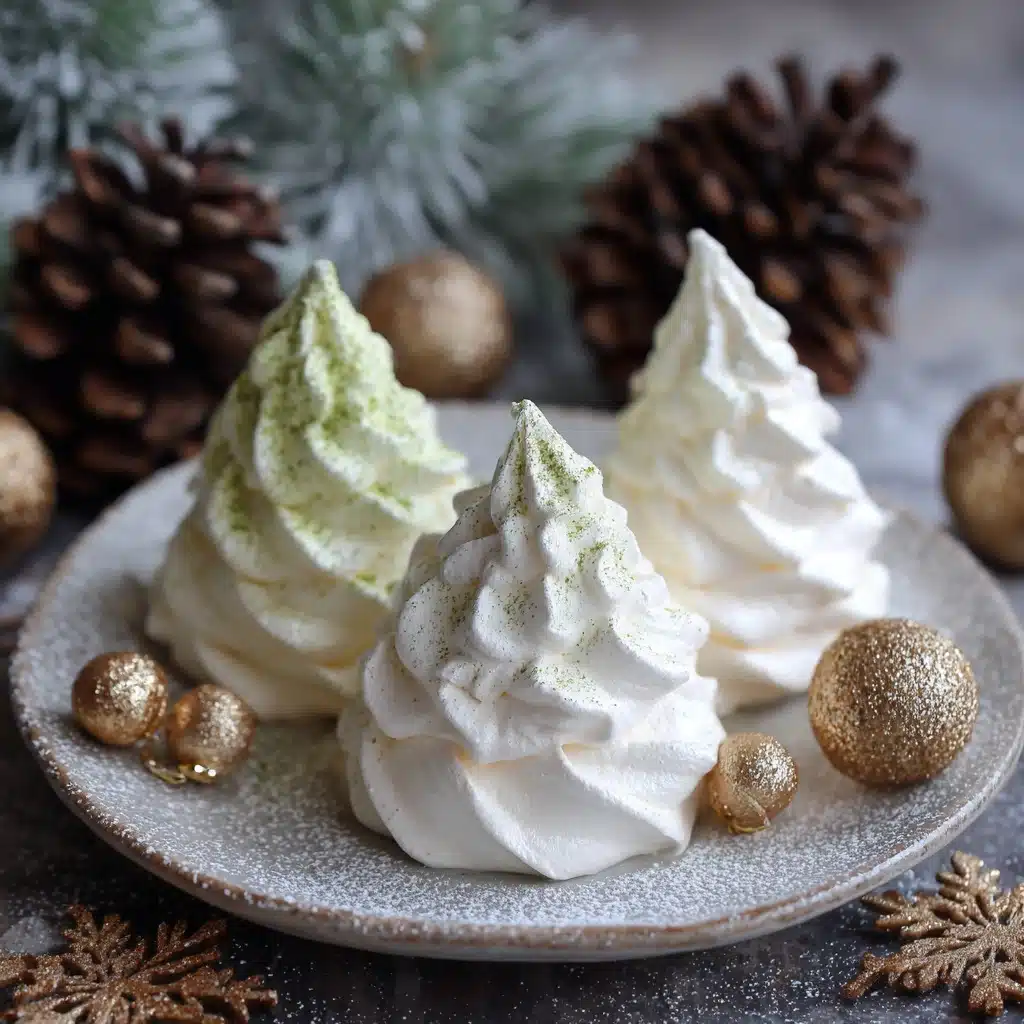
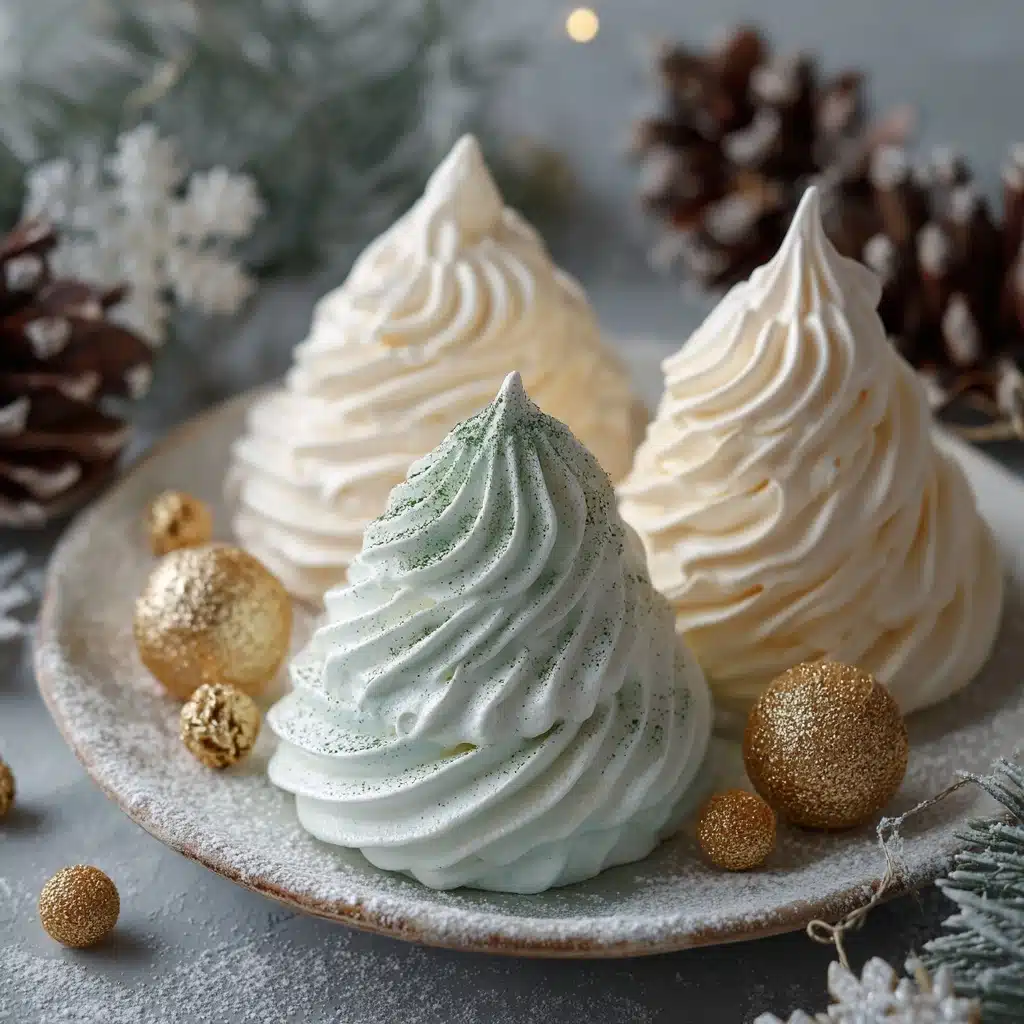
Delicate, crisp, and as festive as it gets, Christmas Meringue Cookies are pure holiday magic in a bite. With their snowy white swirls and pops of red and green, they’re the kind of treat that seems to delight both kids and grown-ups the second the cookie tin pops open. The peppermint-scented air, a gentle crunch, and the snowy sweetness—they’re not only gorgeous to look at but melt-in-your-mouth incredible. Whether you’re after a gluten-free holiday cookie or a showstopper for your cookie exchange, these Christmas meringue cookies add a special sparkle to any celebration, and I can’t wait for you to whip up a batch!
Ingredients You’ll Need
One of my favorite things about these cookies is how each ingredient shines in its own simple way. There are no fancy secrets—just a handful of staples that work together to create a cookie that’s light, airy, and full of flavor and color!
- Egg Whites: Room temperature egg whites whip up higher and glossier, giving your cookies that magical texture.
- Granulated Sugar: This is what gives meringues their beautiful, crisp shell and subtle sweetness.
- Cream of Tartar: Just a touch helps stabilize the egg whites and create those picture-perfect peaks.
- Peppermint or Vanilla Extract: Go classic with vanilla or take it festive with peppermint for extra holiday cheer.
- Red and Green Gel Food Coloring (Optional): A tiny squeeze brings those quintessential Christmas colors without thinning the meringue.
- Festive Sprinkles or Crushed Candy Canes: Sprinkle on a playful finishing touch and a light crunch!
How to Make Christmas Meringue Cookies
Step 1: Prep the Oven and Baking Sheets
Let the festivities begin! Start by preheating your oven to 225°F (110°C), then line two baking sheets with parchment paper. This low, slow bake is what gives Christmas Meringue Cookies their signature crunch without browning. Parchment also keeps them from sticking—an absolute must for picture-perfect cookies.
Step 2: Whip the Egg Whites
Using a clean, dry mixing bowl (seriously, even a drop of oil or water can sabotage your peaks), beat the egg whites on medium speed until they look light and foamy. This step is where the magic begins, so make sure you’re patient—the transformation is worth it!
Step 3: Add Cream of Tartar and Whip to Soft Peaks
Sprinkle in the cream of tartar, and keep beating. You’re looking for soft peaks at this stage—they’ll gently droop when you pull out the beaters. Cream of tartar helps the meringue hold its shape, so don’t skip this little hack.
Step 4: Gradually Add Sugar and Whip to Stiff, Glossy Peaks
Slowly add the sugar, just one tablespoon at a time, whipping on high speed. This is crucial—adding it gradually ensures it dissolves completely, which leads to the smoothest, shiniest peaks imaginable. When it’s ready, the mixture will look beautifully white and glossy and form stiff peaks that stand tall.
Step 5: Fold in Flavor and Tint with Color
Gently fold in the peppermint or vanilla extract—remember, gentle is the name of the game. If you’re going for classic Christmas Meringue Cookies flair, divide the meringue into separate bowls and tint one part red, another green, and leave some plain. Use gel coloring so you don’t mess with the consistency!
Step 6: Pipe and Decorate
Spoon your meringue mixture into a piping bag fitted with a star tip (or simply use a zip-top bag with the corner snipped off for an easy fix). Pipe small swirls onto your prepared baking sheets, leaving a little space in between. This is the moment to go wild with the sprinkles or sprinkle crushed candy canes for real Christmas magic!
Step 7: Bake and Cool
Bake your cookies for 1 hour in the preheated oven. Here’s the crucial part: once an hour is up, turn off the oven, but leave the cookies inside without opening the door. Letting them cool slowly in the oven for another hour dries them out perfectly and keeps them crisp and dreamy. Patience pays off, promise!
How to Serve Christmas Meringue Cookies

Garnishes
A little flourish goes a long way! Right before serving, add an extra pinch of crushed candy canes or a fresh dusting of holiday-themed sprinkles. The red and green sparkle turns your Christmas Meringue Cookies into edible ornaments—they look almost too pretty to eat (but go ahead, eat them!).
Side Dishes
Serve these clouds of sweetness alongside mugs of hot cocoa or spiced apple cider for the ultimate cozy treat. They also play nicely on a dessert platter with chocolate truffles, shortbread, or dried fruit, adding a light balance to richer holiday sweets.
Creative Ways to Present
Pile the cookies in a glass apothecary jar for a sugary centerpiece, or stack them in gift tins lined with parchment and a sprinkle of edible glitter. For a party, string them into a sweet “cookie garland” or use them as a dazzling topper on a festive cake or pavlova. Presentation is half the fun with Christmas Meringue Cookies!
Make Ahead and Storage
Storing Leftovers
If you somehow have leftovers (good luck with that!), store your meringue cookies in an airtight container at room temperature. To keep them perfectly crisp, stash them somewhere cool and dry, away from humidity—moisture is not their friend. Properly stored, Christmas Meringue Cookies stay fresh and crunchy for up to two weeks.
Freezing
You can freeze these cookies, but only if you’re careful. Place completely cooled cookies in a single layer in a freezer-safe container, then stack layers with parchment in between. Thaw at room temperature, uncovered, to keep them from absorbing extra moisture. They’re just as delightful after freezing—nobody will ever know!
Reheating
Generally, you won’t need to reheat Christmas Meringue Cookies (they’re supposed to be crisp and cool!). If you find they’ve softened a bit, you can refresh them: spread on a baking sheet and pop into a 200°F oven for 10–15 minutes, then let them cool completely. They’ll return to their perfectly crunchy state.
FAQs
Why do my meringue cookies turn out chewy instead of crisp?
A chewy texture usually means the cookies didn’t dry out enough or there was humidity in the air. Make sure to bake them low and slow, and leave them in the oven with the door closed so they dry out thoroughly. Storing them away from moisture is key for that signature crisp.
Can I use liquid food coloring instead of gel?
It’s best to stick to gel coloring for Christmas Meringue Cookies. Liquid food coloring can add too much moisture and deflate the meringue, leading to less voluminous and less stable cookies. Gel gives those beautiful, concentrated colors without compromising texture!
What’s the best way to separate egg whites?
Eggs separate most easily when cold, but let the whites come to room temperature before whipping for maximum volume. Crack each egg over a separate small bowl, transfer the white, and add to your mixing bowl one at a time to avoid any stray yolks ruining the batch.
Can I double this recipe for a big gathering?
Absolutely! You can easily double the Christmas Meringue Cookies recipe, just make sure your bowl is large enough to handle all the volume. Whip the egg whites thoroughly and bake in batches to keep them airy and perfectly crisp.
Do I need a piping bag, or can I shape the cookies by hand?
While piping gives a pretty, bakery-style finish, you can absolutely dollop meringue onto the trays with a spoon for a rustic look. Swirl with the back of the spoon for some personality—Christmas Meringue Cookies are all about charm, not perfection!
Final Thoughts
Bringing a batch of homemade Christmas Meringue Cookies to your holiday table is a little act of festive joy. They’re as much fun to make as they are to eat! Embrace the color, flavor, and whimsy—your friends and family will be talking about these sweet bites all season long. Go ahead, give them a try and spread some sweet cheer!
Print
Christmas Meringue Cookies Recipe
- Total Time: 2 hours (including cooling)
- Yield: 40 cookies 1x
- Diet: Vegetarian
Description
These Christmas Meringue Cookies are light, airy, and perfect for the holiday season. With a hint of peppermint or vanilla, these gluten-free treats make a festive addition to any dessert table.
Ingredients
Egg Whites:
4 large egg whites (room temperature)
Granulated Sugar:
1 cup
Cream of Tartar:
1/4 teaspoon
Peppermint or Vanilla Extract:
1/4 teaspoon
Food Coloring:
red and green gel food coloring (optional)
Toppings:
festive sprinkles or crushed candy canes
Instructions
- Preheat the oven: Set the oven to 225°F (110°C) and line two baking sheets with parchment paper.
- Beat egg whites: In a clean mixing bowl, beat the egg whites until foamy. Add cream of tartar and continue beating until soft peaks form.
- Add sugar: Gradually add sugar, one tablespoon at a time, beating until stiff, glossy peaks form.
- Flavor and color: Gently fold in extract. Divide and tint meringue with food coloring if desired.
- Pipe meringue: Spoon meringue into a piping bag fitted with a star tip. Pipe small swirls onto baking sheets.
- Add toppings: Sprinkle with decorations.
- Bake: Bake for 1 hour, then turn off the oven. Let meringues sit inside for another hour to dry completely without opening the oven door.
Notes
- Use gel food coloring to prevent thinning the meringue.
- Meringues should be dry and crisp, not chewy.
- Store in an airtight container away from humidity for up to 2 weeks.
- Prep Time: 20 minutes
- Cook Time: 1 hour
- Category: Dessert
- Method: Baking
- Cuisine: American
Nutrition
- Serving Size: 1 cookie
- Calories: 20
- Sugar: 5g
- Sodium: 5mg
- Fat: 0g
- Saturated Fat: 0g
- Unsaturated Fat: 0g
- Trans Fat: 0g
- Carbohydrates: 5g
- Fiber: 0g
- Protein: 0.3g
- Cholesterol: 0mg