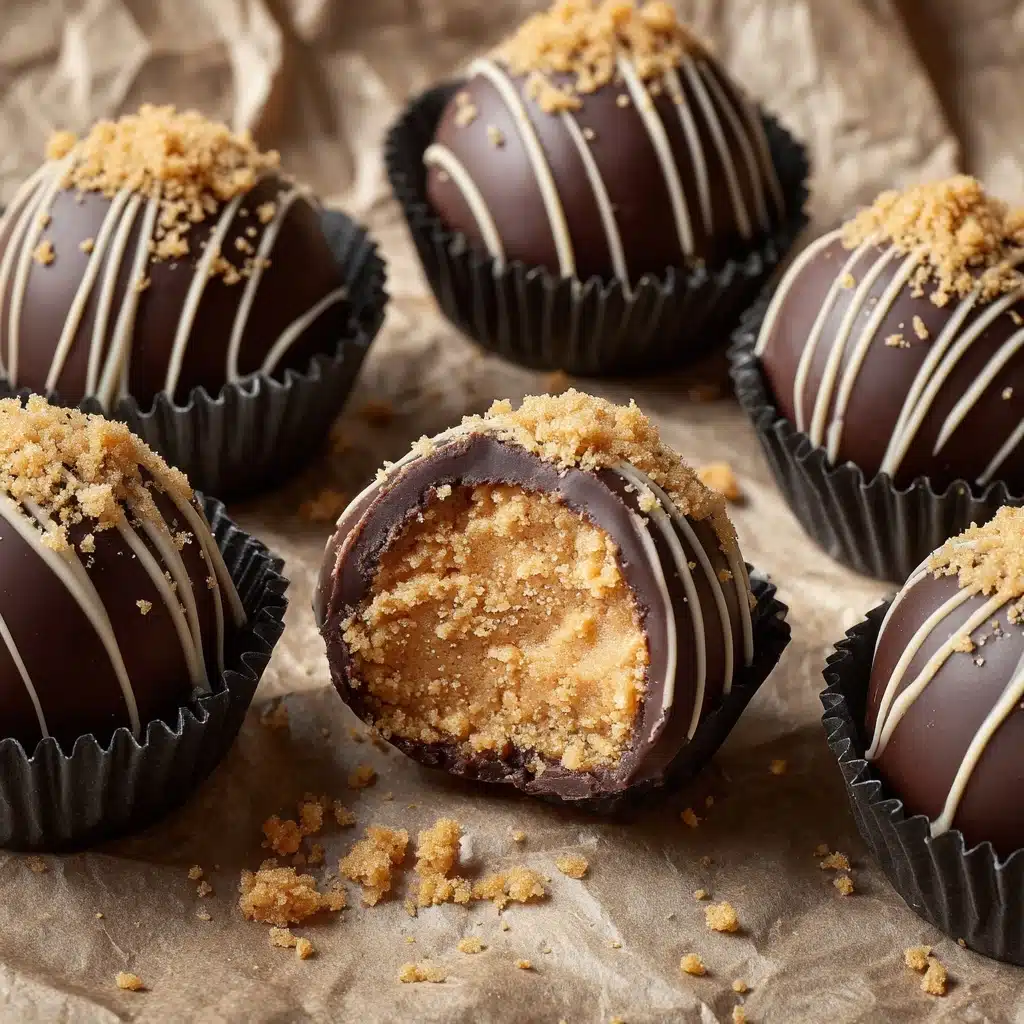
If you’re a fan of sweet, crunchy, and chocolatey treats with a nutty center, this Butterfinger Balls Recipe is about to be your next dessert MVP. Imagine everything you love about your favorite candy bar — creamy peanut butter, that classic Butterfinger crunch, and a smooth chocolate shell — all wrapped up in a ridiculously fun, easy-to-make bite-sized snack. These no-bake delights instantly level up any dessert table, pack perfectly into lunchboxes or party trays, and are totally irresistible for kids and adults alike.
Ingredients You’ll Need
This Butterfinger Balls Recipe keeps things delightfully simple. Each ingredient serves a purpose, whether it’s for flavor, texture, or ensuring those perfect, dreamy layers come together. Let’s break down what you’ll need and why you don’t want to skip a single thing.
- Creamy peanut butter: The smooth, nutty foundation brings both flavor and a decadent, fudge-like texture.
- Powdered sugar: Adds sweetness and helps create a thick, workable dough without graininess.
- Crushed Butterfinger candy bars: Offer that unmistakable crunch, caramelized flavor, and signature orange flecks throughout the mix.
- Vanilla extract: Just a teaspoon, but it deepens all the rich flavors and boosts the “homemade” taste.
- Unsalted butter (softened): Adds richness and helps everything blend smoothly.
- Semisweet chocolate chips: The perfect not-too-sweet shell for dipping; you want the chocolate flavor to shine through in every bite.
- Coconut oil or shortening (optional): Just a bit keeps your melted chocolate extra silky for dipping and a beautiful shiny finish.
How to Make Butterfinger Balls Recipe
Step 1: Mix Up the Peanut Butter Center
Begin by grabbing a large mixing bowl and combining the peanut butter, powdered sugar, crushed Butterfinger candy bars, vanilla extract, and softened butter. Use a sturdy spoon or hand mixer to blend everything together. You’re looking for a thick, smooth dough, slightly sticky but easy to handle. The aroma at this stage is half the reward!
Step 2: Shape the Balls
With your dough ready, use a tablespoon or small cookie scoop to portion out even amounts. Roll them gently between your palms into 1-inch balls and arrange on a parchment-lined baking sheet. This step is a little bit messy and a whole lot of fun—perfect for recruiting any eager helpers in the kitchen!
Step 3: Chill Until Firm
Place the baking sheet in the freezer for 20 to 30 minutes. This quick chill makes the balls much easier to dip in chocolate later—no melting or losing their shape, and your chocolate sets up quicker for a crisp shell.
Step 4: Melt the Chocolate
In a microwave-safe bowl, combine the semisweet chocolate chips and coconut oil or shortening, if you’re using it. Microwave in 30-second blasts, stirring well after each interval, until the chocolate is completely smooth and glossy. Keep a close eye so it doesn’t scorch!
Step 5: Dip and Set
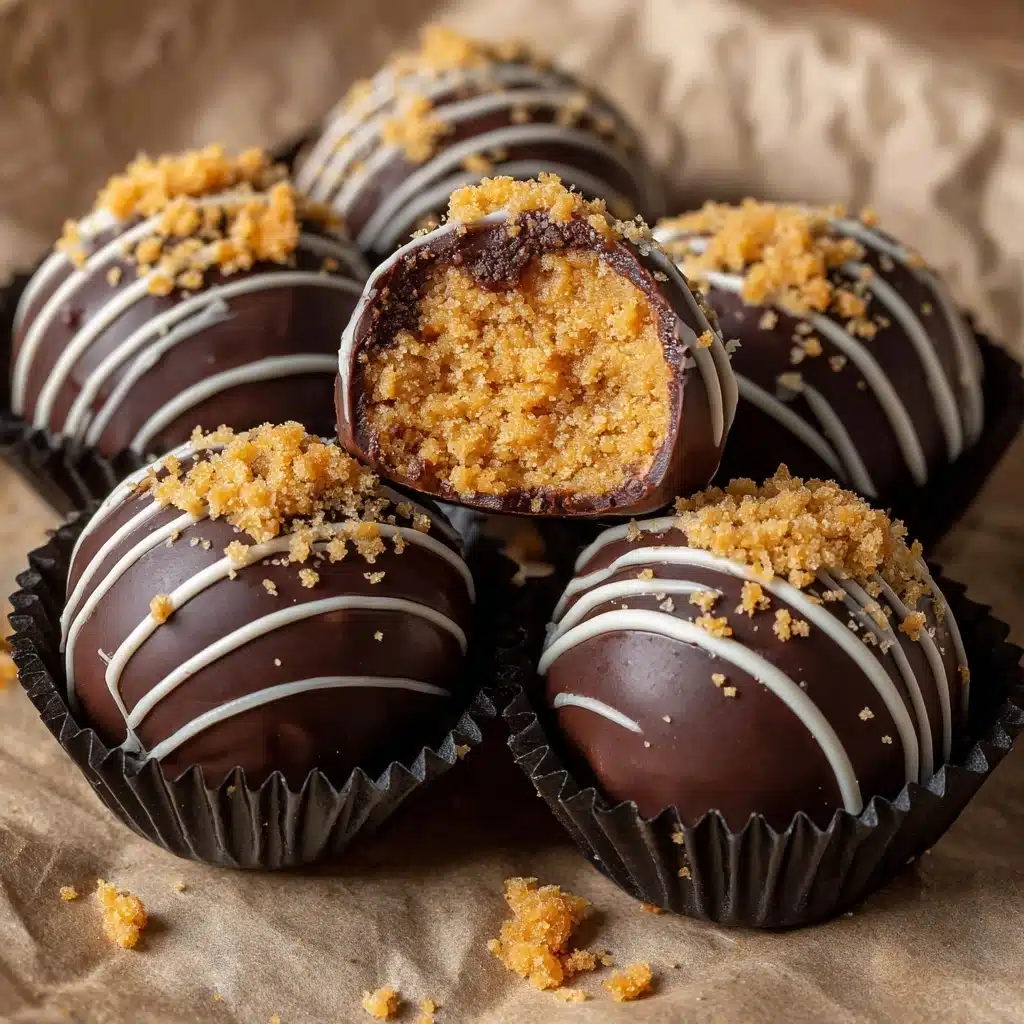
Working one at a time, use a fork or dipping tool to lower each chilled Butterfinger ball into the melted chocolate. Let any excess chocolate drip off, then return each dipped ball to the parchment-lined sheet. If you want to add flair, sprinkle a pinch of crushed Butterfinger or drizzle a bit of white chocolate over the tops before the coating sets. Let them sit at room temperature or tuck the tray into the fridge until those chocolate shells are firm to the touch.
How to Serve Butterfinger Balls Recipe
Garnishes
The beauty of this Butterfinger Balls Recipe is how easily you can turn a simple treat into a showstopper. For a classic finish, sprinkle extra crushed Butterfinger pieces onto the chocolate while it’s still tacky. If you’re looking to impress, a zigzag of melted white chocolate or a light dusting of gold sprinkles really ups the wow factor for parties.
Side Dishes
These sweet, chocolatey bites stand out on their own, but they also pair wonderfully as part of a dessert platter. Surround your Butterfinger Balls with fresh strawberries, pretzels, or a medley of other no-bake truffles. For a festive touch, try serving them alongside coffee, hot cocoa, or a scoop of vanilla ice cream for an extra-indulgent treat.
Creative Ways to Present
Turn your Butterfinger Balls Recipe into the star of any event by arranging them in mini cupcake liners, piling them high on a cake stand, or skewering several onto sticks for dessert pops. During the holidays, wrap them up in cellophane bags with pretty ribbons—they make adorable homemade gifts. You could even add them as show-stopping toppers for frosted cupcakes or cakes!
Make Ahead and Storage
Storing Leftovers
After making your Butterfinger Balls, store any extras in an airtight container in the refrigerator. They’ll stay fresh, chewy, and delicious for up to a week, though it’s honestly surprising if they last that long! Chilling keeps the chocolate crisp and the center luxuriously fudgy.
Freezing
Want to stash away a secret treat supply? Freeze your Butterfinger Balls on a tray until solid, then transfer to a freezer-safe bag or container for up to two months. Thaw a few in the fridge for an instant dessert fix whenever the craving strikes.
Reheating
No true reheating required here, but if serving straight from the freezer, let your Butterfinger Balls sit at room temperature for 10 to 15 minutes. This way, the centers soften back to their irresistible, melt-in-your-mouth texture while still keeping that snappy chocolate coating.
FAQs
Can I use crunchy peanut butter instead of creamy?
Absolutely! Using crunchy peanut butter adds even more texture to your Butterfinger Balls Recipe, so if you love a little extra bite, go for it. The finished balls might be just a bit chunkier, but they’re every bit as delicious.
How do I crush Butterfinger bars easily?
The fastest way is to place your candy bars in a zip-top bag and give them a good whack with a rolling pin or heavy skillet. You want some fine crumbs and some small crunchy pieces for the perfect mix-ins.
Can I use almond butter or another nut butter?
Yes, you can swap peanut butter for almond butter or cashew butter for a delicious twist. Just make sure to choose a thicker, no-stir variety to help your Butterfinger Balls Recipe hold their shape.
Is there a dairy-free version of this recipe?
You can easily make it dairy-free by using a dairy-free butter substitute, vegan chocolate chips, and making sure your Butterfinger bars are the dairy-free kind (some store-brands have options!).
What if my chocolate coating is too thick?
If your chocolate seems gloppy or won’t coat smoothly, just stir in a bit more coconut oil or shortening while it’s melted. This trick makes your dipping chocolate glossy, smooth, and totally photo-worthy.
Final Thoughts
There’s something so satisfying about sharing a homemade treat that’s nostalgic, easy, and always a crowd-pleaser. This Butterfinger Balls Recipe truly hits every mark, delivering that perfect combination of peanut butter and chocolate with a fun twist. If you’ve never made your own candy balls before, this is the recipe that will have your friends and family begging for your secret. Give it a try — you’re sure to fall in love at first bite!
Print
Butterfinger Balls Recipe
- Total Time: 50 minutes (including chilling)
- Yield: 24 balls 1x
- Diet: Vegetarian
Description
These Butterfinger Balls are a delightful no-bake treat that combines creamy peanut butter, powdered sugar, and crushed Butterfinger candy bars, all coated in rich chocolate. Perfect for satisfying your sweet tooth!
Ingredients
Peanut Butter Mixture:
- 1 (16 oz) jar creamy peanut butter
- 1 ½ cups powdered sugar
- 1 ½ cups crushed Butterfinger candy bars (about 6 fun-size bars)
- 1 teaspoon vanilla extract
- 2 tablespoons unsalted butter (softened)
Chocolate Coating:
- 2 cups semisweet chocolate chips
- 1 tablespoon coconut oil or shortening (optional, for smoother coating)
Instructions
- Prepare Peanut Butter Mixture: In a large mixing bowl, combine peanut butter, powdered sugar, crushed Butterfinger candy, vanilla extract, and softened butter. Mix until a thick dough forms.
- Shape Balls: Scoop and roll the mixture into 1-inch balls, then place them on a parchment-lined baking sheet. Freeze for 20–30 minutes.
- Coat in Chocolate: Melt chocolate with coconut oil in the microwave. Dip each chilled ball in chocolate, then let them set on the baking sheet.
- Set and Store: Allow the chocolate to set at room temperature or refrigerate until firm. Store in an airtight container in the fridge.
Notes
- You can drizzle white chocolate over the tops for decoration.
- Press a sprinkle of crushed Butterfinger on top before the coating sets for added crunch.
- Prep Time: 20 minutes
- Cook Time: 0 minutes
- Category: Dessert
- Method: No-Bake
- Cuisine: American
Nutrition
- Serving Size: 1 ball
- Calories: 180
- Sugar: 16g
- Sodium: 85mg
- Fat: 11g
- Saturated Fat: 5g
- Unsaturated Fat: 5g
- Trans Fat: 0g
- Carbohydrates: 19g
- Fiber: 1g
- Protein: 3g
- Cholesterol: 5mg