If you’ve ever dreamed of indulging in something both luxuriously creamy and beautifully balanced between sweet and salty, then Homemade Salted Caramel Ice Cream is your new must-make treat. This crowd-pleasing frozen dessert brings together silky caramel, a whisper of sea salt, and a rich custard base that melts in your mouth with every spoonful. Whether you’re treating yourself after a long day or sharing scoops at a summer gathering, there’s magic in that swirl of homemade caramel. Trust me, once you try this, you’ll be thinking up excuses to keep a batch stashed away in your freezer at all times!
Ingredients You’ll Need
Exceptional ice cream starts with a handful of high-quality, well-chosen ingredients. Every component in this Homemade Salted Caramel Ice Cream plays a specific role, from the sugar that creates golden caramel to real vanilla extract for pure flavor. Here’s what makes each element so essential to the texture and color you’ll love.
- Granulated Sugar (1 cup): The heart of the homemade caramel, it melts into a gorgeous amber base that brings classic caramel flavor alive.
- Unsalted Butter (6 tablespoons, cut into pieces): Stirred into the hot sugar, butter gives the caramel luscious richness and silkiness.
- Heavy Cream (2 cups, divided): Makes your ice cream sumptuously creamy and helps temper the caramel as well as form the custard.
- Sea Salt (1 teaspoon): The secret to perfect salted caramel—this brightens and balances all the sweet notes beautifully.
- Whole Milk (1 cup): Lightens up the base and ensures the finished scoop is smooth without being overly heavy.
- Large Egg Yolks (5): These build a luxurious, classic custard and add that unbeatable mouthfeel.
- Brown Sugar (3/4 cup): Adds a deep, molasses-scented sweetness that underscores the caramel flavor.
- Vanilla Extract (2 teaspoons): Rounds out the flavors with warmth and the comforting aroma we all love in desserts.
How to Make Homemade Salted Caramel Ice Cream
Step 1: Make the Caramel
Pour your granulated sugar into a medium saucepan and set it over medium heat. Let the sugar melt, swirling the pan or gently stirring now and then, until it turns a deep amber color. This is where that nutty, grown-up caramel flavor starts. Once it’s the color of copper pennies, carefully stir in the butter. The sugar will bubble up and hiss—just keep stirring until it’s smooth. Then, slowly stream in one cup of heavy cream. The mixture will foam dramatically at first, so add the cream in a steady trickle. Stir in the sea salt, take the pan off the heat, and set aside to cool for a few minutes.
Step 2: Prepare the Custard Base
In a second saucepan, combine the whole milk, remaining cup of heavy cream, and brown sugar. Warm this mixture over medium heat, stirring occasionally, until everything is steaming but not boiling. You want to be patient at this step—rushing can scorch the milk or sugar, and that mild, gentle heat is important for a silky base.
Step 3: Temper the Egg Yolks
While your milk mixture heats, whisk the egg yolks together in a medium bowl until smooth and combined. Take a ladle of the hot milk mixture and slowly drizzle it into the yolks, whisking constantly. This “tempering” step ensures the eggs warm up gently, so you don’t end up with scrambled bits. Once combined, slowly pour the egg mixture back into the saucepan, whisking all the while.
Step 4: Cook the Custard
Return the pot to the heat and cook over low, stirring slowly and constantly with a wooden spoon or heatproof spatula. The magic moment comes when the mixture thickens enough to coat the back of your spoon—run your finger down the middle, and the line should keep its shape. This usually takes just a few minutes. Take care not to let it boil, as overheating can curdle the eggs.
Step 5: Combine and Flavor
Off the heat, stir in the vanilla extract and about 1/2 cup of your glorious homemade caramel sauce. Whisk until smooth. At this point, you can taste and swoon a little—just remember, it’ll taste even better cold!
Step 6: Strain and Chill
To ensure your ice cream stays extra silky, strain the custard through a fine-mesh sieve into a heatproof bowl. Press gently to extract every creamy drop. Cover the bowl and refrigerate for at least 4 hours or—if you can stand the wait—all night. Chilled custard churns into smoother ice cream, so don’t rush this part.
Step 7: Churn and Swirl
Once your custard is thoroughly chilled, pour it into your ice cream maker and churn according to the manufacturer’s instructions. Watch it transform into a thick, spoonable treat! As you transfer the churned ice cream to its container, swirl in extra caramel for dramatic ribbons of flavor. Cover and freeze at least 4 hours to set.
How to Serve Homemade Salted Caramel Ice Cream
Garnishes
Garnishing this ice cream is a chance to get creative and add depth or crunch. Try a sprinkling of flaky sea salt on top for a vivid pop that accentuates the caramel’s complexity. Toasted pecans or walnuts add warm nuttiness, while shards of caramelized sugar or toffee turn every scoop into a special occasion. Even a light drizzle of warm caramel can’t hurt if you happen to have some left over!
Side Dishes
Homemade Salted Caramel Ice Cream plays wonderfully with an array of desserts. Pair it with fudgy brownies, apple crisp, or a slice of warm spice cake for dessert heaven. If you’re feeling ambitious, stack scoops between soft chocolate chip cookies for a homemade ice cream sandwich that disappears in seconds.
Creative Ways to Present
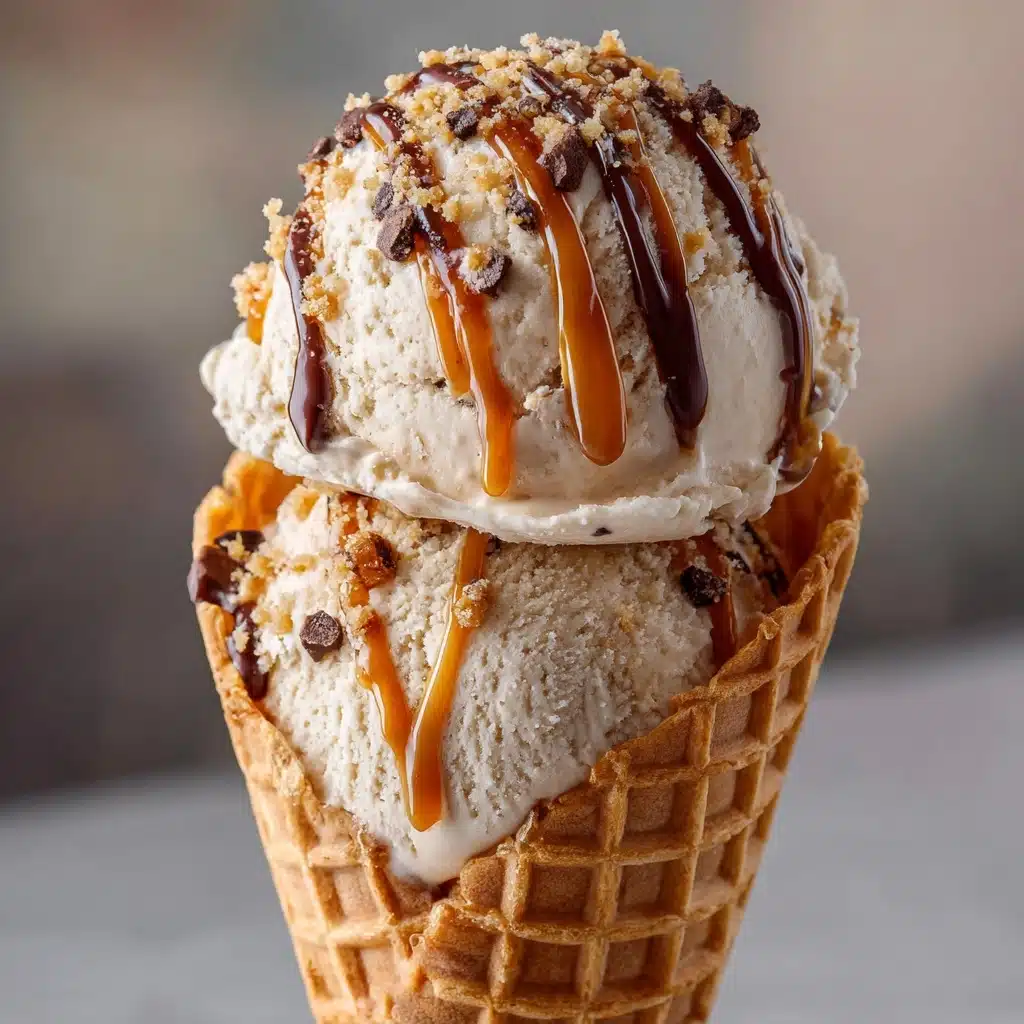
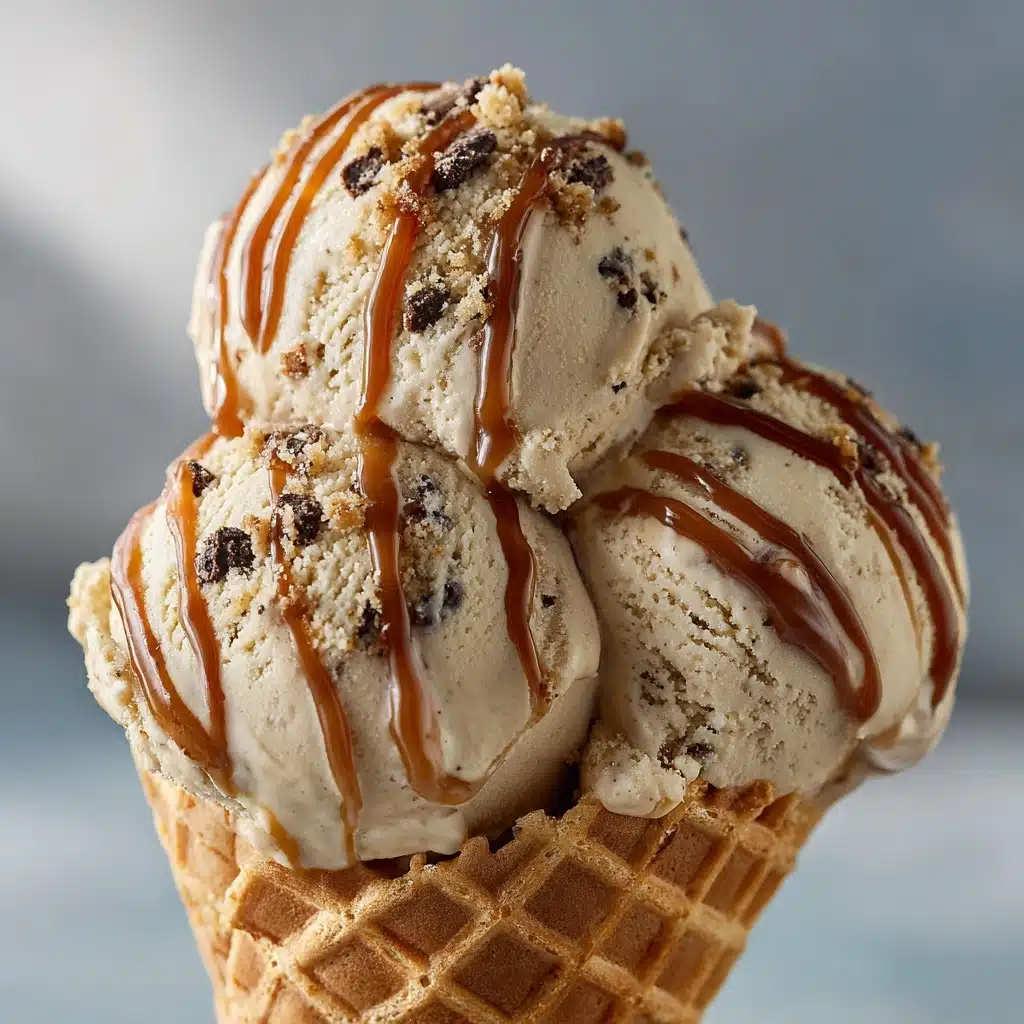
Don’t just scoop and serve—transform your Homemade Salted Caramel Ice Cream into something unforgettable with presentation! Try mini waffle cones for party-friendly bites, or serve smaller scoops alongside espresso for a caramel affogato. You can even layer it with whipped cream and chopped praline in clear glasses for showstopping parfaits.
Make Ahead and Storage
Storing Leftovers
After enjoying your first round (and maybe sneaking back for seconds), store any leftover ice cream in an airtight container. Press a layer of parchment or plastic wrap directly onto the surface before sealing to prevent icy crystals from forming. This keeps your Homemade Salted Caramel Ice Cream smooth and scoopable for days.
Freezing
This ice cream keeps its luxurious texture for up to two weeks in the freezer when stored properly. For the best flavor and consistency, avoid frequent temperature changes and keep the ice cream at the back of the freezer, where it’s coldest and most stable.
Reheating
Unlike some desserts, ice cream isn’t a candidate for reheating, but you can soften it if it’s too hard to scoop. Just let the container rest on the counter for 5 to 10 minutes before serving, and it’ll be perfectly creamy and ready for your bowl or cone.
FAQs
Can I make Homemade Salted Caramel Ice Cream without an ice cream maker?
Yes! After chilling the custard, pour it into a freezer-safe container. Freeze and stir every 30 minutes for 3 to 4 hours, breaking up ice crystals until the ice cream is creamy and set. The texture won’t be quite as airy as churned, but it’s still decadent and delicious.
Can I use store-bought caramel sauce instead of making my own?
While homemade caramel adds deep, nuanced flavor, you can use a high-quality store-bought sauce in a pinch. Just be sure to pick one with real butter and cream if possible, and warm it gently so it blends smoothly with your custard base.
Which salt is best for the salted caramel?
Sea salt is the classic choice because of its bright, clean taste and tender flakes, which melt beautifully into the caramel. Avoid regular table salt, which can taste harsh or chemical in a delicate dessert like this.
How do I know when the custard is thick enough?
The custard is ready when it coats the back of a spoon and a finger-drawn line holds its shape. Don’t rush this step or let it boil, as this can curdle the eggs—gentle heat is essential for a smooth finish.
Can I double the recipe for a crowd?
Absolutely! You can double all the ingredients, just be sure to use a large enough saucepan and churn the ice cream in batches if needed, depending on your machine’s capacity. The more, the merrier when it comes to Homemade Salted Caramel Ice Cream!
Final Thoughts
With every bite of this Homemade Salted Caramel Ice Cream, you’ll understand why it earns a permanent spot in my dessert repertoire. It’s one of those treats that feels both nostalgic and dazzlingly fresh—rich, satisfying, and full of flavor only homemade can deliver. If you haven’t tried making your own ice cream before, this is the batch to start with. Grab your spoon and enjoy!
Print
Homemade Salted Caramel Ice Cream Recipe
- Total Time: 8 hours 45 minutes
- Yield: 8 servings 1x
- Diet: Vegetarian
Description
Indulge in the creamy decadence of homemade salted caramel ice cream with a luscious swirl of rich caramel. This recipe combines the sweetness of caramel with a hint of sea salt for a perfect balance of flavors.
Ingredients
Caramel Sauce:
- 1 cup granulated sugar
- 6 tablespoons unsalted butter, cut into pieces
- 1 cup heavy cream
- 1 teaspoon sea salt
Ice Cream Base:
- 1 cup whole milk
- 1 cup heavy cream
- 5 large egg yolks
- 3/4 cup brown sugar
- 2 teaspoons vanilla extract
Instructions
- Caramel Sauce: In a medium saucepan, melt granulated sugar until amber. Add butter, then whisk in 1 cup of heavy cream. Remove from heat, stir in sea salt.
- Ice Cream Base: Heat milk, cream, and brown sugar. Whisk egg yolks, temper with milk mixture, cook until thickened. Stir in vanilla and 1/2 cup caramel. Chill. Churn in ice cream maker, swirl in extra caramel, freeze.
Notes
- Enhance flavor with flaky sea salt topping.
- For non-ice cream maker method, freeze custard, stirring every 30 minutes.
- Prep Time: 25 minutes
- Cook Time: 20 minutes
- Category: Dessert
- Method: Churned, Freezing
- Cuisine: American
Nutrition
- Serving Size: 1/2 cup
- Calories: 320
- Sugar: 32 g
- Sodium: 180 mg
- Fat: 20 g
- Saturated Fat: 12 g
- Unsaturated Fat: 7 g
- Trans Fat: 0 g
- Carbohydrates: 34 g
- Fiber: 0 g
- Protein: 4 g
- Cholesterol: 135 mg