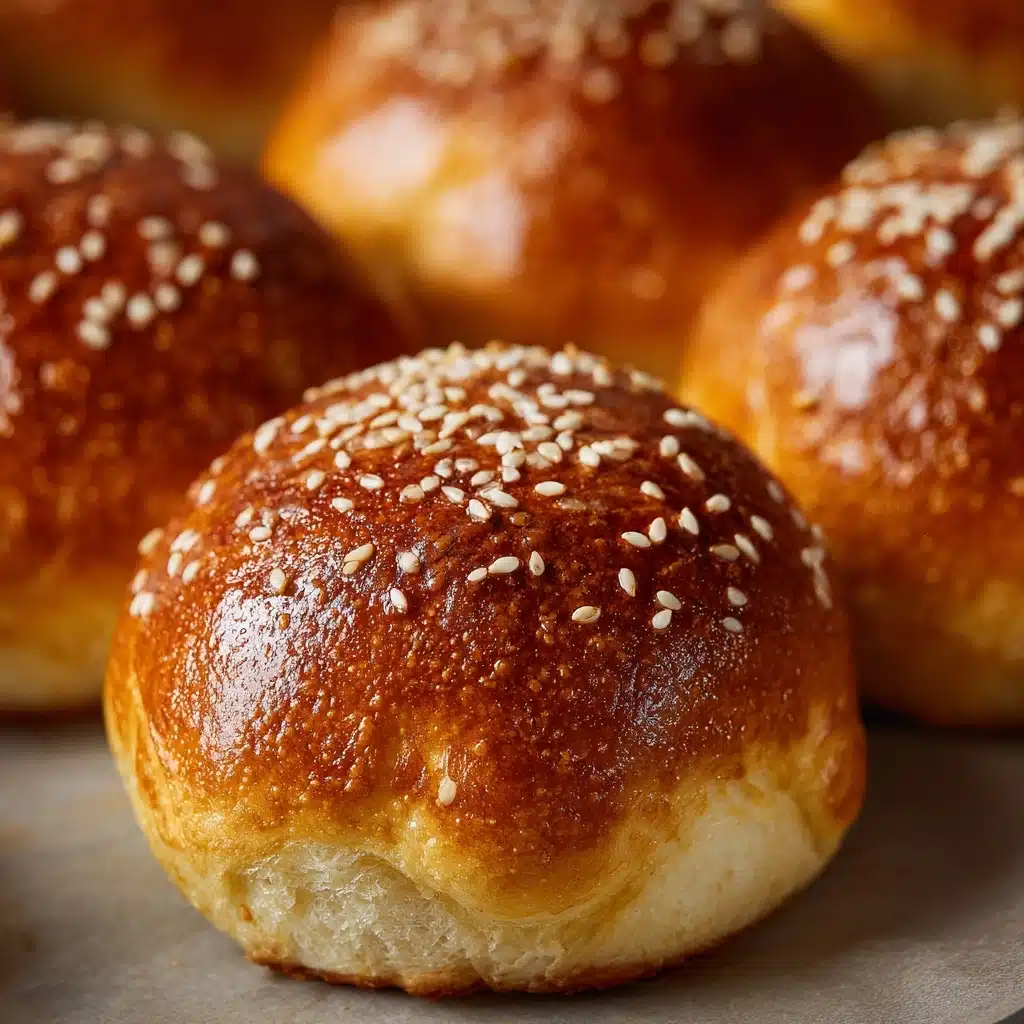
Get ready to bring smiles to your table with these irresistible Bunny Buns! Fluffy, slightly sweet, and endlessly adorable, these homemade rolls are as fun to make as they are to eat. Whether you’re baking them for a spring brunch, a festive Easter breakfast, or a playful treat for the kids, Bunny Buns deliver both on cuteness and on flavor. Each tender bun is crafted from a simple yeast dough and shaped into a delightful bunny, complete with raisin or chocolate chip eyes and perky little ears. Let’s hop into the kitchen and create a batch that’s sure to brighten any occasion!
Ingredients You’ll Need
Ingredients You’ll Need
You’ll be amazed at how a handful of pantry staples come together to make something so magical! Each ingredient in Bunny Buns plays a unique role, adding flavor, texture, or a pop of personality that makes these little rolls truly shine.
- All-purpose flour: The backbone of the dough, giving your Bunny Buns structure and softness.
- Active dry yeast: For that irresistible rise and fluffy, light texture.
- Granulated sugar: Just enough to sweeten the dough and feed the yeast.
- Salt: A pinch ensures your buns have plenty of flavor and balance out the sweetness.
- Warm milk (110°F): Activates the yeast and adds tenderness to each bite.
- Unsalted butter, melted: Richness and a hint of buttery flavor for perfect, melt-in-your-mouth bread.
- Large egg: Adds richness, color, and a lovely soft crumb.
- Raisins or chocolate chips: Perfect for dotting those little bunny faces with “eyes” full of character.
- Sliced almonds or dough scraps: These create the cutest bunny ears and fluffy tails—choose whichever your heart desires!
- Egg (for egg wash): The finishing touch for glossy, golden-brown bunnies straight from the oven.
How to Make Bunny Buns
Step 1: Wake Up the Yeast
Pour the warm milk into a large mixing bowl or the bowl of a stand mixer. Sprinkle in the yeast and a spoonful of sugar, then give it a gentle stir. Let this mixture hang out for 5 to 10 minutes until it’s nice and foamy—this is your signal that the yeast is alive and ready to make your Bunny Buns extra fluffy.
Step 2: Build the Dough
Add the remaining sugar, melted butter, egg, and salt into the bubbly yeast mixture. Stir everything together until well combined, then begin adding the flour, a cup at a time. Mix until a soft dough forms—it might get a little sticky, but that’s just part of the magic!
Step 3: Knead to Perfection
Turn your dough out onto a lightly floured surface, or keep it in the mixer and knead for about 5 to 7 minutes. You’re looking for a silky, smooth ball that springs back when poked. This step develops the gluten, which is the secret behind that pillowy Bunny Bun texture.
Step 4: First Rise
Place your dough baby back in the bowl, cover it with a clean kitchen towel, and let it rise in a warm spot for about an hour. It should double in size and feel light and puffy to the touch. Baking with yeast feels like a little kitchen magic, doesn’t it?
Step 5: Shape the Bunny Buns
Gently punch down the risen dough, then divide it into 10 to 12 equal pieces. Give each a quick roll into a ball. Now comes the fun part: shape each piece into a bunny by forming a head, body, and ears. You can use little bits of dough or sliced almonds for enchanting ears and tails, then press in raisins or chocolate chips for sparkling eyes that bring your bunnies to life.
Step 6: Second Rise
Transfer your shaped bunnies onto a parchment-lined baking sheet and cover them loosely with a towel. Let them puff up for another 20 to 30 minutes—this makes them extra airy and ensures they’ll bake up as light as possible.
Step 7: Bake to Golden Glory
While your bunnies are taking their second rest, preheat your oven to 375°F. Right before baking, brush each Bunny Bun with a glossy coat of beaten egg. Pop them in the oven for 12 to 15 minutes; when they’re golden and their little faces look simply irresistible, they’re ready to cool (just slightly!) before serving.
How to Serve Bunny Buns
Garnishes
For extra flair, dust your Bunny Buns with powdered sugar right before serving. A light dusting creates a fairy-tale effect that makes these buns even more magical. A dab of honey or a touch of melted chocolate can also add a special finishing touch, especially for special occasions or sweet tooths in the family!
Side Dishes
Serve your Bunny Buns alongside fresh fruit, creamy scrambled eggs, or a vibrant citrus salad for a balanced, beautiful brunch spread. They’re equally at home with a mug of hot cocoa or a frothy latte, making your spring mornings feel extra special and cozy.
Creative Ways to Present
Arrange the Bunny Buns in a basket lined with a pretty napkin and add a few fresh spring flowers for a joyful tabletop centerpiece. Or, set the bunnies hopping along a platter for an adorable addition to any Easter egg hunt! Kids love helping choose which bun to eat first, especially when each bunny has its own unique “personality.”
Make Ahead and Storage
Storing Leftovers
If you happen to have any Bunny Buns left (it can be rare with how quickly they disappear!), store them in an airtight container at room temperature. They’ll stay fresh and soft for up to 2 days—perfect for snacking or tuck-ins for tomorrow’s lunch.
Freezing
Want to keep the Bunny Buns magic going all season long? Cool them completely, then pop them into a freezer-safe bag or container. They freeze beautifully for up to three months. For best results, thaw at room temperature when you’re ready to enjoy them again.
Reheating
To revive that just-baked warmth, simply pop the buns into a moderate oven (325°F) for 5 to 7 minutes or give them a brief zap in the microwave. You’ll restore all that softness and fresh-baked aroma, making them taste as if they just hopped from the oven!
FAQs
Can I use instant yeast instead of active dry yeast?
Absolutely! You can swap instant yeast for the active dry yeast in equal amounts. The rising times may be a bit shorter, so keep an eye on the dough and proceed when it has doubled in size.
How do I make Bunny Buns with a filling?
For a sweet surprise, you can roll each dough ball flat, sprinkle with cinnamon sugar or a little chocolate spread, then shape as usual. The filling adds an extra pop of flavor and makes these bunnies even more irresistible!
Do I have to shape the buns as bunnies?
Not at all! While the bunny shape is perfect for spring and Easter, you can shape the dough into traditional rolls, knots, or even little chicks if you’re feeling creative. The possibilities are endless!
My Bunny Buns aren’t browning nicely—what can I do?
Be sure to use a thorough egg wash on each bun before baking. This creates that beautiful golden glow. If your oven bakes unevenly, rotate the tray halfway for even color on each bun.
Can I make Bunny Buns ahead of time?
Yes! Shape the buns the night before, cover them well, and let them rise slowly in the fridge overnight. In the morning, simply bring them to room temperature while the oven preheats and bake as usual for freshly baked Bunny Buns with hardly any morning fuss.
Final Thoughts
There’s a special kind of joy in baking and sharing Bunny Buns, whether you’re crafting them with little helpers or surprising loved ones at brunch. Give this recipe a try and watch those bunnies hop straight into everyone’s hearts (and tummies)! Happy baking!
Print
Bunny Buns Recipe
- Total Time: 1 hour 40 minutes (includes rise time)
- Yield: 10–12 buns 1x
- Diet: Vegetarian
Description
These adorable Bunny Buns are a delightful addition to any Easter brunch or springtime gathering. Soft, fluffy, and sweet, these buns are as fun to make as they are to eat, making them a perfect project for the whole family.
Ingredients
Dough:
- 3 cups all-purpose flour
- 1 packet (2 1/4 teaspoons) active dry yeast
- 1/4 cup granulated sugar
- 1/2 teaspoon salt
- 2/3 cup warm milk (110°F)
- 1/4 cup unsalted butter, melted
- 1 large egg
Decorations:
- Raisins or chocolate chips for eyes
- Sliced almonds or dough scraps for tails and ears
- 1 egg (for egg wash)
Instructions
- Prepare the Dough: In a large bowl or stand mixer, combine warm milk, yeast, and 1 tablespoon of sugar. Let sit until foamy. Add remaining sugar, melted butter, egg, and salt. Gradually add flour until a soft dough forms. Knead until smooth.
- Shape the Bunnies: Divide dough into pieces. Shape each piece into a bunny, adding ears, tails, and facial features. Let rise.
- Bake: Brush buns with egg wash and bake until golden brown.
Notes
- For a sweeter version, add a cinnamon-sugar filling before shaping.
- Perfect for Easter breakfast or springtime brunches.
- Can be made a day ahead and gently reheated.
- Prep Time: 25 minutes
- Cook Time: 15 minutes
- Category: Breakfast
- Method: Baking
- Cuisine: American
Nutrition
- Serving Size: 1 bun
- Calories: 190
- Sugar: 5g
- Sodium: 100mg
- Fat: 6g
- Saturated Fat: 3g
- Unsaturated Fat: 2g
- Trans Fat: 0g
- Carbohydrates: 29g
- Fiber: 1g
- Protein: 4g
- Cholesterol: 35mg