If you love the comforting aroma of garlic mingling with warm, crispy bread, you’re in for a treat with this Air Fryer Garlic Bread Recipe. It offers the perfect blend of buttery richness and garlicky goodness, all achieved in a flash using your air fryer. Whether you’re craving a quick snack, a side to your pasta, or something easy to whip up for unexpected guests, this recipe will quickly become your go-to for golden, crunchy, and flavorful garlic bread with minimal mess and maximum taste.
Ingredients You’ll Need
The magic behind this Air Fryer Garlic Bread Recipe is in its simple yet incredibly flavorful ingredients. Each one plays an important part to create the perfect crispy, aromatic bites that are perfectly satisfying.
- French or Italian bread (1 loaf): Choose a fresh loaf with a sturdy crust for the best texture and air frying results.
- Butter (4 tbsp, softened): The base of that luscious garlic butter, spreading easily for even flavor coverage.
- Garlic cloves (3, minced) or garlic powder (1 tsp): Fresh garlic gives vibrant flavor, while powder can be a handy shortcut.
- Fresh parsley (1 tbsp, chopped) or dried parsley (1 tsp): Adds a pop of color and fresh herbaceous notes to brighten the bread.
- Salt (½ tsp): Balances and enhances all the flavors for a seasoned finish.
- Italian seasoning (½ tsp, optional): A sprinkle of this mix amps up the Italian vibe for an added twist.
- Grated Parmesan (¼ cup, optional): For a cheesy, savory touch that melts into crispy deliciousness.
How to Make Air Fryer Garlic Bread Recipe
Step 1: Mix the Garlic Butter
Start by combining softened butter with minced garlic, parsley, salt, and Italian seasoning in a small bowl. If you love cheesy garlic bread, stir in the grated Parmesan here. Mixing these ingredients well creates a punchy, fragrant butter that will soak into every bite of bread.
Step 2: Prep the Bread
Take your loaf and slice it either into halves or thick slices depending on your preference. Spread the garlic butter mixture evenly on each slice to ensure every piece bursts with flavor. Thickness matters because it helps the bread crisp perfectly inside the air fryer without drying out.
Step 3: Air Fry to Golden Perfection
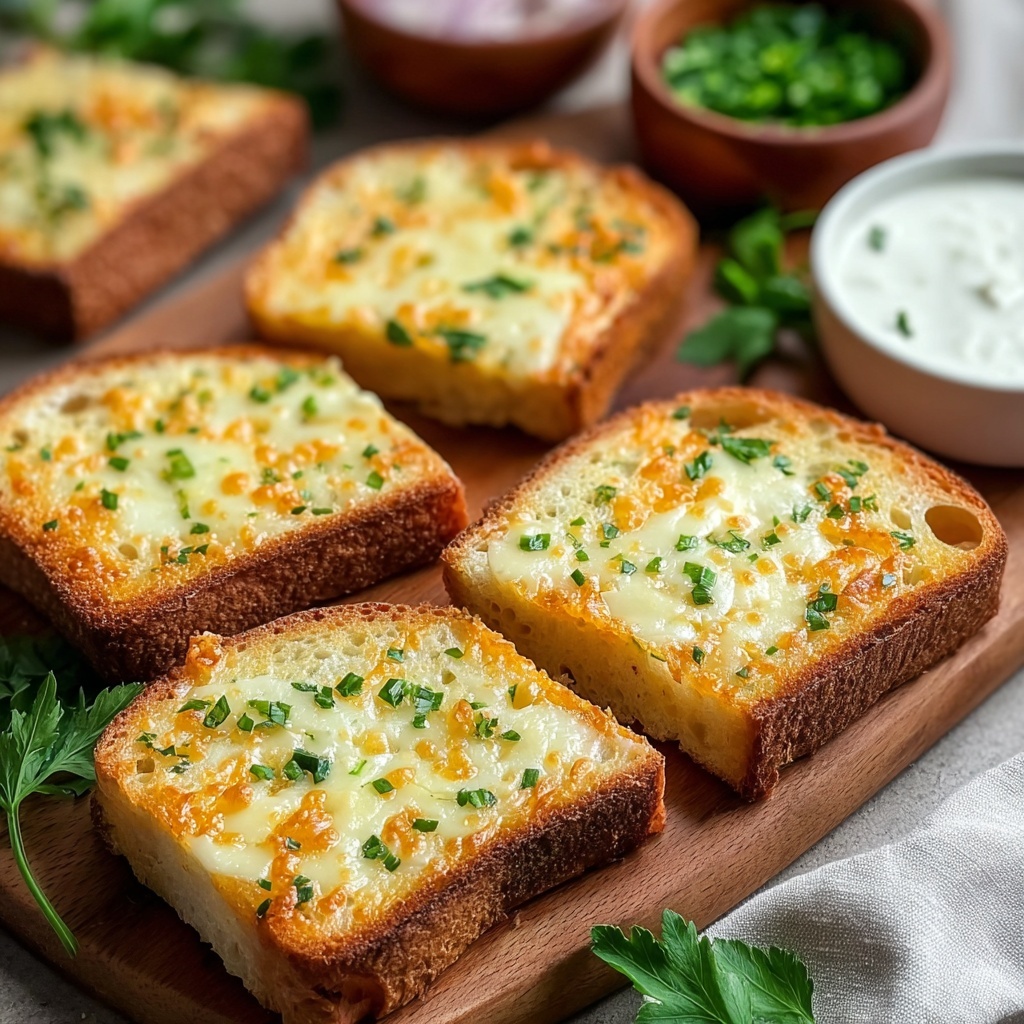
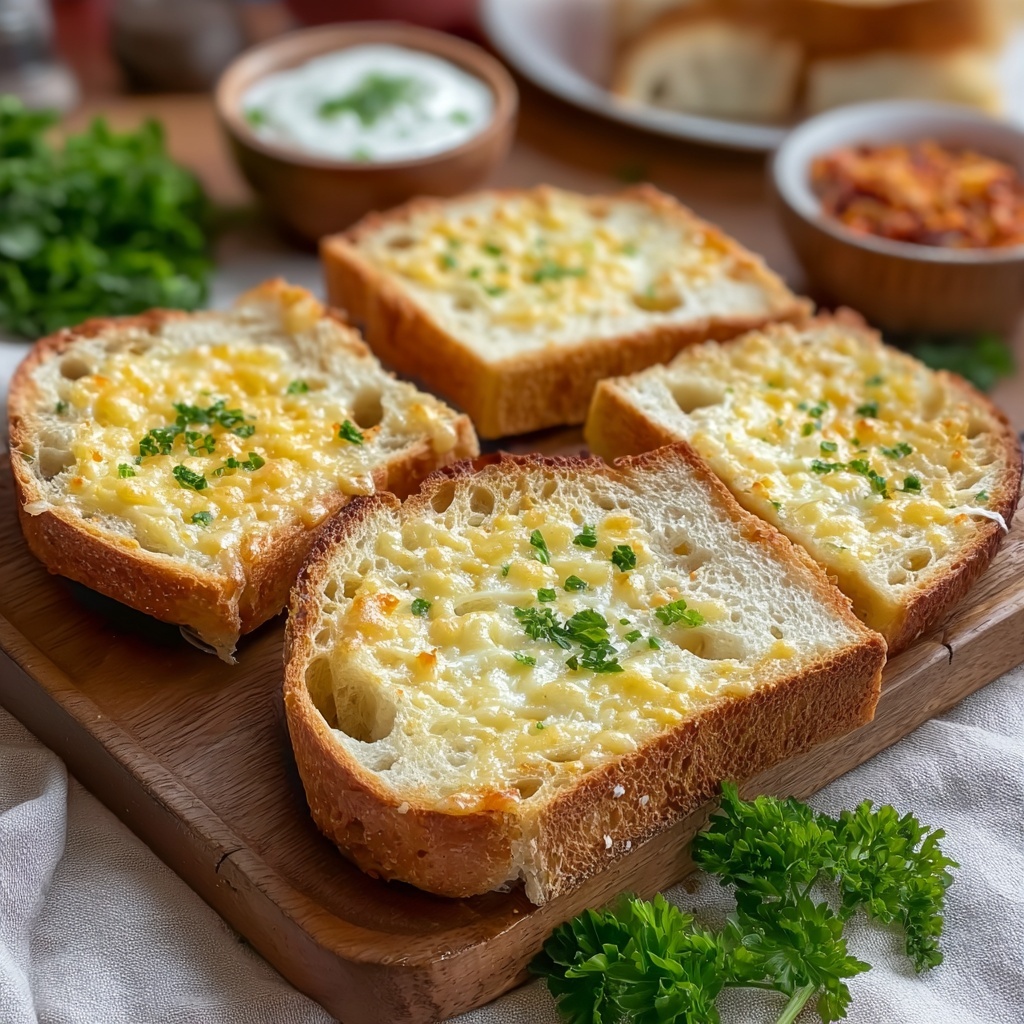
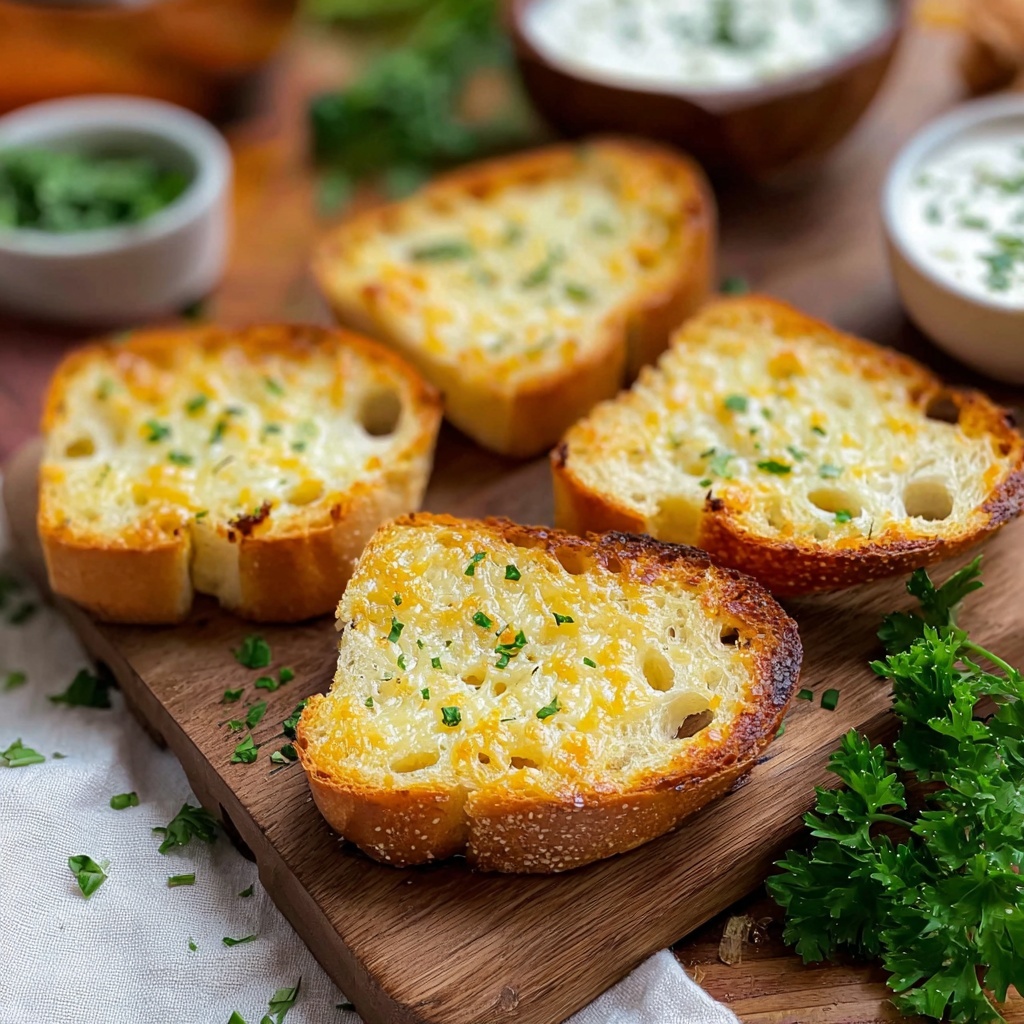
Arrange your buttered slices in a single layer inside the air fryer basket—crowding can stop the bread from crisping up evenly. Cook at 350°F (175°C) for around 4 to 6 minutes. Keep an eye toward the end, as the goal is a golden, crunchy surface with a warm, tender center.
Step 4: Serve & Enjoy
Allow the bread to cool for just a few seconds before serving so the garlic butter sets yet remains melty. This is when the aroma really draws everyone in, and you know you have something special ready to be enjoyed.
How to Serve Air Fryer Garlic Bread Recipe
Garnishes
Fresh parsley sprinkled on top adds a lovely green pop of color and a fresh herbal note that complements the rich garlic butter perfectly. You can also add a touch more grated Parmesan or a pinch of crushed red pepper flakes for a subtle kick.
Side Dishes
This garlic bread pairs beautifully with Italian classics like pasta marinara, creamy Alfredo, or even a hearty bowl of minestrone soup. It’s also fantastic alongside a crisp green salad or roasted vegetables, making your meal feel complete and well-rounded.
Creative Ways to Present
For an impressive presentation, arrange the slices on a wooden serving plank, garnished with extra herbs and a small bowl of marinara or ranch dipping sauce. You can even use this recipe to top bruschetta, adding diced tomatoes and basil for a fresh, vibrant appetizer.
Make Ahead and Storage
Storing Leftovers
If you have leftovers, wrap them tightly in foil or place in an airtight container and store in the fridge. They will stay good for about 2 to 3 days, allowing you to enjoy your Air Fryer Garlic Bread Recipe again without wasting any deliciousness.
Freezing
To freeze, wrap individual slices or the whole loaf tightly in plastic wrap and then in foil before placing in the freezer. This method preserves freshness for up to 1 month. When you’re ready to indulge, thaw in the fridge or at room temperature before reheating.
Reheating
The best way to reheat is by popping the garlic bread back into the air fryer at 320°F for about 3-4 minutes. This revives its crispiness perfectly without drying it out, giving you that freshly made feel every time.
FAQs
Can I use other types of bread for this recipe?
Absolutely! While French or Italian bread is ideal, you can experiment with sourdough, ciabatta, or even a baguette. Just be mindful of the thickness to ensure it crisps well in the air fryer.
Is it possible to make this garlic bread vegan?
Yes! Simply swap out the butter for a plant-based margarine or vegan butter alternative. Use nutritional yeast or vegan parmesan if you want a cheesy flair without dairy.
Can I add cheese other than Parmesan?
Definitely. Mozzarella, cheddar, or a blend of Italian cheeses can be delicious on garlic bread. Add them just before air frying or sprinkle halfway through cooking so they melt perfectly.
What if I don’t have an air fryer? Can I bake this in the oven?
You can bake the bread slices at 375°F for about 8-10 minutes or until golden and crispy. Although it won’t be quite the same as the air fryer’s crisp finish, it still works great for a quick garlic bread fix.
How do I make the garlic flavor more intense?
Using fresh minced garlic will always give a stronger garlic punch than powder. For an extra kick, you can also brush on additional garlic-infused olive oil before air frying.
Final Thoughts
If you’re ready for a fast, flavorful upgrade to your meal or a snack that never disappoints, this Air Fryer Garlic Bread Recipe should be your next culinary adventure. It’s straightforward, delicious, and the perfect way to bring everyone together around the table with warm, crispy, garlicky goodness every time.
Print
Air Fryer Garlic Bread Recipe
- Prep Time: 5 minutes
- Cook Time: 5 minutes
- Total Time: 10 minutes
- Yield: 4 servings
- Category: Appetizer
- Method: Air Frying
- Cuisine: Italian
Description
This easy Air Fryer Garlic Bread recipe transforms simple bread into a crispy, buttery delight infused with fresh garlic and herbs. Ready in just 10 minutes, it’s perfect as a quick appetizer or a savory side to complement any meal.
Ingredients
For the Garlic Butter
- 4 tbsp butter (softened)
- 3 cloves garlic (minced) or 1 tsp garlic powder
- 1 tbsp fresh parsley (chopped) or 1 tsp dried parsley
- ½ tsp salt
- ½ tsp Italian seasoning (optional)
- ¼ cup grated Parmesan (optional)
For the Bread
- 1 loaf French or Italian bread (or any bread of choice)
Instructions
- Mix the Garlic Butter: In a small bowl, combine the softened butter with minced garlic, chopped parsley, salt, and Italian seasoning. If using Parmesan, stir it in now to add a savory, cheesy flavor to the mixture.
- Prep the Bread: Slice the loaf of bread into halves or thick slices depending on your preference. Spread the prepared garlic butter mixture evenly across each piece to ensure every bite is flavorful.
- Air Fry: Arrange the buttered bread slices in a single layer inside the air fryer basket, avoiding overlap for even cooking. Set the air fryer to 350°F (175°C) and cook for 4-6 minutes until the bread turns golden and the edges get crispy.
- Serve & Enjoy: Once cooked, allow the garlic bread to cool for a few seconds. Serve warm as a delicious appetizer or side dish with your favorite meals.
Notes
- For a milder garlic flavor, reduce the amount of fresh garlic or substitute with garlic powder.
- If using dried parsley, adjust quantities accordingly as its flavor is more concentrated.
- For extra crispiness, you can air fry a bit longer but watch carefully to avoid burning.
- Parmesan cheese is optional but adds a wonderful umami depth.
- Leftover garlic bread can be reheated in the air fryer for a minute or two to regain crispiness.

