
If you’ve ever dreamed of pulling a perfectly chewy yet crispy pizza crust right out of your own oven, then this Artisan Pizza Dough: 5 Steps to a Crispy Chewy Crust Recipe is going to be your new kitchen hero. It’s simple enough for even a pizza novice to master, yet crafted in a way that yields that beautiful balance of crust texture that pizza lovers crave. With just a handful of staple ingredients and straightforward steps, you’ll be turning out artisan-quality pizzas that taste like they came from a wood-fired oven, every single time.
Ingredients You’ll Need
The magic of artisan pizza dough starts with its ingredients. Each one is simple, but essential—combining to give your dough the right flavor, texture, and elasticity. Let’s break down what you’ll need and why.
- 4 cups all-purpose flour: The backbone of your dough, providing structure and the chewiness you want in every bite.
- 1 1/2 cups warm water: Activates the yeast and hydrates the dough for softness and suppleness.
- 2 teaspoons active dry yeast: The little powerhouse causing your dough to rise and develop airy pockets.
- 2 teaspoons salt: Balances flavor and tightens gluten strands for better dough elasticity.
- 1 tablespoon olive oil: Adds moisture and richness, helping the crust crisp up beautifully during baking.
How to Make Artisan Pizza Dough: 5 Steps to a Crispy Chewy Crust Recipe
Step 1: Activate the Yeast
Start by dissolving the active dry yeast in warm water—ideally around 110°F—to wake it up and get it bubbling. Let it sit for about 5 minutes until it becomes frothy. This little front step sets the stage for light and airy dough.
Step 2: Combine the Ingredients
Once your yeast mixture is bubbly, mix in the flour, salt, and olive oil. Each ingredient plays its part here: the flour builds structure, salt intensifies flavor, and olive oil keeps everything tender. Bringing these together transforms simple pantry staples into dough that’s ready for kneading.
Step 3: Knead Until Smooth and Elastic
Turn your dough out onto a floured surface and knead for about 10 minutes. This process may feel like a workout, but it’s essential: kneading develops the gluten network, which gives your artisan pizza dough its chewy texture and strength. When your dough is soft, smooth, and springs back, you know you’re there.
Step 4: Let the Dough Rise
Place your dough in a greased bowl, cover it with a damp cloth or plastic wrap, and let it rest in a warm spot for 1 to 2 hours. As it rises, you’ll see its size double as the yeast ferments sugars, creating that airy structure responsible for the perfect crust.
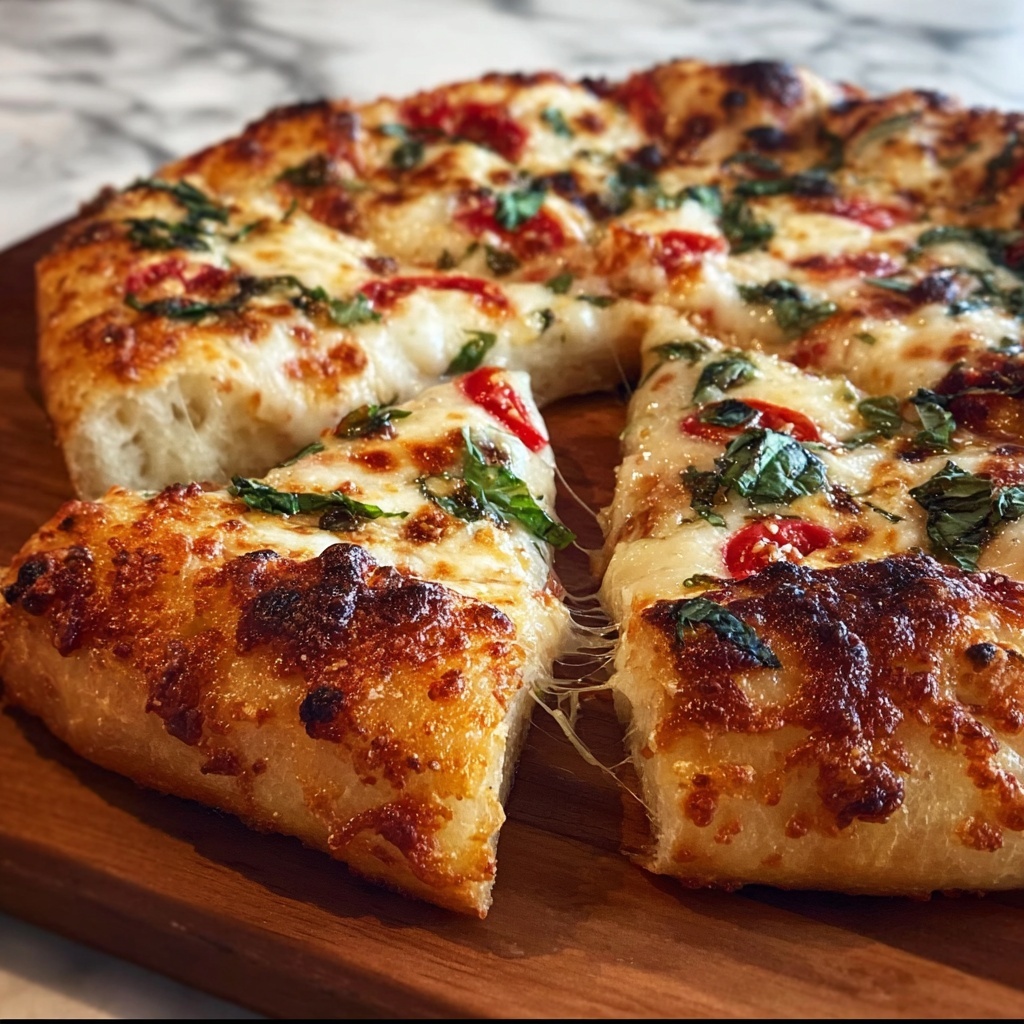
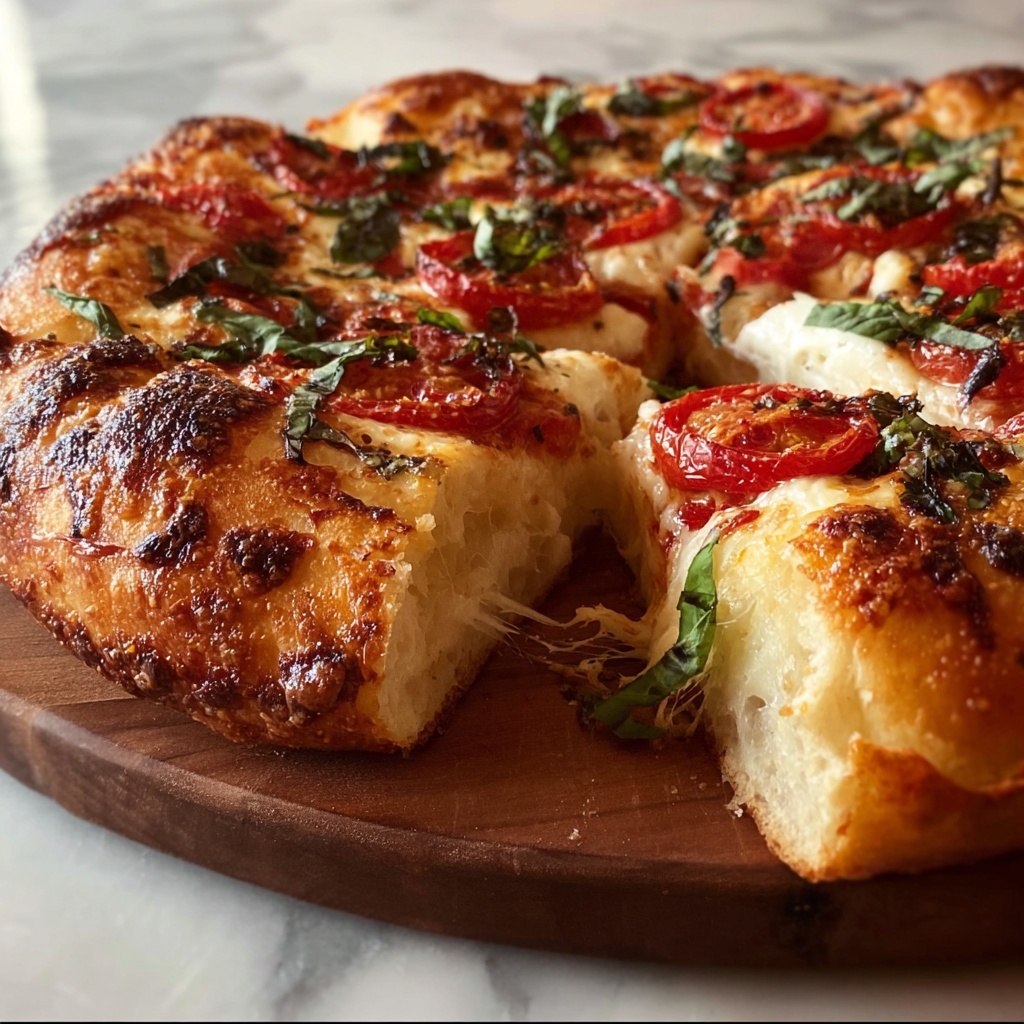
Step 5: Shape, Top, and Bake
Preheat your oven to a scorching 475°F (245°C). Divide the dough into two rounds and stretch or roll them out to your desired thickness. Add your favorite toppings—whether it’s classic tomato and mozzarella or something adventurous—and bake for 12 to 15 minutes until the crust is golden, crispy at the edges, and wonderfully chewy in the center. Voilà, artisan pizza in your very own kitchen!
How to Serve Artisan Pizza Dough: 5 Steps to a Crispy Chewy Crust Recipe
Garnishes
Your artisan pizza dough is a blank canvas, so finishing touches like fresh basil leaves, a drizzle of extra virgin olive oil, or a sprinkle of flaky sea salt can elevate flavors and bring a gourmet touch to your slice. Try a bit of grated Parmesan or crushed red pepper for an extra kick.
Side Dishes
Pair your pizza with light and refreshing sides like a crisp arugula salad dressed in lemon vinaigrette or roasted garlic and herb olives. These complement without overpowering the beautiful depth of flavor in your crunchy yet chewy crust.
Creative Ways to Present
Serve your handmade pizzas family-style on a wooden board for casual gatherings or on individual artisan plates for a restaurant feel at home. For a fun twist, transform leftover dough into garlic knots or breadsticks to impress guests and make your meal stretch further.
Make Ahead and Storage
Storing Leftovers
If you have leftover pizza dough or extra pizza, wrap the dough tightly in plastic wrap and keep it in the fridge for up to two days. Cooked pizza slices should be refrigerated in an airtight container to maintain freshness.
Freezing
You can freeze unused dough by forming it into a ball, wrapping it well in plastic wrap and a freezer bag, then storing it for up to three months. Thaw it overnight in the refrigerator before use to preserve that perfect texture.
Reheating
Reheat leftover pizza in a hot oven or skillet to refresh the crispy crust and melty toppings. Avoid microwaving if you want to keep that irresistible texture—oven heat is the trick to revive your pizza’s original charm.
FAQs
How long does the dough need to rise for the best results?
Letting the dough rise for 1 to 2 hours until it doubles in size is ideal for developing a light, airy texture. Rushing this step often results in a denser crust.
Can I use bread flour instead of all-purpose flour?
Absolutely! Bread flour has more protein, which can lead to an even chewier crust. Just expect your dough to be slightly firmer and possibly require a bit more water.
Is it necessary to use olive oil in the dough?
Olive oil adds moisture and a subtle richness to your dough that enhances both flavor and texture, helping achieve that crispy exterior and tender crumb.
Can I make this dough without yeast?
Yeast is essential for this recipe’s characteristic rise and airy crumb. For a quick alternative, other leavening agents can be used, but the result will not have the same chewy, artisan texture.
What’s the best way to stretch the dough without tearing it?
Let your dough rest a few minutes after kneading and use your hands to gently stretch from the center outward, rotating as you go. Avoid rolling pins as they can press out too much air, leading to a denser crust.
Final Thoughts
Crafting this Artisan Pizza Dough: 5 Steps to a Crispy Chewy Crust Recipe is one of those simple kitchen joys that pay off in big, delicious ways. Once you nail these steps and feel the dough’s perfect texture in your hands, you’ll never go back to pre-made crusts. So grab your ingredients, roll up your sleeves, and treat yourself and your loved ones to the best pizza you’ve ever made at home. Your oven is waiting!
Print
Artisan Pizza Dough: 5 Steps to a Crispy Chewy Crust Recipe
- Prep Time: 15 minutes
- Cook Time: 15 minutes
- Total Time: 1 hour 45 minutes
- Yield: 2 servings
- Category: Main Course
- Method: Baking
- Cuisine: Italian
Description
This Artisan Pizza Dough recipe guides you through creating a crispy, chewy pizza crust perfect for homemade pizzas. Using simple ingredients and classic techniques, the dough is mixed, kneaded, allowed to rise, shaped, topped, and baked to golden perfection, delivering a delicious base for your favorite pizza toppings.
Ingredients
For the Dough
- 4 cups all-purpose flour
- 1 1/2 cups warm water
- 2 teaspoons active dry yeast
- 2 teaspoons salt
- 1 tablespoon olive oil
Instructions
- Activate the yeast: In a bowl, combine the warm water and active dry yeast. Let the mixture sit for 5 minutes until it becomes frothy, indicating the yeast is activated.
- Mix the dough: Add the all-purpose flour, salt, and olive oil to the yeast mixture. Stir until a rough dough forms.
- Knead the dough: Transfer the dough to a floured surface and knead it for about 10 minutes until it becomes smooth, elastic, and slightly tacky.
- First rise: Place the kneaded dough in a greased bowl, cover it with a damp cloth or plastic wrap, and let it rise in a warm place for 1-2 hours until it doubles in size.
- Preheat the oven: Set your oven to 475°F (245°C) to ensure it reaches the ideal temperature for baking the pizza crust.
- Shape the dough: Once risen, punch down the dough and divide it into two portions. Shape each portion into a pizza round by stretching or rolling to your desired thickness.
- Add toppings: Place your favorite sauces, cheeses, and toppings evenly over the prepared dough rounds.
- Bake the pizzas: Bake in the preheated oven for 12-15 minutes or until the crust is golden and crisp, and the cheese is melted and bubbly.
Notes
- For a chewier crust, allow the dough to rise longer or refrigerate overnight.
- Use a pizza stone or baking steel if available for a crispier bottom crust.
- You can adjust topping quantities based on personal preference.
- Ensure the water is warm, not hot, to properly activate the yeast.
- Let the baked pizza cool for a few minutes before slicing to preserve the crust texture.


