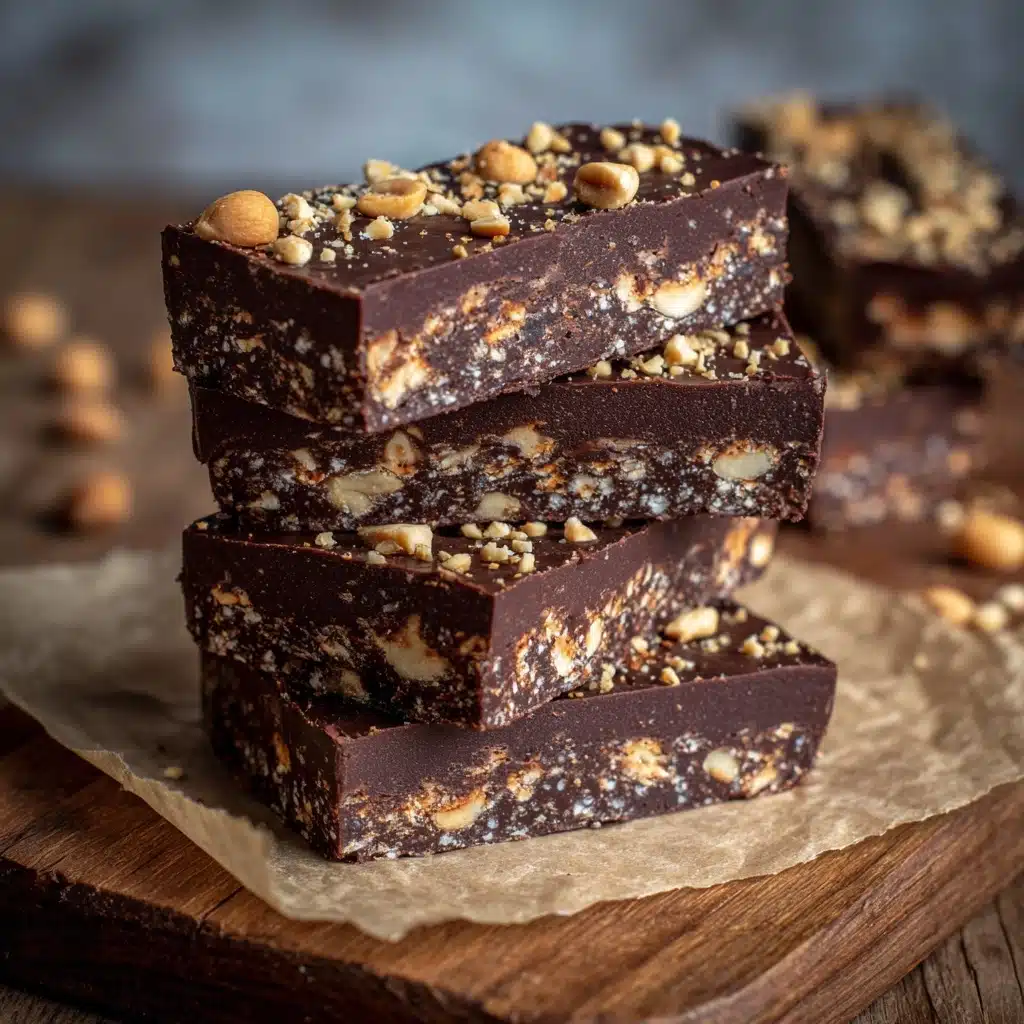
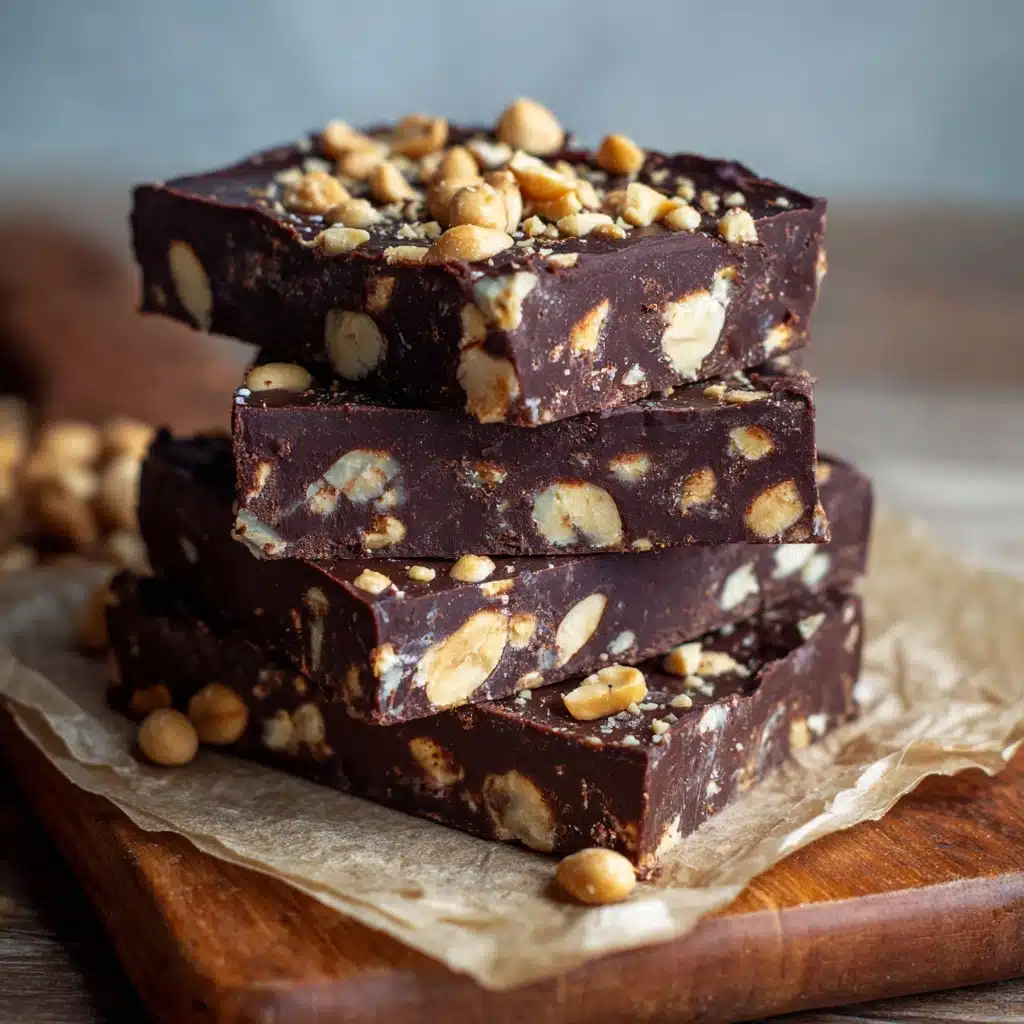
There’s just something magical about the combination of chocolate and peanut butter, especially when it comes together with a delightful crunch! Chocolate Peanut Butter Crunch Bars are an irresistible treat that blends creamy, salty-sweet peanut butter with crispy rice cereal, all topped with a luscious layer of chocolate. Whether you’re craving a quick snack, need an easy dessert for a gathering, or want to sneak a little joy into your lunchbox, these no-bake bars are sure to become your new favorite. Each bite is a perfect harmony of flavors and textures, making Chocolate Peanut Butter Crunch Bars a must-try for anyone with a sweet tooth.
Ingredients You’ll Need
What’s so wonderful about this recipe is how a handful of pantry staples come together to create pure magic. Each ingredient has its role, contributing either creaminess, sweetness, crunch, or that signature chocolatey finish that makes these bars so special.
- Creamy Peanut Butter: The heart of the bars, bringing rich flavor and that signature nutty smoothness.
- Honey or Maple Syrup: Adds natural sweetness and helps bind everything together—pick your favorite for a subtle flavor twist.
- Unsalted Butter or Coconut Oil: Lends richness and helps meld the peanut butter layer; coconut oil keeps it dairy-free.
- Crispy Rice Cereal: The secret to that satisfying crunch in every bite—be sure it’s fresh for best results.
- Semi-Sweet Chocolate Chips: Melted on top for a decadent, glossy finish that perfectly balances the peanut butter base.
- Chopped Peanuts (Optional): Sprinkle on top for extra crunch and a little salty flair.
- Pinch of Salt: Enhances all the flavors and keeps the bars from tasting too sweet.
How to Make Chocolate Peanut Butter Crunch Bars
Step 1: Prepare Your Pan
Start by lining an 8×8-inch square pan with parchment paper, leaving some overhang for easy removal. This little step makes cutting and serving the bars a total breeze, plus it keeps cleanup simple.
Step 2: Melt Peanut Butter Mixture
In a medium saucepan over medium heat, combine the peanut butter, honey (or maple syrup), unsalted butter (or coconut oil), and a pinch of salt. Stir continuously until everything is melted together and silky smooth, which takes just 2 to 3 minutes. This mixture is the glue that holds your Chocolate Peanut Butter Crunch Bars together and infuses them with amazing flavor.
Step 3: Fold in the Crunch
Take the saucepan off the heat and gently fold in the crispy rice cereal. Stir until every single puff is coated in that luscious peanut butter mixture. Don’t rush this part—making sure it’s evenly mixed ensures each bar will have the perfect crunch.
Step 4: Press and Set the Base
Transfer the peanut butter-cereal mix to your lined pan. Use a spatula (or clean hands) to press it down firmly and evenly. This helps create a sturdy base that holds together when sliced. Take your time and really pack it in!
Step 5: Melt and Spread the Chocolate
Place the chocolate chips in a microwave-safe bowl and melt them in 30-second intervals, stirring after each, until smooth. Pour the melted chocolate over the peanut butter layer and spread it out evenly, reaching all the corners for full coverage.
Step 6: Add the Finishing Touch
If you’re using chopped peanuts, now’s the time to sprinkle them over the melted chocolate. This adds extra crunch and gives your Chocolate Peanut Butter Crunch Bars that bakery-style look.
Step 7: Chill and Slice
Pop the pan in the refrigerator for at least 1 hour, or until everything is fully set. Once firm, use the parchment overhang to lift the slab out of the pan, then cut into bars. Now they’re ready to share, devour, or stash away for later!
How to Serve Chocolate Peanut Butter Crunch Bars
Garnishes
For an extra-special touch, top your bars with a pinch of flaky sea salt, a light drizzle of melted white chocolate, or a scattering of mini chocolate chips. These simple garnishes make each bar look even more tempting and add extra layers of flavor.
Side Dishes
Serve Chocolate Peanut Butter Crunch Bars alongside fresh berries, a scoop of vanilla ice cream, or a tall glass of cold milk. The fruity tartness and creamy ice cream make a perfect pairing, balancing out the richness of the bars.
Creative Ways to Present
Stack the bars on a pretty platter for parties, or wrap them individually in wax paper for lunchbox treats and edible gifts. For a fun twist, cut them into bite-size squares and use mini cupcake liners for a pop of color on dessert tables.
Make Ahead and Storage
Storing Leftovers
Keep leftover Chocolate Peanut Butter Crunch Bars in an airtight container in the refrigerator for up to a week. They’ll stay firm and delicious, ready for a quick treat whenever you need one!
Freezing
These bars freeze beautifully. Place them in a single layer (or separate with parchment) in a freezer-safe container, and they’ll keep for up to 2 months. Just thaw in the fridge before serving for best texture.
Reheating
No reheating is necessary, but if you like a softer, gooier bar, let them sit at room temperature for about 10 minutes before enjoying. If you prefer them extra crisp, eat them straight from the fridge.
FAQs
Can I use crunchy peanut butter instead of creamy?
Absolutely! Crunchy peanut butter will add even more texture and nutty bits to your Chocolate Peanut Butter Crunch Bars. Just make sure to stir well so everything comes together smoothly.
Are these bars gluten-free?
They can be! Just double-check that your crispy rice cereal is labeled gluten-free, as some brands contain malt flavoring. Everything else in the recipe is naturally gluten-free.
Can I make these vegan?
Yes! Simply use coconut oil instead of butter, maple syrup instead of honey, and choose dairy-free chocolate chips. With these swaps, your bars will be completely plant-based.
What can I use instead of peanut butter?
If peanut butter isn’t your thing, try almond butter, cashew butter, or sunflower seed butter for a nut-free version. Each brings its own unique flavor to the bars.
How do I keep the chocolate layer from cracking when slicing?
Let the bars sit at room temperature for 5–10 minutes after chilling so the chocolate softens slightly. Use a sharp knife, and wipe it clean between cuts for neat, beautiful bars every time.
Final Thoughts
If you find yourself craving a sweet, crunchy, and chocolatey treat, give these Chocolate Peanut Butter Crunch Bars a try. They’re so easy to make and even easier to love, whether you’re sharing with friends or savoring one all to yourself. Enjoy every bite!
Print
Chocolate Peanut Butter Crunch Bars Recipe
- Total Time: 1 hour 15 minutes
- Yield: 16 bars 1x
- Diet: Vegetarian
Description
Delicious and easy-to-make Chocolate Peanut Butter Crunch Bars featuring a crispy rice cereal base coated in a creamy peanut butter and honey mixture, topped with a smooth layer of melted chocolate and optional chopped peanuts for added crunch. Perfect no-bake dessert or snack that’s quick to prepare and sure to satisfy your sweet tooth.
Ingredients
Main Ingredients
- 1 cup creamy peanut butter
- 1/2 cup honey or maple syrup
- 1/4 cup unsalted butter or coconut oil
- 3 cups crispy rice cereal
- 1 cup semi-sweet chocolate chips
- Pinch of salt
Toppings (Optional)
- 1/4 cup chopped peanuts
Instructions
- Prepare the pan: Line an 8×8-inch baking pan with parchment paper to prevent sticking and make removal easier.
- Make the peanut butter mixture: In a saucepan over medium heat, combine the peanut butter, honey (or maple syrup), unsalted butter (or coconut oil), and a pinch of salt. Stir continuously until the mixture is melted and smooth, about 2 to 3 minutes. Then remove from heat.
- Combine with cereal: Gently fold the crispy rice cereal into the peanut butter mixture until the cereal is fully coated and evenly distributed.
- Press mixture into pan: Transfer the mixture to the prepared pan and press it down firmly and evenly to create a compact layer.
- Melt the chocolate: Place the semi-sweet chocolate chips in a microwave-safe bowl and heat in 30-second intervals, stirring in between, until the chocolate melts smoothly.
- Top with chocolate and peanuts: Pour the melted chocolate over the peanut butter mixture in the pan and spread it evenly. Sprinkle the chopped peanuts on top if using.
- Chill to set: Refrigerate the bars for at least 1 hour until the chocolate is firm and the bars set completely.
- Cut and serve: Once set, remove from the refrigerator, lift the bars out using the parchment paper, cut into 16 bars, and serve.
Notes
- Store bars in the fridge for a firmer texture or at room temperature for a softer bite.
- Swap peanut butter for almond or sunflower seed butter to suit dietary preferences.
- Use dairy-free chocolate chips to keep this recipe vegan-friendly.
- Ensure to press the mixture firmly into the pan for easy cutting and good bar shape.
- Bars keep well in an airtight container in the refrigerator for up to one week.
- Prep Time: 10 minutes
- Cook Time: 5 minutes
- Category: Dessert
- Method: No-Bake
- Cuisine: American
Nutrition
- Serving Size: 1 bar
- Calories: 210
- Sugar: 13 g
- Sodium: 90 mg
- Fat: 13 g
- Saturated Fat: 5 g
- Unsaturated Fat: 7 g
- Trans Fat: 0 g
- Carbohydrates: 22 g
- Fiber: 2 g
- Protein: 4 g
- Cholesterol: 5 mg