If you crave melty, golden cheese and juicy, spice-infused beef enveloped in a crispy tortilla, you’re about to fall in love with these Crispy, Cheesy Quesabirria Tacos. Born from vibrant Mexican street food, this iconic dish brings together the deep, smoky richness of slow-cooked beef, stretchy pools of Oaxaca cheese, and an irresistible crunch. Perfect for wowing friends or simply indulging your cravings, every bite offers a perfect blend of comfort and flavor. Trust me: these tacos have a way of disappearing fast!
Ingredients You’ll Need
Each ingredient in this recipe plays a starring role, from the chiles that define the rich consommé to the cheese that delivers ultimate ooey-gooey satisfaction. No substitutions can quite replicate the depth these bring, so gather these essentials and prepare for taco greatness.
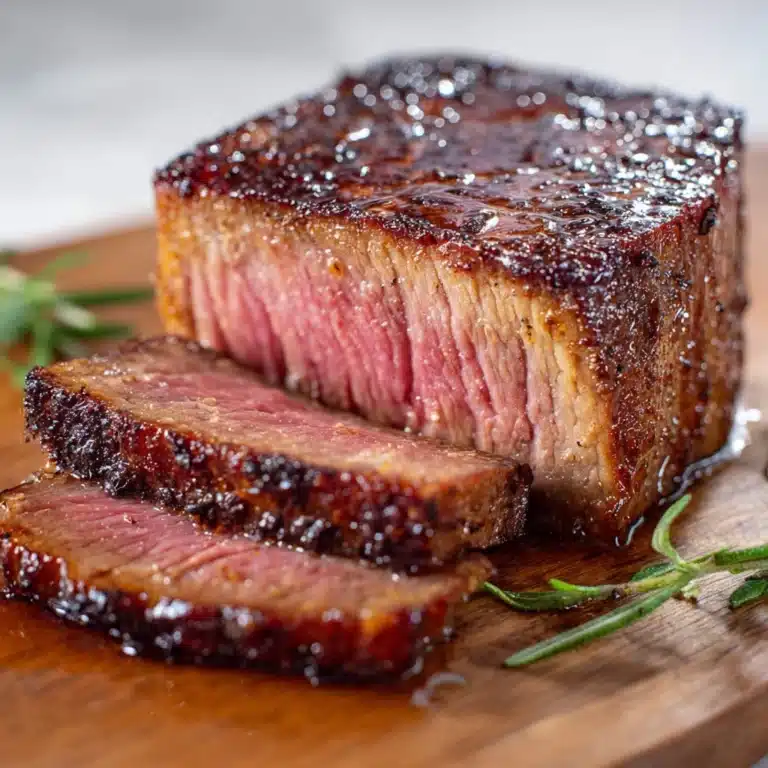
- Beef chuck roast (3 pounds, cut in chunks): The marbled beef develops unbeatable tenderness and savor after a slow simmer.
- Vegetable oil (1 tablespoon): For searing the beef, which locks in flavor and creates a flavorful crust.
- Dried guajillo chiles (4, stems and seeds removed): They offer a mild, slightly sweet heat and signature red color.
- Dried ancho chiles (2, stems and seeds removed): Anchos deepen the flavor with their sweet, earthy spice.
- Dried pasilla chiles (2, stems and seeds removed): Pasillas bring both mellow heat and subtle smokiness.
- White onion (1, quartered): Essential aromatic for building robust flavor in both meat and sauce.
- Garlic (5 cloves): Infuses the consommé with warmth and savory depth.
- Cinnamon stick (1): Adds an unexpected hint of warm, earthy sweetness.
- Cumin seeds (1 teaspoon): Contributes a nutty, aromatic note that’s classic in Mexican cuisine.
- Dried oregano (1 teaspoon): Lends herbal brightness and rounds out the sauce.
- Smoked paprika (1 teaspoon): Boosts smokiness and adds alluring red color.
- Bay leaf (1): Elevates the broth with its subtle, woodsy aromatics.
- Beef broth (2 cups): Forms the rich, meaty base for the consommé.
- Apple cider vinegar (1 tablespoon): Brings a balancing tang that brightens the sauce.
- Salt and pepper (to taste): Crucial for seasoning and lifting all the other flavors.
- Corn tortillas (12): Offer the classic structure and authentic texture for frying up crisp.
- Shredded Oaxaca cheese (2 cups; or mozzarella): Melts beautifully, delivering that quintessential cheese pull.
- Chopped cilantro & diced white onion (for garnish): Add freshness, crunch, and visual appeal.
- Lime wedges (for serving): The final squeeze brings everything into bright, zesty harmony.
How to Make Crispy, Cheesy Quesabirria Tacos
Step 1: Sear the Beef
Begin by heating your largest heavy pot or Dutch oven over medium heat and adding the vegetable oil. Once shimmering, sear the beef chunks on all sides until they’re deep golden brown. This simple step gives your birria a rich, caramelized flavor base — don’t rush it, and work in batches if necessary so every piece has its moment to brown.
Step 2: Toast the Chiles
After removing the beef, toss in your dried guajillo, ancho, and pasilla chiles. Toast them gently for just 1–2 minutes until fragrant. This brings out their oils and deepens their flavor — watch closely to avoid burning, which can turn them bitter.
Step 3: Sauté Aromatics
Add quartered white onion and garlic cloves to the pot. Sauté for a few minutes until they start to soften. Their browning and sweetness will become the heart of your birria consommé.
Step 4: Simmer with Spices
Return the toasted chiles to the pot, then add the cinnamon stick, cumin seeds, dried oregano, smoked paprika, bay leaf, and beef broth. Let everything simmer together for about 15 minutes. The chiles will soften and soak up all those beautiful aromatics, infusing the broth with their signature warmth and color.
Step 5: Blend the Sauce
Remove the bay leaf and cinnamon stick, then carefully transfer the mixture to a blender. Add the apple cider vinegar, then blend until completely smooth. Taste and season with salt and pepper, adjusting to your preference. The result: a rich, velvety sauce that’s punchy and irresistible.
Step 6: Braise the Beef
Pour the blended sauce back into the pot, nestle in the seared beef, and bring everything to a steady simmer. Cover and cook gently for 2.5 to 3 hours, or until the beef is falling-apart tender and easy to shred. Stir occasionally and add a splash more broth if needed to keep everything cozy and covered.
Step 7: Shred and Prepare for Tacos
Once the beef is tender, remove it from the pot. Use two forks to shred the meat into juicy strands. Meanwhile, skim the flavorful fat that has risen to the top of the consommé and reserve it for frying the tacos — this is the secret to that signature crispy bite!
Step 8: Dip, Fill, and Fry
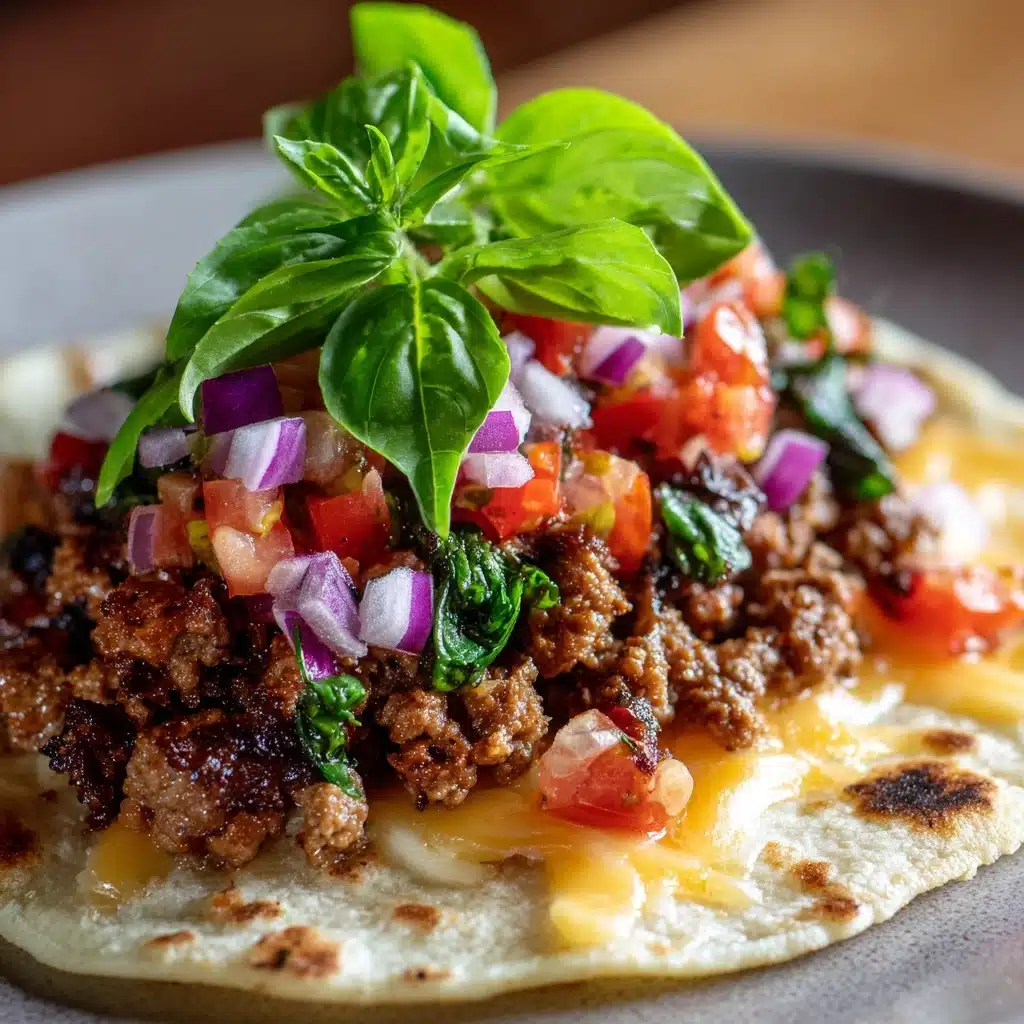
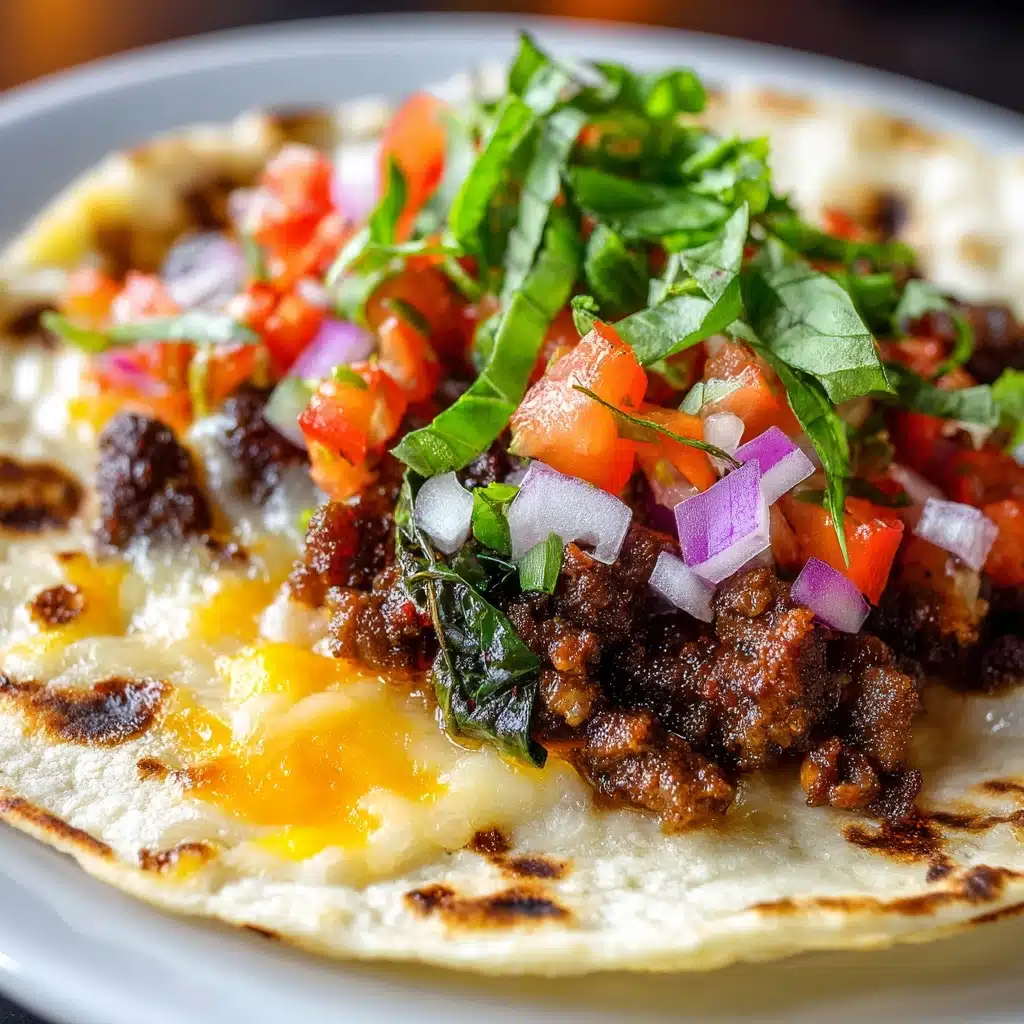
Dip each corn tortilla briefly into the surface layer of the consommé to coat it in the seasoned fat. Set the dipped tortilla in a hot skillet. Sprinkle plenty of shredded Oaxaca cheese on one side, spoon over some shredded beef, then fold the tortilla in half. Fry until both sides are irresistibly crispy and golden, and the cheese inside is bubbling and gooey. Repeat for all tortillas, keeping finished tacos warm while you work.
How to Serve Crispy, Cheesy Quesabirria Tacos
Garnishes
No taco is truly complete without a celebration of color and freshness on top. Shower each taco with a generous handful of chopped cilantro and diced onion. For brightness, serve plenty of lime wedges on the side. A small bowl of hot consommé for dipping transforms every bite into a dunked delight, elevating the entire experience!
Side Dishes
The boldness of Crispy, Cheesy Quesabirria Tacos calls for some simple, refreshing sides. Try Mexican street corn (elote), tangy pickled jalapeños, or a light jicama salad. Rice and creamy refried beans also round out the meal beautifully, letting the tacos remain the absolute star.
Creative Ways to Present
If you’re having friends over, serve the tacos family-style on a large platter with little bowls of cilantro, onion, lime, and hot consommé on the side. Or stack the tacos in a cast iron skillet for a rustic, party-ready look. For a fun twist, skewer mini Quesabirria tacos as appetizers — irresistible for any crowd!
Make Ahead and Storage
Storing Leftovers
Place any leftover beef, consommé, and tortillas in separate airtight containers in the fridge. Properly stored, the meat and broth will taste even richer the next day, as the flavors have more time to meld. They’ll keep beautifully for up to 4 days.
Freezing
The braised beef and consommé freeze well: cool fully, then transfer to freezer-safe bags or containers. Freeze for up to 2 months. When ready, thaw overnight in the fridge for easy quesabirria cravings anytime. Hold off on freezing assembled tacos, as the tortillas lose their delightful crispiness.
Reheating
For best results, reheat the beef and consommé gently on the stovetop. To regain the tacos’ crunch, pan-fry the tortillas with a hint of reserved consommé fat before building your tacos again. If you’re short on time, the microwave works, but nothing beats a skillet for reviving that fresh-off-the-griddle texture.
FAQs
Can I use a different cut of meat?
Absolutely! While beef chuck roast gives you ideal tenderness and flavor, you can substitute with short ribs or beef brisket. Even a mix of cuts works beautifully — just aim for something with some marbling, which ensures juicy, shreddable results.
What cheese is best for Crispy, Cheesy Quesabirria Tacos?
Oaxaca cheese is traditional for its smooth melting and subtle flavor, but Monterey Jack or mozzarella are great options if you can’t find Oaxaca. The main goal is lots of creamy melt and a bit of that classic cheese pull with every bite.
Are the tacos spicy?
The combination of ancho, guajillo, and pasilla chiles provides rich flavor without overwhelming heat. If you like it fiery, add a chipotle or even extra chiles to the sauce. For something milder, simply reduce the chiles or remove them entirely before blending.
What’s the secret to crispy tortillas?
Don’t skip dipping the tortillas in the top layer of consommé fat and frying in a hot skillet! This technique gives your Crispy, Cheesy Quesabirria Tacos their coveted crunch. A cast iron skillet helps, and don’t overcrowd the pan to keep them golden and crisp.
Can I make these in advance?
Definitely! Prepare the beef and consommé a day ahead for even deeper flavor, and store them separately. Just assemble and fry the tacos right before serving for that unforgettable crispy finish.
Final Thoughts
If you’ve ever wanted to dive headfirst into the world of Crispy, Cheesy Quesabirria Tacos, now’s your chance. This recipe fills your kitchen with tantalizing aromas and rewards you with tacos that are both comforting and restaurant-worthy. Give them a try — your friends and family are going to be begging for repeat taco nights!
Print
Crispy, Cheesy Quesabirria Tacos Recipe
- Total Time: 3 hours 30 minutes
- Yield: 6 servings 1x
- Diet: Non-Vegetarian
Description
Indulge in the ultimate comfort food with these Crispy, Cheesy Quesabirria Tacos. Slow-cooked beef, flavorful chiles, and gooey cheese come together in a crispy tortilla for a mouthwatering experience.
Ingredients
For the Beef:
- 3 pounds beef chuck roast, cut into large chunks
- 1 tablespoon vegetable oil
- 4 dried guajillo chiles (stems and seeds removed)
- 2 dried ancho chiles (stems and seeds removed)
- 2 dried pasilla chiles (stems and seeds removed)
- 1 white onion (quartered)
- 5 cloves garlic
- 1 cinnamon stick
- 1 teaspoon cumin seeds
- 1 teaspoon dried oregano
- 1 teaspoon smoked paprika
- 1 bay leaf
- 2 cups beef broth
- 1 tablespoon apple cider vinegar
- Salt and pepper to taste
For the Tacos:
- 12 corn tortillas
- 2 cups shredded Oaxaca cheese (or mozzarella)
- Chopped cilantro and diced white onion for garnish
- Lime wedges for serving
Instructions
- Sear the Beef: Brown beef chunks in a pot, then set aside.
- Prepare the Sauce: Toast dried chiles, sauté onion and garlic, add spices and broth, simmer, blend until smooth.
- Cook the Beef: Simmer seared beef in sauce until tender, then shred.
- Assemble Tacos: Dip tortillas in consommé, fill with cheese, meat, fold, and crisp in a skillet.
- Serve: Garnish tacos with cilantro, onion, and lime wedges. Serve hot with consommé for dipping.
Notes
- You can prepare the beef a day ahead for enhanced flavor.
- Substitute Oaxaca cheese with Monterey Jack or mozzarella if needed.
- For a spicier kick, add a chipotle pepper to the sauce while blending.
- Prep Time: 30 minutes
- Cook Time: 3 hours
- Category: Main Course
- Method: Stovetop
- Cuisine: Mexican
Nutrition
- Serving Size: 2 tacos
- Calories: 620
- Sugar: 3g
- Sodium: 720mg
- Fat: 36g
- Saturated Fat: 16g
- Unsaturated Fat: 17g
- Trans Fat: 1g
- Carbohydrates: 38g
- Fiber: 5g
- Protein: 38g
- Cholesterol: 105mg