
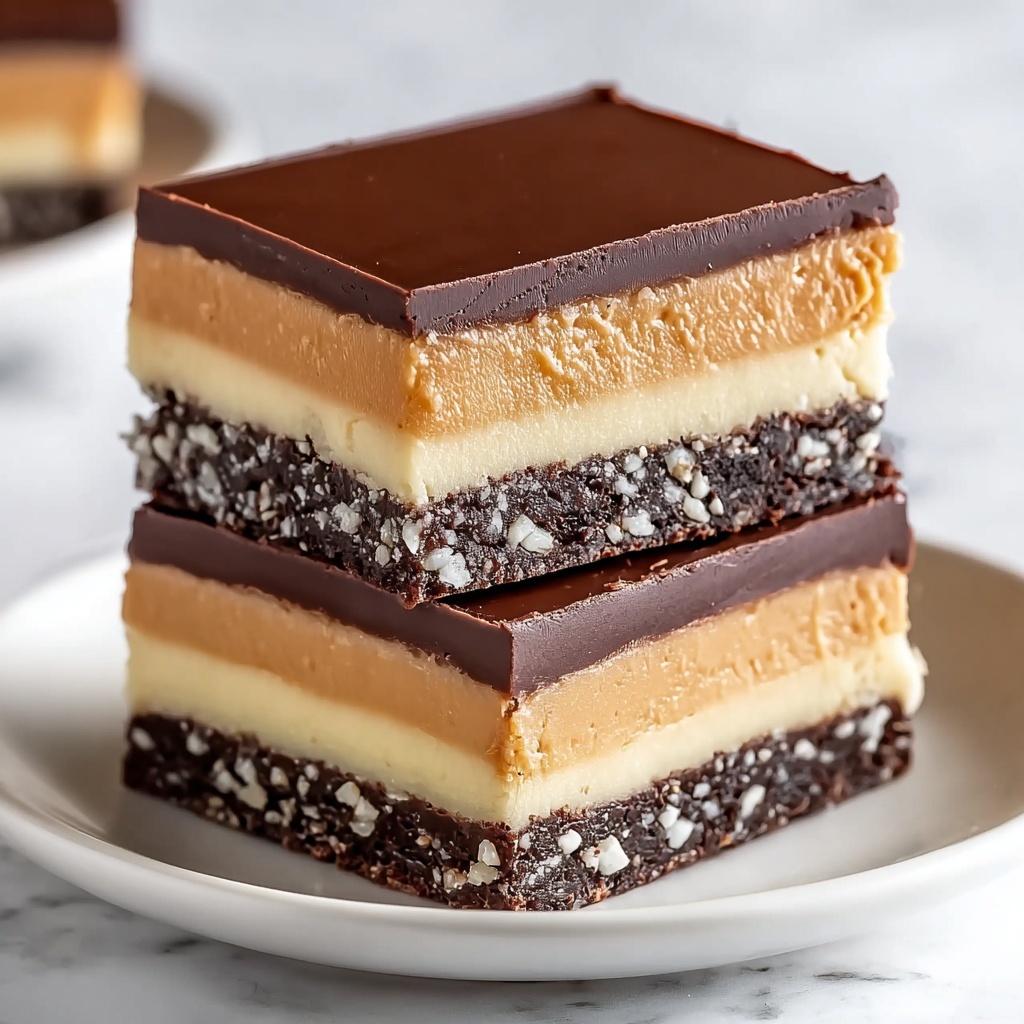
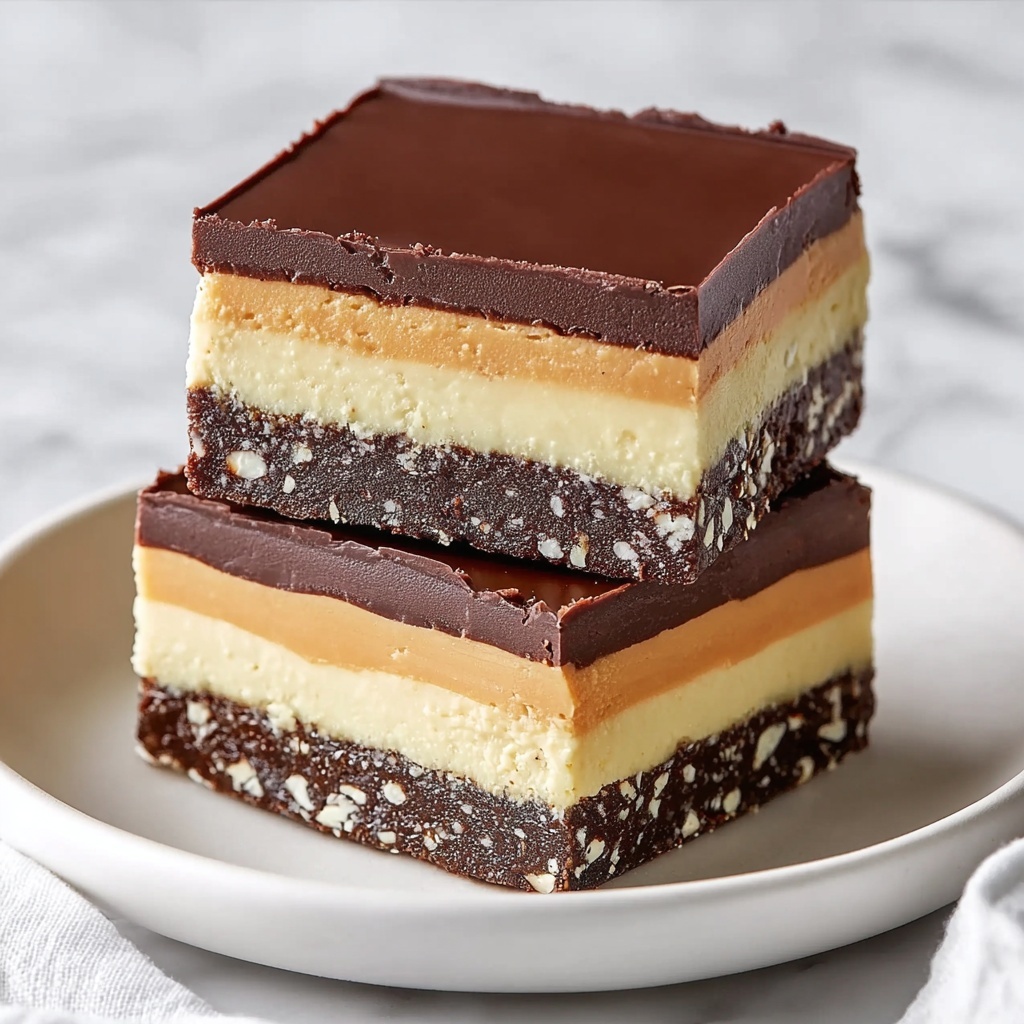
If you’re craving a dessert that feels like a little slice of heaven, let me introduce you to the Decadent Nanaimo Bars That Will Wow Your Taste Buds Recipe. This classic no-bake treat layers a rich chocolatey base, a smooth custard filling, and a glossy chocolate top, delivering the perfect balance of textures and flavors that will have you reaching for seconds (and maybe thirds). Whether it’s a special occasion or just a day you want a sweet pick-me-up, these bars bring a delightful nostalgia with every bite and promise to impress everyone lucky enough to try them.
Ingredients You’ll Need
Don’t let the layers fool you — the ingredients for this recipe are wonderfully simple yet essential, each bringing a unique texture, flavor, or color that works harmoniously to create these unforgettable bars.
- Unsalted butter (1/2 cup melted + 6 tablespoons softened + 1/2 cup melted): Butter binds, enriches, and adds that luscious, creamy flavor crucial to nanaimo bars.
- Cocoa powder (1/3 cup + 1/3 cup): For deep chocolate flavor and a hint of bittersweet intensity.
- Sugar (1/4 cup + 1/4 cup): Sweetens and balances the cocoa’s richness perfectly.
- Large eggs (2): Creates the glossy, thickened chocolate base, adding structure and smoothness.
- Graham crumbs (1 3/4 cups): Or digestive cookie crumbs, these give the base that irresistible, lightly crunchy texture.
- Shredded coconut (3/4 cup): Adds a subtle nutty sweetness and chewiness in the base layer.
- Chopped walnuts (1/2 cup): Or your favorite nuts, to add crunch and a toasty contrast.
- Custard powder (2 tablespoons): Key for that silky, smooth custard filling with vanilla warmth.
- Heavy cream (3 tablespoons): Keeps the custard filling soft and creamy.
- Powdered sugar (1 1/2 to 2 cups): Provides sweetness and thickens the custard to the perfect spreadable consistency.
- Semi-sweet chocolate (4 oz): Or 50-60% dark chocolate, for the shiny, luscious topping that seals the deal in flavor and presentation.
- Oil (2 teaspoons): Ensures a glossy finish on the chocolate top layer, making these bars look as good as they taste.
How to Make Decadent Nanaimo Bars That Will Wow Your Taste Buds Recipe
Step 1: Prepare the Pan and Base
Start by lining an 8×8 or 9×9 inch pan with parchment paper, letting some extra hang over the sides for easy lifting later. This simple step ensures your bars come out perfectly without any fuss. Then, get your double boiler ready by filling a medium saucepan with a couple of centimeters of water and placing a glass bowl on top, making sure it doesn’t touch the water below.
Step 2: Create the Chocolate Base
In the glass bowl, combine melted butter, sugar, and cocoa powder, stirring occasionally until velvety smooth. Now, add the egg while whisking continuously off the heat—the magic moment where the mixture thickens and turns glossy is a pure joy to see. Once you’ve got this luscious chocolate base, fold in the graham crumbs, shredded coconut, and walnuts. Press this slightly sticky mixture evenly into your prepared pan and pop it into the freezer for 20 minutes to get firm.
Step 3: Whip Up the Custard Layer
While your base chills, grab a large bowl and beat the softened butter until it’s fluffy and light—the cornerstone of that dreamy filling. Stir in the custard powder and heavy cream until silky smooth, then gradually add powdered sugar until the filling thickens to a spreadable delight. The texture here is everything since it needs to hold itself between the rich base and the chocolate topping.
Step 4: Assemble the Middle Layer
Once the chocolate base is firm, gently spread the custard filling evenly over it. The combination of textures is already starting to tease the taste buds! Pop the pan back into the refrigerator for at least 15 minutes so this layer sets nicely and holds its shape.
Step 5: Melt and Pour the Chocolate Topping
Next, melt your chocolate in a heatproof bowl using medium power in the microwave for about 45 seconds, stirring well to smooth it out. Stir in the oil to give your topping that brilliant shine. Pour this glossy chocolate over the custard layer, smoothing with a spatula for a flawless finish. Then, refrigerate the entire pan until the chocolate firms up—patience here pays off in those perfect slices.
Step 6: Slice and Serve
When the chocolate has set about 75 percent, use a sharp knife to score the bars into 16 pieces. Return to the fridge so they can fully firm up, and before cutting through completely, let the bars sit at room temperature for 10 minutes. This little trick allows for clean, neat slices without the chocolate cracking.
How to Serve Decadent Nanaimo Bars That Will Wow Your Taste Buds Recipe
Garnishes
While these bars shine on their own, feel free to add a sprinkle of toasted coconut, a dusting of powdered sugar, or a few chopped nuts on top for added texture and visual appeal. These simple garnishes make your dessert look like it came straight from a bakery!
Side Dishes
Serve your nanaimo bars alongside fresh berries or a dollop of whipped cream to cut through the richness with a burst of brightness. A cup of strong coffee or tea also pairs beautifully, balancing sweetness with a warm, aromatic drink.
Creative Ways to Present
For a fun twist, try layering smaller nanaimo squares in clear dessert glasses with fresh fruit or mousse in between, turning every spoonful into a layered delight. Or, arrange the bars on a colorful platter with edible flowers or mint leaves to impress guests visually as well as with flavor.
Make Ahead and Storage
Storing Leftovers
After you’ve tasted these bars, leftovers can be stored in an airtight container in the refrigerator. They’ll stay fresh and delicious for up to 5 days, maintaining their layers’ integrity and flavor.
Freezing
If you want to make these in advance, nanaimo bars freeze beautifully. Just wrap them tightly in plastic wrap and foil before placing them in the freezer. They keep well for up to 3 months, making them great for holiday prep or surprise guests.
Reheating
To enjoy frozen nanaimo bars, thaw them overnight in the fridge and let them sit at room temperature for about 10 minutes before serving. Avoid microwaving, which could melt the perfect chocolate topping and soften the base too much.
FAQs
Can I use different nuts in this recipe?
Absolutely! Walnuts are traditional, but pecans, almonds, or hazelnuts add delightful variations in texture and flavor. Just keep the quantity the same to maintain the balance in the base.
What if I don’t have custard powder?
Vanilla pudding mix is a great substitute and will give a similar creamy flavor. If neither is available, you can try a bit of cornstarch mixed with vanilla extract, though it might slightly alter the texture.
Do I have to use graham crumbs?
Graham crumbs provide a subtle sweetness and structure, but digestive cookie crumbs work just as well. You could even experiment with crushed vanilla wafers for a different flavor twist.
Is it possible to make these bars gluten-free?
Yes! Simply swap out graham crumbs for a gluten-free cookie crumb alternative, and double-check the other ingredients like custard powder to ensure they are gluten-free as well.
How long do nanaimo bars need to chill before serving?
At a minimum, chill the bars for at least 1 hour after assembly to allow the layers to set properly. For the best cutting experience and flavor, letting them rest overnight is ideal.
Final Thoughts
Making these Decadent Nanaimo Bars That Will Wow Your Taste Buds Recipe is not only incredibly rewarding but also a wonderful way to share a classic Canadian treat with your loved ones. The layered textures and rich flavors create a dessert experience that’s truly memorable. I can’t wait for you to try this recipe — your taste buds are in for a real treat!
Print
Decadent Nanaimo Bars That Will Wow Your Taste Buds Recipe
- Prep Time: 20 minutes
- Cook Time: 25 minutes
- Total Time: 1 hour 5 minutes
- Yield: 16 servings
- Category: Dessert
- Method: No-Cook
- Cuisine: Canadian
Description
These Decadent Nanaimo Bars are a classic no-bake Canadian dessert with a luscious layered texture. Featuring a rich chocolatey base with graham crumbs and walnuts, a creamy custard-flavored middle, and a glossy chocolate ganache topping, these bars are sure to wow your taste buds. Perfect for parties or an indulgent treat, they combine buttery, sweet, and crunchy elements in every bite.
Ingredients
Base Layer
- 1/2 cup Unsalted butter (melted)
- 1/3 cup Cocoa powder
- 1/4 cup Sugar
- 1 large Egg
- 1 3/4 cups Graham crumbs (or digestive cookie crumbs)
- 3/4 cup Shredded coconut
- 1/2 cup Chopped walnuts (or other favorite nuts)
Custard Buttercream Layer
- 6 tablespoons Unsalted butter (softened)
- 2 tablespoons Custard powder (or vanilla pudding mix)
- 3 tablespoons Heavy cream
- 1 1/2 to 2 cups Powdered sugar (to achieve thick consistency)
Chocolate Topping
- 4 oz Semi-sweet chocolate (or 50-60% dark chocolate)
- 2 teaspoons Oil (for glossy finish)
Instructions
- Prepare the pan: Line an 8×8 or 9×9 inch pan with parchment paper, leaving some overhang to easily lift out the bars later.
- Melt base ingredients: Fill a medium saucepan with 1-2 cm of water and heat on low. Place a glass bowl on top, ensuring it does not touch the water (double boiler setup). Add the melted butter, sugar, and cocoa powder to the bowl and stir occasionally until smooth and combined.
- Add egg and thicken: While whisking continuously, add the egg to the chocolate mixture until it becomes thick, glossy, and smooth.
- Combine base mixture: Remove from heat and fold in graham crumbs, shredded coconut, and chopped walnuts until fully incorporated.
- Firm the base: Press the base mixture evenly into the prepared pan and place in the freezer for 20 minutes to set firmly.
- Make custard buttercream: In a large bowl, beat softened butter until light and fluffy. Mix in the custard powder and heavy cream until smooth.
- Add powdered sugar: Gradually beat in powdered sugar until a very thick, spreadable consistency is achieved.
- Layer buttercream: Spread the custard buttercream evenly over the chilled chocolate base. Refrigerate for at least 15 minutes to allow it to firm up.
- Melt chocolate topping: In a heatproof bowl, microwave the semi-sweet chocolate at medium power for 45 seconds, stirring until smooth.
- Glaze with chocolate: Stir in oil for a glossy finish, then pour melted chocolate over the layered bars and smooth gently.
- Chill chocolate layer: Return the pan to the refrigerator to allow the chocolate to firm completely.
- Score bars: When the chocolate has hardened about 75%, use a sharp knife to score the bars into 16 serving sizes.
- Final chill: Refrigerate again until the bars are completely firm.
- Serve: Let bars warm for about 10 minutes before slicing along the scored lines for clean, neat pieces.
Notes
- Using parchment paper with overhang makes removing the bars easier and cleaner.
- Make sure to whisk the egg continuously when adding to the melted chocolate base to avoid curdling.
- Adjust powdered sugar quantity in the custard layer to get the perfect spreadable thickness.
- Chilling times are important for layering and cutting neat bars.
- Use good quality semi-sweet or dark chocolate for a richer topping.


