
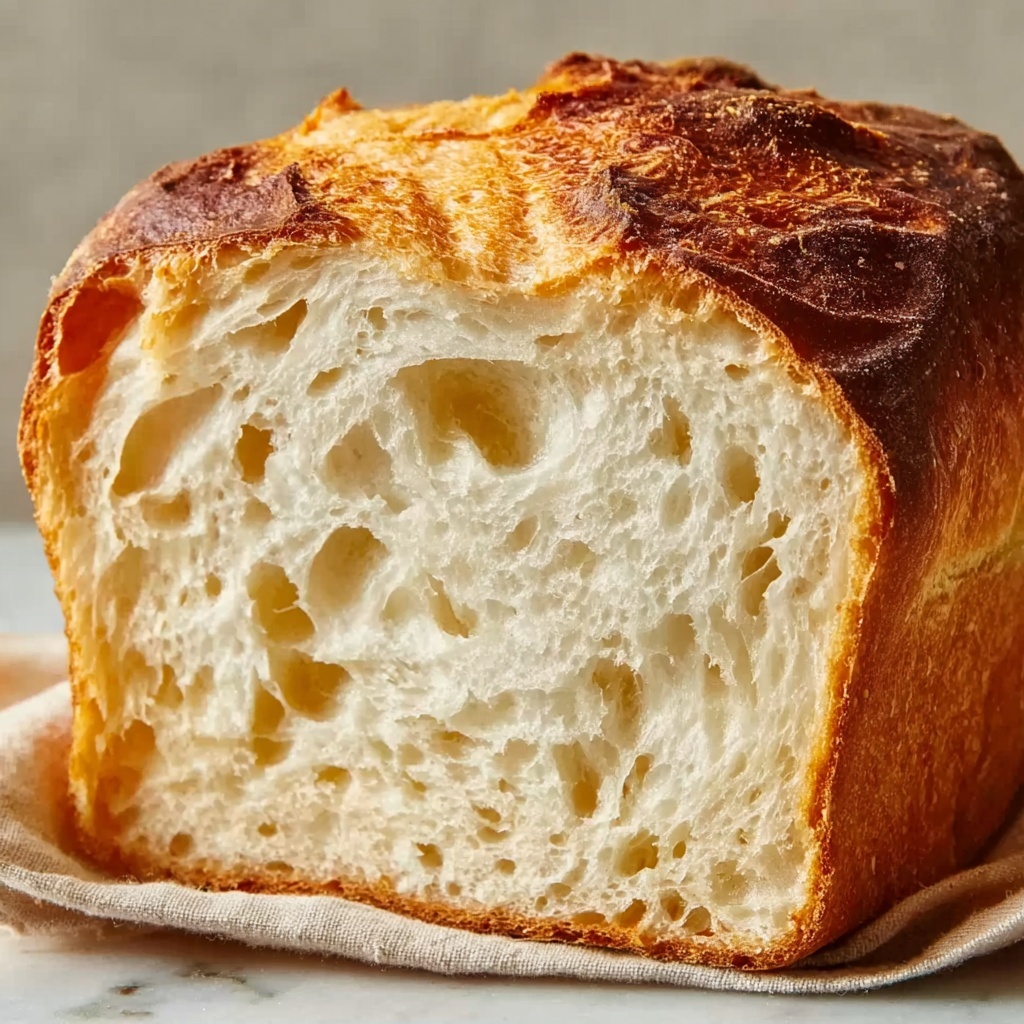
If you’ve ever dreamed of baking your own crusty, golden loaf that fills your kitchen with the heartwarming aroma of fresh bread, this Dutch Oven Bread Recipe is exactly what you need to try. It’s a fantastic way to create bakery-style bread right at home with just a handful of simple ingredients and a trusty Dutch oven. This recipe transforms basic pantry staples into a delightfully chewy loaf with a crunchy crust and soft, airy crumb that’s perfect for everything from sandwiches to simple buttered toast.
Ingredients You’ll Need
Getting started with this Dutch Oven Bread Recipe is incredibly straightforward because the ingredients are simple yet crucial for that perfect loaf. Each component plays a role in developing flavor, texture, and that irresistible crust.
- 500 g strong bread flour: Provides the necessary gluten structure for a chewy texture and excellent rise.
- 1½ teaspoons salt: Balances the flavor and strengthens the dough’s gluten network.
- 1 teaspoon active dried yeast: The magical ingredient that ferments and gives the bread its airy crumb.
- 350 ml warm water: Hydrates the flour and activates the yeast for fermentation.
- 1 tablespoon honey: Adds a subtle sweetness and helps brown the crust beautifully.
How to Make Dutch Oven Bread Recipe
Step 1: Combine Dry Ingredients
Start by whisking together the bread flour, salt, and active dried yeast in a large bowl. This ensures even distribution of the ingredients, which is key for consistent flavor and proper yeast activation throughout your dough.
Step 2: Prepare Wet Ingredients
In a separate measuring jug, mix the warm water with the tablespoon of honey until the honey is fully dissolved. The warmth of the water wakes up the yeast gently, and the honey provides food for the yeast to start working its magic.
Step 3: Mix Dough
Create a well in the center of your dry ingredients and pour in the honey-water mixture. Use a wooden spoon or your hands to bring it all together until it forms a shaggy dough. This shaggy texture is a good starting point before the kneading begins.
Step 4: Knead the Dough
Transfer your dough to a floured surface and knead vigorously for about 10 minutes until it becomes smooth and elastic. Kneading develops the gluten network which helps the dough trap air, leading to that perfect rise and chewy crumb.
Step 5: First Rise
Place your dough into a clean, greased bowl, cover it with a damp cloth, and let it rest for about an hour or until it doubles in size. This resting period allows the yeast to ferment, producing those delightful bubbles that give bread its airy texture.
Step 6: Preheat Oven & Dutch Oven
While your dough is rising, preheat your oven to 200ºC (400ºF). Place your cast iron Dutch oven with its lid inside the oven. Getting the Dutch oven nice and hot is the secret to a crusty exterior that beautifully contrasts with the soft inside.
Step 7: Shape the Dough
After the dough has risen, gently punch it down to release excess gas, then shape it into a round ball. Place it seam side down on a piece of baking paper to make transferring it easier and to prevent sticking.
Step 8: Prepare for Baking
Carefully lift the dough along with the baking paper and place it into the preheated Dutch oven. Cover it with the lid to trap steam, which helps the bread develop a wonderful crust.
Step 9: Bake Covered
Bake the bread in the Dutch oven for 25 minutes with the lid on. This steaming effect encourages the crust to set beautifully while the inside continues to cook evenly.
Step 10: Bake Uncovered
Remove the lid and bake for another 10 to 15 minutes until the bread turns a gorgeous golden brown. This step crisps up the crust to that enviable crunch we all love in artisan bread.
Step 11: Cool & Serve
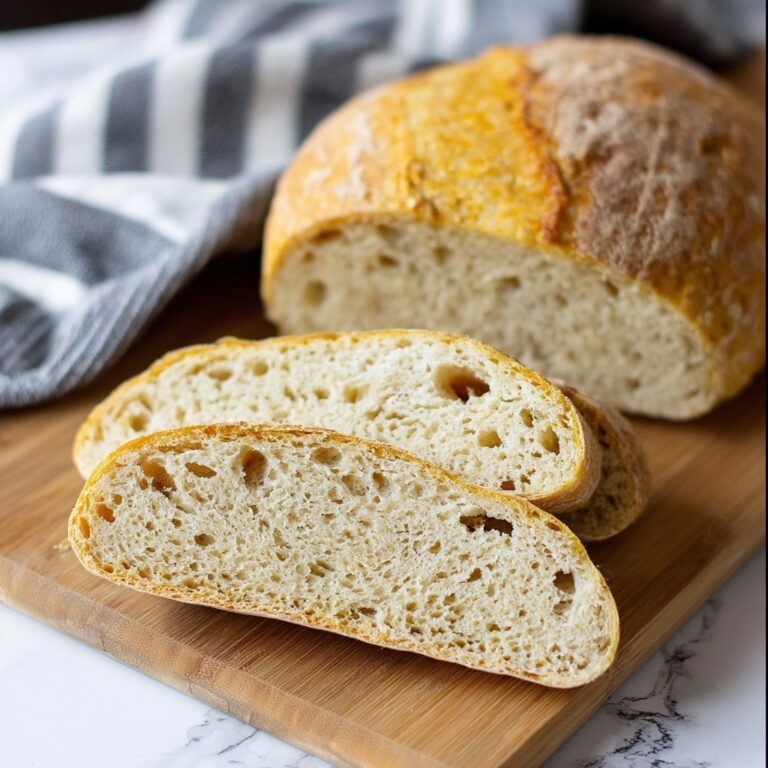
Once baked, carefully remove the bread and let it cool on a wire rack before slicing. Cooling prevents the crumb from becoming gummy and allows the flavors to fully develop.
How to Serve Dutch Oven Bread Recipe

Garnishes
This Dutch Oven Bread Recipe is delicious on its own, but you can elevate it with a sprinkle of flaky sea salt on the crust or a brush of melted garlic butter right after baking for an extra layer of flavor and aroma.
Side Dishes
This bread pairs wonderfully with hearty soups, fresh salads, or even just a bowl of creamy hummus. Its sturdy crust and soft interior make it perfect for dipping, soaking, and serving alongside savory dishes.
Creative Ways to Present
Try slicing thick pieces and toasting them for bruschetta topped with ripe tomatoes and basil. You could also hollow out the loaf to create an edible bread bowl for creamy soups or dips. It’s a fun way to impress guests or enjoy a cozy night in.
Make Ahead and Storage
Storing Leftovers
Store leftover bread in a paper bag or wrapped loosely in a kitchen towel at room temperature to maintain the crunchy crust and chewy crumb. Avoid plastic bags as they trap moisture and soften the crust.
Freezing
If you want to keep your Dutch Oven Bread Recipe longer, slice it first, then freeze the slices in an airtight container or freezer bag. This way, you can toast individual slices straight from the freezer whenever the bread craving hits.
Reheating
To revive day-old bread, pop slices in the toaster or warm the whole loaf in a preheated oven at 180ºC (350ºF) for about 10 minutes. This brings back the crisp crust and soft crumb as if freshly baked.
FAQs
Can I use regular all-purpose flour for this recipe?
While you can use all-purpose flour, strong bread flour is preferred because it has higher protein content that develops gluten for better structure and chewiness. All-purpose flour might result in a softer, less chewy loaf.
Do I need a Dutch oven to make this bread?
A Dutch oven is ideal because it traps steam, which creates the perfect crust and crumb. However, if you don’t have one, a heavy oven-safe pot with a lid or a baking stone with a pan of water for steam can work as alternatives.
Why is the honey important in this recipe?
Honey feeds the yeast to help it ferment more actively, then adds a subtle sweetness and promotes browning of the crust, giving your bread an appealing color and flavor.
How do I know when the bread is done?
The crust should be a deep golden brown, and the bread should sound hollow when tapped on the bottom. You can also check the internal temperature with a thermometer; it should read around 90-95ºC (190-205ºF).
Can I add extras like seeds or herbs to this Dutch Oven Bread Recipe?
Absolutely! Feel free to mix in seeds, nuts, dried herbs, or even olives during the initial mixing step for added flavor and texture. Just be careful not to overload the dough, so it still rises nicely.
Final Thoughts
There’s nothing quite like pulling a warm loaf of homemade bread out of a Dutch oven, and this Dutch Oven Bread Recipe makes that dream easily achievable. It’s a rewarding baking project that invites cozy moments and delicious meals. Give it a try—your kitchen (and your taste buds) will thank you!
Print
Dutch Oven Bread Recipe
- Prep Time: 20 minutes
- Cook Time: 40 minutes
- Total Time: 2 hours 55 minutes
- Yield: 1 loaf (about 8-10 slices)
- Category: Bread
- Method: Baking
- Cuisine: European
- Diet: Vegetarian
Description
This classic Dutch Oven Bread recipe yields a beautifully crusty, artisan-style loaf with a soft and chewy interior. Utilizing simple ingredients and an easy method, the bread is baked inside a preheated cast iron Dutch oven to trap steam, ensuring a golden, crisp crust. Perfect for homemade sandwiches, toasts, or simply enjoyed with butter, this bread recipe is ideal for bakers of all skill levels.
Ingredients
Dry Ingredients
- 500 g strong bread flour
- 1½ teaspoons salt
- 1 teaspoon active dried yeast
Wet Ingredients
- 350 ml warm water
- 1 tablespoon honey
Instructions
- Combine Dry Ingredients: In a large bowl, whisk together the bread flour, salt, and active dried yeast ensuring they are evenly mixed.
- Prepare Wet Ingredients: In a measuring jug, dissolve the honey completely into the warm water to sweeten and activate the yeast.
- Mix Dough: Make a well in the center of the dry ingredients and pour in the warm water and honey mixture. Stir with a wooden spoon or your hands until a shaggy dough forms.
- Knead the Dough: Turn the dough onto a floured surface and knead vigorously for 10 minutes until it is smooth, elastic, and slightly tacky to the touch.
- First Rise: Place the dough into a clean, greased bowl, cover with a damp cloth or plastic wrap, and leave it to rise in a warm spot for about 1 hour until it has doubled in size.
- Preheat Oven & Dutch Oven: Preheat your oven to 200ºC (400ºF). Place an empty cast iron Dutch oven with its lid inside to heat up thoroughly.
- Shape the Dough: Once the dough has risen, punch it down gently to release air, shape it into a round ball, and place it seam side down on a piece of baking paper.
- Prepare for Baking: Carefully transfer the dough on the baking paper into the preheated Dutch oven. Cover it with the lid to trap steam.
- Bake Covered: Bake for 25 minutes with the lid on, which helps the bread develop moisture and rise well.
- Bake Uncovered: Remove the Dutch oven lid and continue baking for an additional 10-15 minutes until the crust turns a beautiful golden brown and becomes crispy.
- Cool & Serve: Remove the bread from the Dutch oven and let it cool completely on a wire rack before slicing to ensure the crumb is fully set.
Notes
- Use strong bread flour for optimal gluten development and chewy texture.
- Ensure the water is warm, not hot, to properly activate the yeast without killing it.
- Kneading time is important; well-kneaded dough results in a better crumb structure.
- Preheating the Dutch oven is key for trapping steam, which yields a crispy crust.
- Allow the bread to cool fully before slicing to avoid a gummy interior.


