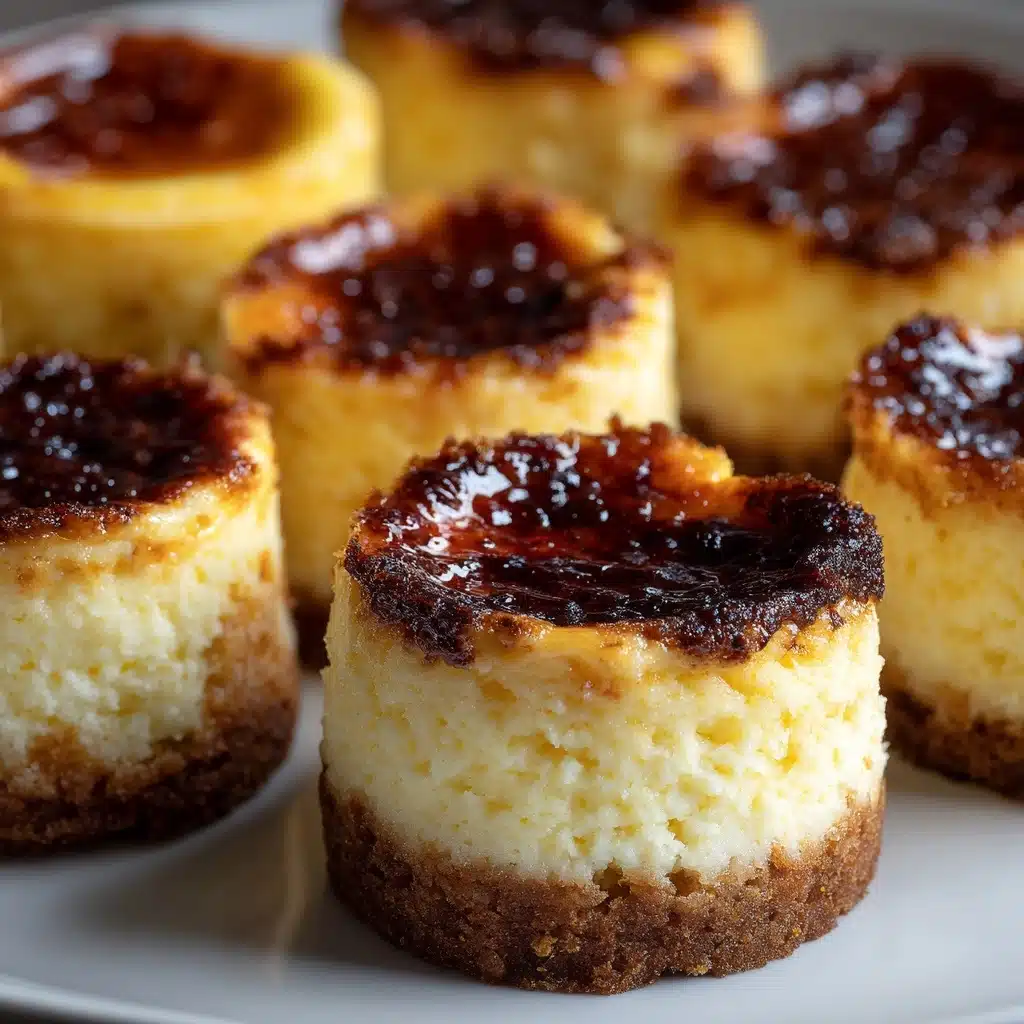
If you’re looking for a dessert that’s as adorable as it is irresistible, these Mini Cheesecake Tarts are your answer. Imagine a crisp, buttery shell filled with the creamiest cheesecake, all topped off with a jewel-like burst of fresh berries or a swirl of jam. With their perfect size for parties or the occasional weeknight treat, these tarts are beautifully simple to make and a surefire crowd-pleaser. Trust me, you’ll want to make a double batch — one for sharing, and one to stash away for when those cravings hit!

Ingredients You’ll Need
Every ingredient in Mini Cheesecake Tarts plays a starring role, creating that luscious texture and subtle tang that real cheesecake fans love. With just a handful of kitchen staples, you’ll transform basic components into bakery-worthy bites!
- Mini tart shells (12, store-bought or homemade): These are your shortcut to that perfectly crisp, golden base—use your favorite brand or go homemade for an extra touch.
- Cream cheese (8 ounces, softened): The heart and soul of any cheesecake, softened cream cheese ensures a silky, lump-free filling.
- Granulated sugar (1/4 cup): Adds just the right amount of sweetness to balance the mild tang of cream cheese.
- Vanilla extract (1 teaspoon): For warmth and a beautiful aroma; pure vanilla brings out all the rich flavors.
- Egg (1 large): Binds everything together and provides that custardy structure classic cheesecakes are known for.
- Sour cream (1/4 cup): A hint of sour cream gives the filling extra creaminess and a subtle tang that makes each bite pop.
- All-purpose flour (1 tablespoon): Just a touch helps thicken the filling so each tart holds together perfectly.
- Fresh berries or fruit preserves: The ultimate finishing touch—use strawberries, blueberries, raspberries, or a glossy spoonful of your favorite jam for color and bright flavor.
How to Make Mini Cheesecake Tarts
Step 1: Prep the Oven and Tart Shells
Start by preheating your oven to 325°F (163°C). While that heats up, arrange your mini tart shells on a baking sheet. Using pre-made shells makes this part a breeze—and a lined baking sheet helps with easy clean-up later. If your tart shells are frozen, be sure they’re thawed first for even baking.
Step 2: Make the Cheesecake Filling
In a large mixing bowl, combine the softened cream cheese and granulated sugar. Beat with an electric mixer until absolutely smooth and creamy—this step is key! Add in the vanilla extract, egg, sour cream, and flour. Continue beating until every last streak of cream cheese is blended in, and the mixture looks thick and silky.
Step 3: Fill the Tart Shells
Spoon the cheesecake mixture evenly into the prepared tart shells. You’ll want to fill them just below the rim, as the filling will puff ever-so-slightly as it bakes. Use a small spoon or cookie scoop for even portions—it helps get every tart exactly right!
Step 4: Bake to Perfection
Slide your baking sheet into the preheated oven and bake the Mini Cheesecake Tarts for 15 to 18 minutes. You’re looking for centers that are set but still slightly wobbly if you give the pan a gentle shake. Avoid overbaking so the filling stays luxuriously creamy.
Step 5: Cool and Chill
Let the tarts cool completely on a wire rack—the hardest part is resisting a taste test! Then, transfer them to the fridge and chill for at least 2 hours. This rest is what gives that signature firm cheesecakey texture that makes every bite dreamy.
Step 6: Add Your Favorite Toppings
Right before serving, finish each tart with a handful of fresh berries or a generous spoonful of your favorite fruit preserves. This last flourish adds color, flavor, and a burst of freshness—each one will look like it came from your favorite bakery window.
How to Serve Mini Cheesecake Tarts

Garnishes
To really make your Mini Cheesecake Tarts pop, a creative garnish goes a long way. Top them with mint leaves, grated citrus zest, tiny edible flowers, or even a light dusting of powdered sugar. These finishing touches transform your batch from simple to absolutely stunning and give every tart its own personality.
Side Dishes
Pairing these tarts with the right sides can make dessert feel extra special. Try serving them with a small bowl of whipped cream, a sprinkle of toasted nuts, or even a fresh fruit salad to balance out the richness. For parties, arrange them alongside bite-size cookies or chocolate truffles for a playful dessert platter.
Creative Ways to Present
Presentation is half the fun when it comes to Mini Cheesecake Tarts! Arrange them on a tiered cake stand for an eye-catching centerpiece or use colorful cupcake liners for a fun, casual look. For a touch of elegance, serve each tart on a petite dish with a swirl of sauce or a drizzle of honey—it’s a simple trick that’ll make each bite feel extra indulgent.
Make Ahead and Storage
Storing Leftovers
If you’ve got leftovers (which is honestly rare!), place your Mini Cheesecake Tarts in an airtight container and store them in the refrigerator. They’ll stay wonderfully fresh for up to 2 days, so you can sneak a sweet treat anytime. Just be sure they’re chilled to maintain their perfect texture.
Freezing
For longer storage, you can freeze these tarts without their berry topping. Place the cooled tarts on a baking sheet to freeze individually, then transfer them to a freezer-safe container or zip-top bag. They keep well for up to one month. Thaw overnight in the fridge before topping and serving for best results.
Reheating
Mini Cheesecake Tarts are best enjoyed cold or at room temperature, so there’s no need to reheat them. If you’ve just thawed some from the freezer, let them sit out for 15 minutes to take the chill off before adding garnishes and serving. This brings out the flavors and makes the filling extra creamy.
FAQs
Can I use a different crust for Mini Cheesecake Tarts?
Absolutely! Graham cracker crusts, crushed cookie bases, or homemade shortbread shells are all delicious choices. Just make sure whatever crust you use is baked and cooled before filling.
Can Mini Cheesecake Tarts be made gluten-free?
Yes, you can substitute gluten-free tart shells and swap the flour in the filling for a gluten-free all-purpose blend. They’ll turn out just as dreamy and ideal for anyone avoiding gluten.
What other toppings work besides berries?
You can get creative: try lemon curd, chocolate ganache, salted caramel, whipped cream, or even spicy fruit compotes. The neutral cheesecake pairs well with so many flavors, so don’t be afraid to experiment!
Can I double the recipe for a party?
No problem! This recipe easily doubles (or even triples) to feed a crowd. Just bake in batches, and remember to chill everything thoroughly before serving.
How do I avoid cracks in the filling?
Don’t overbake the tarts and try not to overmix the filling once the egg is added. Cooling them gradually and chilling thoroughly afterward also help keep the tops smooth and crack-free.
Final Thoughts
With their creamy centers and endless ways to top and serve, Mini Cheesecake Tarts are a little luxury you can whip up anytime. Invite friends over, make them for a family celebration, or simply enjoy a few yourself—they may just become your new favorite bite-sized dessert!
Print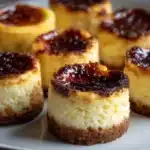
Mini Cheesecake Tarts Recipe
- Total Time: 2 hours 33 minutes (including chilling)
- Yield: 12 mini tarts 1x
- Diet: Vegetarian
Description
These mini cheesecake tarts are a delightful bite-sized dessert perfect for any occasion. Creamy and smooth cheesecake filling nestled in a buttery tart shell, topped with fresh berries or fruit preserves for a burst of flavor.
Ingredients
Tart Shells:
- 12 mini tart shells (store-bought or homemade)
Cheesecake Filling:
- 8 ounces cream cheese, softened
- 1/4 cup granulated sugar
- 1 teaspoon vanilla extract
- 1 large egg
- 1/4 cup sour cream
- 1 tablespoon all-purpose flour
Topping:
- Fresh berries or fruit preserves
Instructions
- Preheat oven: Preheat oven to 325°F. Place the tart shells on a baking sheet.
- Make the filling: In a mixing bowl, beat the softened cream cheese with the sugar until smooth. Add the vanilla extract, egg, sour cream, and flour. Beat until fully combined and creamy.
- Fill the tart shells: Spoon the cheesecake mixture evenly into each tart shell, filling just below the rim.
- Bake: Bake for 15–18 minutes, or until the centers are just set and slightly puffed.
- Cool and refrigerate: Let cool completely on a wire rack, then refrigerate for at least 2 hours before serving.
- Top and serve: Top with fresh berries or a spoonful of fruit preserves before serving.
Notes
- You can make these up to 2 days in advance and store them in the refrigerator.
- Try topping with lemon curd or chocolate ganache for a twist.
- Prep Time: 15 minutes
- Cook Time: 18 minutes
- Category: Dessert
- Method: Baking
- Cuisine: American
Nutrition
- Serving Size: 1 tart
- Calories: 180
- Sugar: 10 g
- Sodium: 120 mg
- Fat: 11 g
- Saturated Fat: 6 g
- Unsaturated Fat: 4 g
- Trans Fat: 0 g
- Carbohydrates: 17 g
- Fiber: 0 g
- Protein: 3 g
- Cholesterol: 45 mg