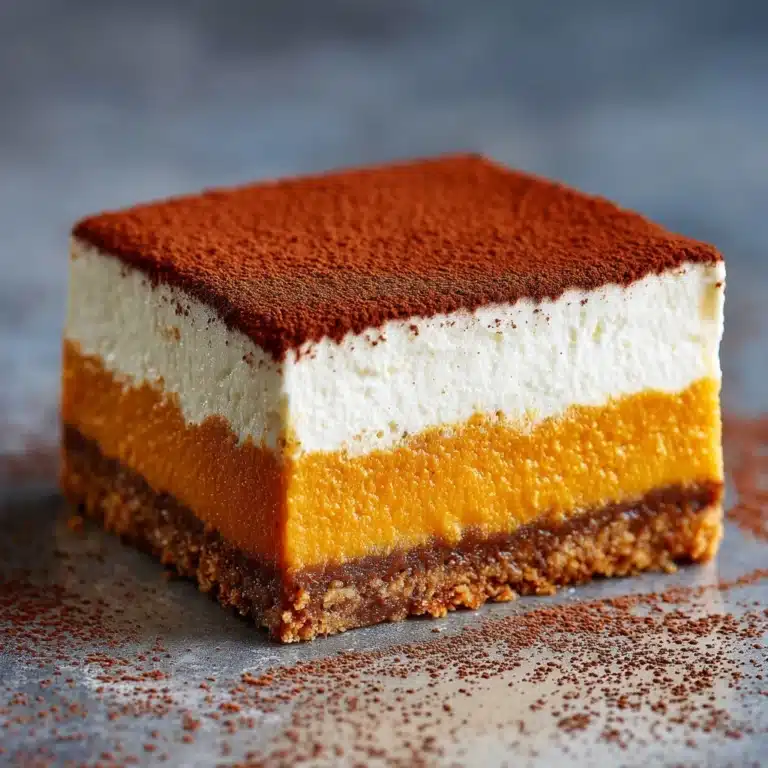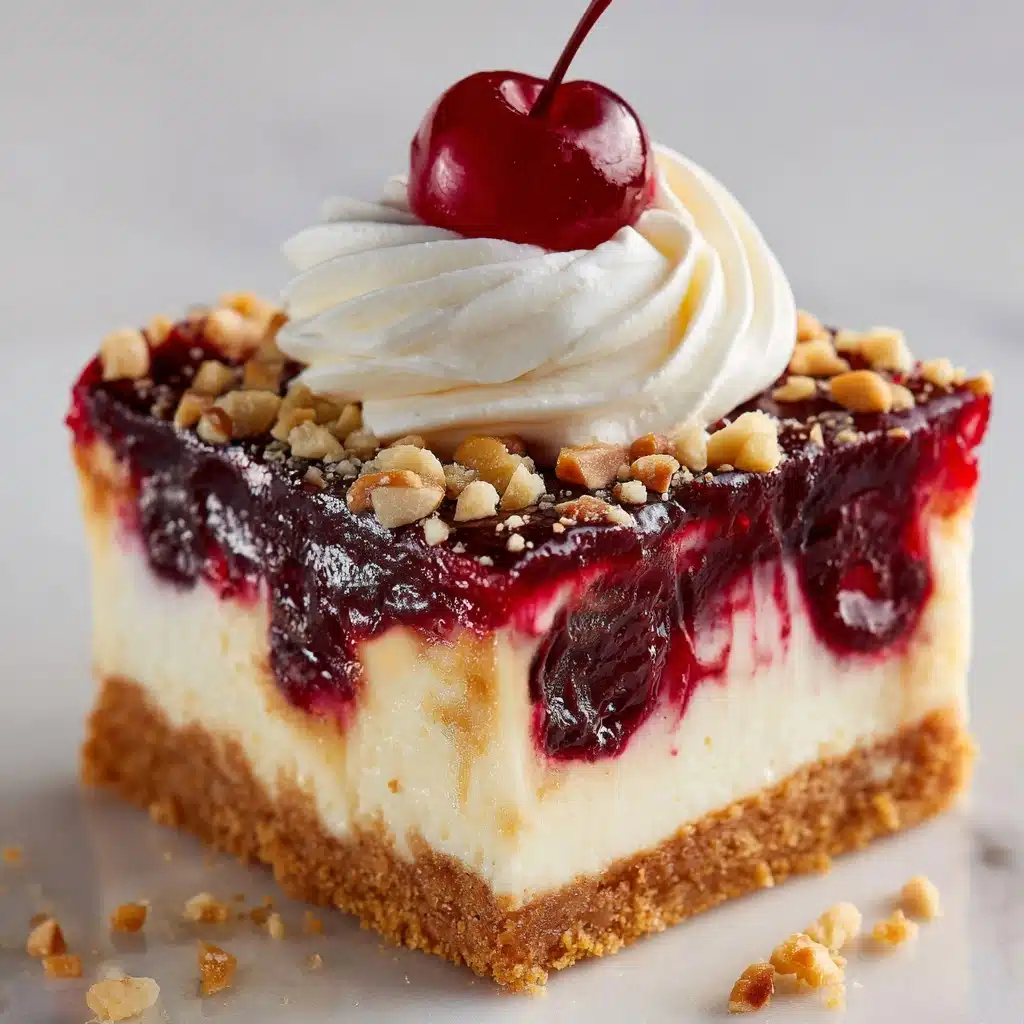
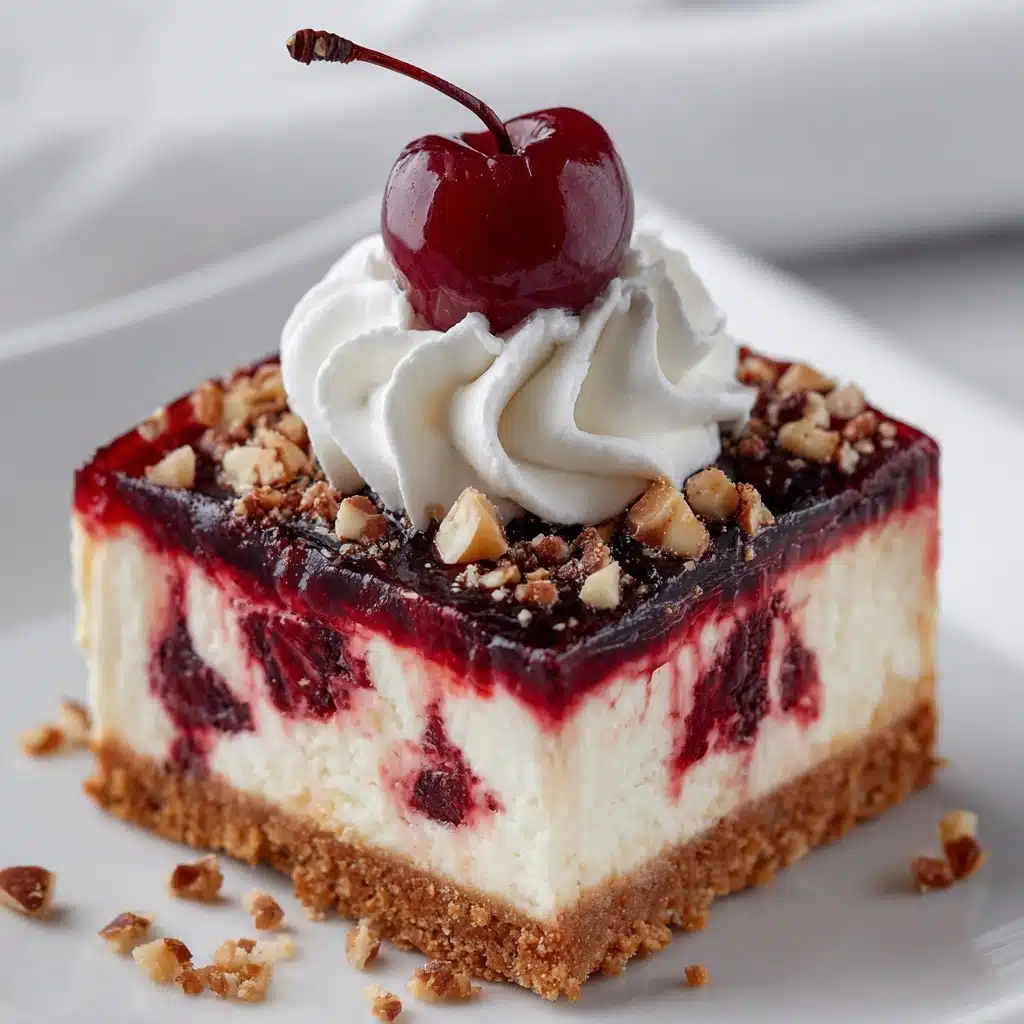
Get ready to fall in love with the irresistible charm of No-Bake Cherry Cheesecake Bars! These bars are a dream come true for dessert lovers: a buttery graham cracker crust, a luscious and creamy cheesecake filling, and a crowning layer of glossy, sweet-tart cherry topping. What makes this recipe extra special is how effortlessly the ingredients come together—no oven required, just a little patience while they chill. Whether you’re channeling nostalgic family gatherings or just need a sweet fix on a warm day, these bars deliver all the classic flavors of cherry cheesecake in a fun, easy-to-serve form.
Ingredients You’ll Need
The magic of No-Bake Cherry Cheesecake Bars lies in just a handful of straightforward ingredients. Each one plays a starring role, from the crisp, golden crust to the creamy filling and the vibrant cherry crown. Here’s what you’ll need and why you shouldn’t skip a thing!
- Graham cracker crumbs: The foundation! These create that familiar, slightly sweet, and crunchy base every good cheesecake bar needs.
- Granulated sugar: Sweetens the crust and helps bind the crumbs together for a satisfying crunch.
- Unsalted butter (melted): Binds the crumb mixture and adds a buttery richness to every bite.
- Cream cheese (softened): The hero of the filling, bringing classic tang and creamy texture—softening helps it blend smoothly.
- Powdered sugar: Dissolves easily into the filling, keeping it silky and sweet without any grit.
- Vanilla extract: Adds a warm, aromatic note that elevates the whole dessert.
- Heavy whipping cream (cold): Whipped into stiff peaks, it makes the filling airy and luscious without weighing it down.
- Cherry pie filling: A glossy, ruby-red finishing touch for a burst of fruit flavor and that classic cheesecake look.
How to Make No-Bake Cherry Cheesecake Bars
Step 1: Prepare the Pan
Start by lining an 8×8-inch baking dish with parchment paper, making sure to leave a little overhang on the sides. This small step makes lifting out your finished bars a breeze, keeping every layer perfectly intact and making for super easy slicing later.
Step 2: Make the Graham Cracker Crust
In a medium bowl, combine your graham cracker crumbs, granulated sugar, and melted butter. Stir until the mixture is evenly moistened and resembles wet sand. Press this firmly and evenly into the bottom of your prepared pan—take your time to really pack it in! Pop the pan into the fridge to let the crust set up while you work on the dreamy filling.
Step 3: Whip Up the Cheesecake Filling
In a large mixing bowl, beat together the softened cream cheese, powdered sugar, and vanilla extract until the mixture is smooth and creamy, with no lumps in sight. Next, in a separate bowl, whip your cold heavy cream until stiff peaks form. Gently fold the whipped cream into the cream cheese mixture, taking care not to deflate all that lovely airiness—this is the secret to a light-as-clouds filling.
Step 4: Assemble the Bars
Spread the cheesecake filling evenly over your chilled crust, using a spatula to smooth the top. Open up your can of cherry pie filling and spoon it lovingly over the cheesecake layer. The bright cherry topping adds a gorgeous pop of color (and flavor!) that makes these bars simply irresistible.
Step 5: Chill and Slice
Patience pays off! Refrigerate the assembled bars for at least 4 hours, or overnight if you can wait, to allow them to set up perfectly. Use the parchment overhang to lift the slab out of the pan and onto a cutting board, then slice into neat, tempting squares—each one a perfect bite of No-Bake Cherry Cheesecake Bar goodness.
How to Serve No-Bake Cherry Cheesecake Bars

Garnishes
For a finishing touch, sprinkle a few extra graham cracker crumbs or some finely grated white chocolate over the cherry topping before serving. A light dusting of powdered sugar or a swirl of whipped cream is lovely too, especially for special occasions. A sprig of mint adds a pop of color and a hint of freshness that balances the sweetness.
Side Dishes
These bars are delightfully rich, so they pair well with light, fresh accompaniments. Try serving them alongside a fruit salad or a platter of mixed summer berries. Unsweetened iced tea, lemonade, or even a glass of bubbly Prosecco make perfect drinks to complement the creamy, tangy, cherry-kissed flavors of No-Bake Cherry Cheesecake Bars.
Creative Ways to Present
Take your dessert game up a notch by cutting the bars into mini squares for bite-sized treats, perfect for parties or potlucks. You can also layer the components in small mason jars or parfait glasses for an elegant, individual presentation. For a fun twist, use different pie fillings—blueberry or strawberry work beautifully with the same basic recipe.
Make Ahead and Storage
Storing Leftovers
Cover any leftover No-Bake Cherry Cheesecake Bars tightly with plastic wrap or transfer them to an airtight container. They’ll stay fresh and delicious in the refrigerator for up to 5 days. The crust might soften a touch over time, but every bite will still be dreamy and satisfying.
Freezing
If you want to save a batch for later, No-Bake Cherry Cheesecake Bars are freezer friendly. Place sliced bars on a baking sheet and freeze until firm, then wrap each one individually in plastic wrap before placing in a zip-top bag or airtight container. They’ll keep well for up to 2 months—just thaw overnight in the fridge before serving.
Reheating
No need to reheat these bars—they’re best enjoyed cold right from the fridge! If serving from the freezer, allow the bars to thaw gently in the refrigerator. This keeps the texture smooth and creamy, just as cheesecake should be.
FAQs
Can I use a different fruit topping?
Absolutely! While cherry is a classic and adds beautiful color, you can top these no-bake bars with blueberry, strawberry, mixed berry, or even homemade lemon curd. Just use about the same amount to keep the balance right.
Is it possible to make these gluten-free?
Yes! Simply swap the graham cracker crumbs for your favorite gluten-free cookie or cracker alternative. Plenty of gluten-free graham-style crackers are available these days and work perfectly in this recipe.
Why does the filling need to chill for so long?
The chilling time allows the filling to firm up so the bars slice neatly and hold their shape, plus it helps the flavors meld together. Four hours is the minimum, but overnight is even better for smooth, clean cuts and the yummiest texture.
Can I make No-Bake Cherry Cheesecake Bars ahead of time?
Yes—the bars actually benefit from being made ahead. Prepare them the night before a party or event, then simply slice and serve when you’re ready. They hold up beautifully in the fridge and taste even better the next day.
What’s the best way to get clean slices?
For tidy, beautiful bars, run a sharp knife under hot water and wipe it dry between cuts. This helps slice through the creamy filling and sticky topping without dragging or making a mess.
Final Thoughts
If you’re in the mood for a no-fuss, show-stopping dessert, give these No-Bake Cherry Cheesecake Bars a spot in your baking lineup. They’re creamy, colorful, and impossibly easy—each bite is pure joy. Gather your ingredients and treat yourself and your loved ones to this slice (or square!) of happiness soon!
Print
No-Bake Cherry Cheesecake Bars Recipe
- Total Time: 4 hours 20 minutes (including chilling)
- Yield: 9 bars 1x
- Diet: Non-Vegetarian
Description
Indulge in these creamy No-Bake Cherry Cheesecake Bars with a buttery graham cracker crust, luscious cream cheese filling, and a sweet cherry topping. This easy dessert is perfect for summer gatherings or a sweet treat anytime!
Ingredients
For the crust:
- 1 ½ cups graham cracker crumbs
- ¼ cup granulated sugar
- ½ cup unsalted butter (melted)
For the filling:
- 16 oz cream cheese (softened)
- ½ cup powdered sugar
- 1 teaspoon vanilla extract
- 1 cup heavy whipping cream (cold)
For the topping:
- 1 can (21 oz) cherry pie filling
Instructions
- Prepare the crust: Line an 8×8-inch baking dish with parchment paper. Mix graham cracker crumbs, sugar, and melted butter. Press into the dish and chill.
- Make the filling: Beat cream cheese, powdered sugar, and vanilla until smooth. Whip cold cream to stiff peaks and fold into cream cheese mixture.
- Assemble the bars: Spread filling over chilled crust. Top with cherry pie filling.
- Chill and serve: Refrigerate for at least 4 hours, then slice into bars to enjoy!
Notes
- For a homemade topping, simmer pitted cherries with sugar and lemon juice until thick.
- Bars can be stored in the fridge for up to 5 days.
- Prep Time: 20 minutes
- Cook Time: 0 minutes
- Category: Dessert
- Method: No-Bake
- Cuisine: American
Nutrition
- Serving Size: 1 bar
- Calories: 340
- Sugar: 23g
- Sodium: 210mg
- Fat: 24g
- Saturated Fat: 14g
- Unsaturated Fat: 9g
- Trans Fat: 0g
- Carbohydrates: 27g
- Fiber: 1g
- Protein: 4g
- Cholesterol: 65mg