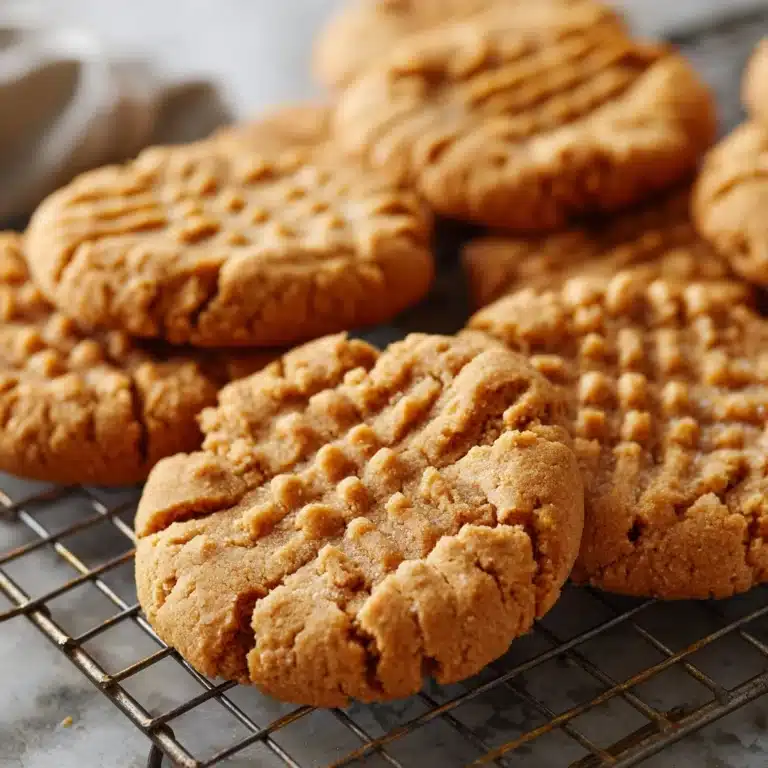
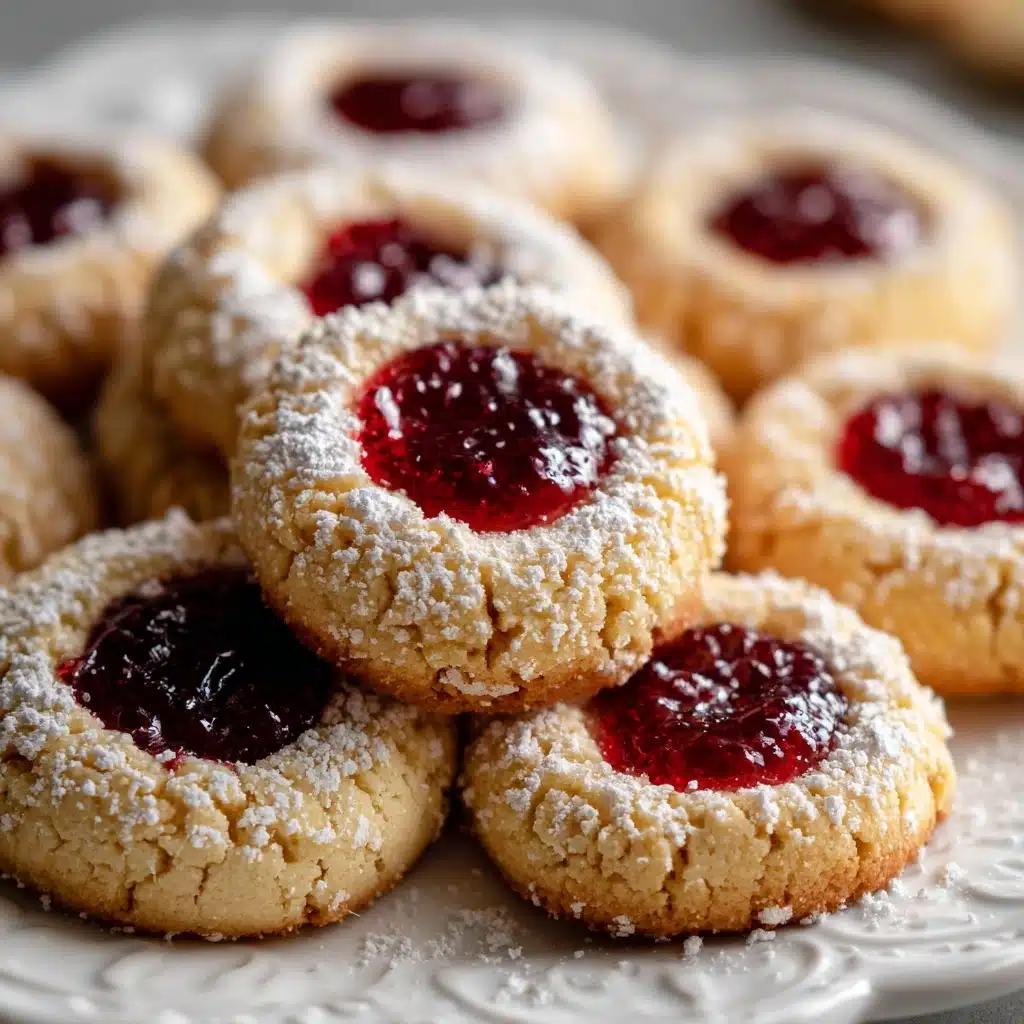
If you’re a lover of buttery, melt-in-your-mouth treats with that perfect pop of fruity sweetness in the center, these Thumbprint Cookies truly deserve a spot in your favorite cookie rotation. With their nostalgic charm, tender bite, and colorful jam centers, they’re as delightful to make as they are to eat. Not only are they perfect for sharing during the holidays or at family gatherings, but they’re also an anytime indulgence that will instantly brighten your day. Get ready to roll up your sleeves and bake a batch of Thumbprint Cookies that everyone will rave about!
Ingredients You’ll Need
Every ingredient in Thumbprint Cookies serves a special purpose, from creating a rich, buttery base to adding a pop of color and brightness with jam. With a handful of pantry staples, you’ll bake a tray full of cookies that truly taste like love in every bite!
- Unsalted Butter (1 cup, softened): The secret to rich, tender cookies with a melt-in-your-mouth texture; be sure it’s at room temperature for easy blending.
- Granulated Sugar (2/3 cup): Provides just the right amount of sweetness and helps the edges turn golden.
- Egg Yolks (2 large): Add richness and create a luxuriously soft crumb.
- Vanilla Extract (1 teaspoon): A splash for warm aroma and cozy, classic flavor.
- All-Purpose Flour (2 cups): Gives structure to the cookies, ensuring they hold their shape beautifully.
- Salt (1/4 teaspoon): A pinch awakens all the other flavors and balances the sweetness.
- Fruit Jam or Preserves (1/2 cup): Raspberry, strawberry, or apricot jams add color and tangy contrast; mix and match for a stunning variety.
- Powdered Sugar (optional, for dusting): A light dusting makes them look extra special, perfect for gifting or celebrations.
How to Make Thumbprint Cookies
Step 1: Prepare Your Baking Sheet
Begin your cookie adventure by preheating your oven to 350°F (175°C). Line a large baking sheet with parchment paper—this not only prevents sticking but also ensures a beautiful golden bottom on every single cookie.
Step 2: Cream the Butter and Sugar
Using an electric mixer or a sturdy wooden spoon, beat together the softened butter and granulated sugar in a large bowl. You’ll want to mix until the combination is light and fluffy—this step is your ticket to irresistibly tender Thumbprint Cookies with a soft texture.
Step 3: Add Egg Yolks and Vanilla
Mix in the egg yolks and vanilla extract until fully incorporated. The yolks lend richness and a lovely golden hue to the dough, while the splash of vanilla rounds out the flavors with fragrant sweetness.
Step 4: Combine the Dry Ingredients
Gradually add the flour and salt, mixing just until a soft dough comes together. Stop once no streaks of flour remain—over-mixing can lead to dense cookies, and we want them light as a cloud!
Step 5: Shape the Dough
Roll the dough into 1-inch balls, keeping them uniform for even baking. Place them about 2 inches apart on your lined baking sheet. If you find the dough is sticky or cracks easily, chilling it for 30 minutes helps make perfect balls.
Step 6: Make the Thumbprints and Fill
Gently press your thumb (or use the back of a small spoon) into the center of each dough ball to create a small well. Spoon in about 1/2 teaspoon of your favorite jam or preserves—the more vibrant the flavor and color, the better!
Step 7: Bake and Cool
Pop the baking sheet into your preheated oven and bake for 12-15 minutes, or until the edges of the cookies are lightly gold. Allow them to cool on the baking sheet for 5 minutes so they set, then transfer to a wire rack to cool completely. Once cooled, finish with a snowy dusting of powdered sugar for an extra special touch.
How to Serve Thumbprint Cookies

Garnishes
A simple dusting of powdered sugar over cooled Thumbprint Cookies gives them classic, bakery-style appeal. For a festive touch, add a few sprinkles or edible glitter, especially if you’re making these for celebrations. The jewel-like jam centers always steal the show!
Side Dishes
These cookies are delightful with a cup of coffee, tea, or a cold glass of milk. If you’re serving them at a party, pair with a fresh fruit salad, a platter of assorted cheeses, or a scoop of vanilla ice cream for a fun dessert “snack board.”
Creative Ways to Present
Arrange Thumbprint Cookies on a tiered cake stand for an elegant display at afternoon tea. Tuck them into gift boxes lined with parchment for homemade hostess gifts, or pack them in cellophane bags tied with ribbon for party favors—the bright jam colors look stunning peeking through clear wrapping!
Make Ahead and Storage
Storing Leftovers
Once fully cooled, store leftover Thumbprint Cookies in an airtight container at room temperature. They’ll stay fresh and scrumptious for up to five days—if they last that long! Layering with parchment paper helps preserve their delicate shapes and keeps the jam centers tidy.
Freezing
If you want to get ahead for the holidays (or late-night cravings), these cookies freeze beautifully. Place cooled cookies in a single layer on a tray to freeze, then transfer to a freezer-safe container, separating layers with parchment paper. They’ll keep their flavor and texture for up to two months.
Reheating
Let frozen Thumbprint Cookies thaw at room temperature for about an hour before serving. If you prefer them a touch warm, pop them on a baking sheet in a 300°F oven for 3-4 minutes—just until the edges perk up and the jam shines.
FAQs
Can I use store-bought jam or homemade preserves?
Absolutely! Both store-bought and homemade jams work beautifully in Thumbprint Cookies. Just make sure whichever you use is thick, so it doesn’t run during baking.
Can I make the dough ahead of time?
Yes, you can prepare the dough and store it in the refrigerator for up to 48 hours. Bring back to room temperature for easier rolling, or shape and fill before chilling overnight to streamline your baking day.
Why did my cookies crack while shaping?
Cracking usually happens if the dough is too cold or dry. Try letting the dough rest at room temperature for a few minutes before shaping, or knead it gently to make it more pliable. A little crack here and there just adds rustic charm!
What’s the best way to get a neat indentation?
A gentle, steady press with your thumb works perfectly, but if you want impeccable, uniform wells, use the rounded end of a 1/2 teaspoon measuring spoon for consistency. Be careful not to press too deep so the cookies hold together.
Can I substitute other fillings besides jam?
Definitely! Nutella, chocolate ganache, lemon curd, or caramel are delicious alternatives. You can even use a variety on one tray for a colorful mix, keeping Thumbprint Cookies endlessly customizable.
Final Thoughts
Baking Thumbprint Cookies is a true act of love—and the results are always worth it! Their tender crumb and fruity centers make them the kind of treat you’ll want to bake (and eat) again and again. If you haven’t tried making them at home yet, there’s no better moment than now. Gather your favorite jam, a few pantry staples, and treat yourself and your loved ones to a batch of homemade happiness!
Print
Thumbprint Cookies Recipe
- Total Time: 35 minutes
- Yield: 24 cookies 1x
- Diet: Vegetarian
Description
These classic Thumbprint Cookies are buttery, tender, and filled with your favorite fruit jam. A perfect treat for any occasion!
Ingredients
Cookies:
- 1 cup unsalted butter, softened
- 2/3 cup granulated sugar
- 2 large egg yolks
- 1 teaspoon vanilla extract
- 2 cups all-purpose flour
- 1/4 teaspoon salt
Filling:
- 1/2 cup fruit jam or preserves (such as raspberry, strawberry, or apricot)
- Optional: powdered sugar for dusting
Instructions
- Preheat the oven: Preheat the oven to 350°F (175°C) and line a baking sheet with parchment paper.
- Cream butter and sugar: In a large bowl, cream together the butter and granulated sugar until light and fluffy.
- Add eggs and vanilla: Beat in the egg yolks and vanilla extract until well combined.
- Mix dry ingredients: Gradually add the flour and salt, mixing until a soft dough forms.
- Shape the dough: Roll the dough into 1-inch balls and place them 2 inches apart on the prepared baking sheet.
- Add filling: Use your thumb or the back of a small spoon to make an indentation in the center of each ball. Fill each indentation with about 1/2 teaspoon of jam.
- Bake: Bake for 12-15 minutes or until the edges are lightly golden.
- Cool and serve: Allow the cookies to cool on the baking sheet for 5 minutes before transferring them to a wire rack to cool completely. Dust with powdered sugar if desired.
Notes
- You can use different flavors of jam for variety.
- To prevent cracks, chill the dough for 30 minutes before rolling into balls.
- Prep Time: 20 minutes
- Cook Time: 15 minutes
- Category: Dessert
- Method: Baking
- Cuisine: American
Nutrition
- Serving Size: 1 cookie
- Calories: 110
- Sugar: 6g
- Sodium: 15mg
- Fat: 6g
- Saturated Fat: 4g
- Unsaturated Fat: 2g
- Trans Fat: 0g
- Carbohydrates: 13g
- Fiber: 0g
- Protein: 1g
- Cholesterol: 25mg