
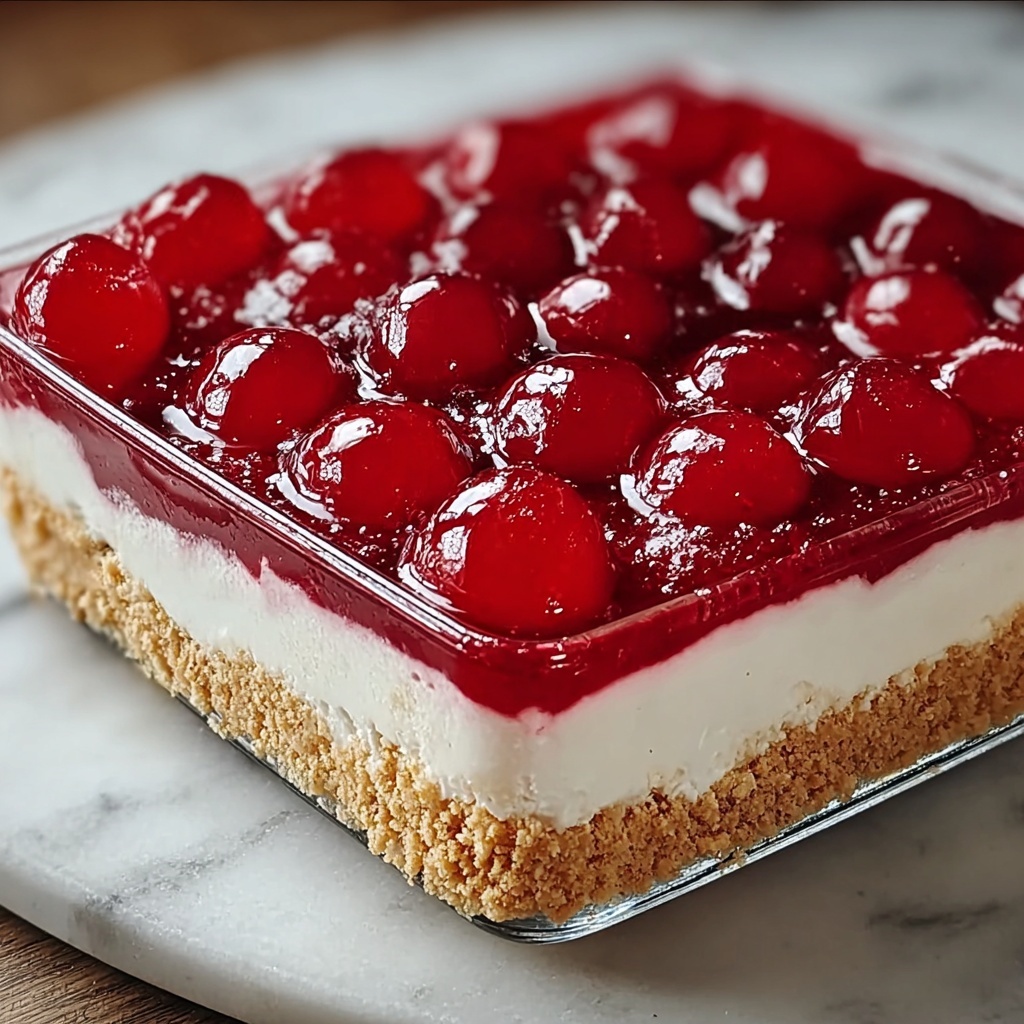
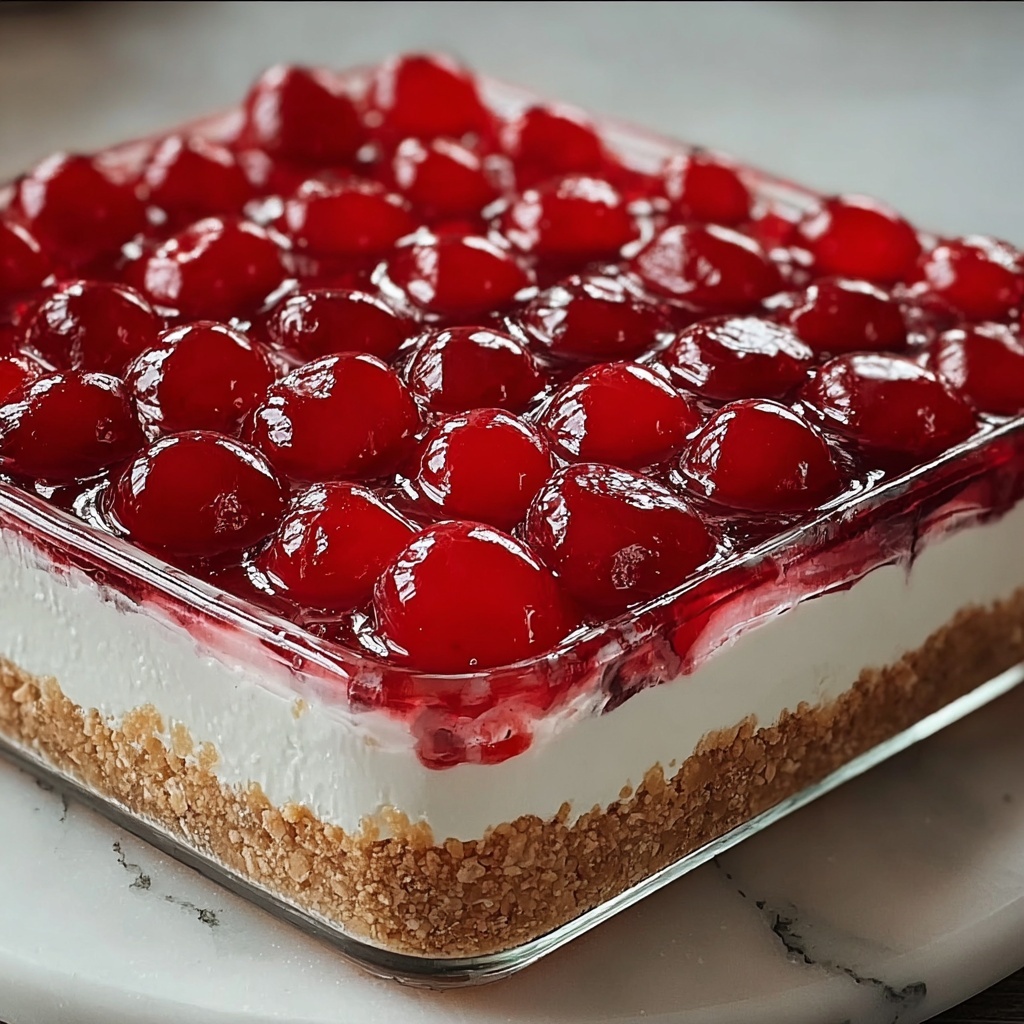
If you have a sweet tooth and a soft spot for desserts that bring back comforting memories, you’re going to absolutely adore this Classic Cherry Delight Recipe. It’s a luscious blend of creamy, dreamy layers and bright cherry goodness all nestled on a buttery graham cracker crust. Perfectly balanced with a smooth cream cheese filling and topped with vibrant cherry pie filling, this dessert is like a warm hug in every bite. Whether you’re whipping it up for a family gathering or just because, Classic Cherry Delight Recipe is a guaranteed crowd-pleaser that never fails to impress.
Ingredients You’ll Need
Gathering the right ingredients is the secret to nailing this fresh and flavorful Classic Cherry Delight Recipe. Each component plays a vital role in creating the perfect harmony of textures and flavors, from crunchy to creamy to sweet and fruity.
- Unsalted butter: Melts into the graham cracker crumbs to create a rich, crispy crust foundation.
- Graham cracker crumbs: Provide that wonderful crunch and depth of flavor for the crust.
- Granulated sugar: Adds subtle sweetness to the crust, balancing the butter’s richness.
- Cream cheese, softened: Ensures a smooth, velvety filling with just the right tang.
- Powdered sugar: Sweetens the cream cheese block seamlessly without any graininess.
- Pure vanilla extract: Boosts the overall flavor with its warm, aromatic notes.
- Cool Whip (8 ounces): Lightens the filling, giving it an airy texture that melts on your tongue.
- Cherry pie filling (21 ounces): Delivers a glossy, juicy topping bursting with vibrant cherry flavor.
How to Make Classic Cherry Delight Recipe
Step 1: Prepare the Crust
Start by melting the butter in a medium bowl, either in the microwave for about 30 seconds or on the stovetop if you prefer. Once melted, stir in the graham cracker crumbs and granulated sugar until the mixture looks evenly moistened and crumbly. Press this crumb mixture firmly into the bottom of a greased 8×8-inch baking dish. Taking your time here ensures a sturdy crust that won’t fall apart when you dig in. Then, set it aside—this crust will serve as the solid base for all the delightful layers to come.
Step 2: Make the Filling
In a separate large bowl, whip the softened cream cheese with a mixer until it’s completely smooth and free of lumps. This is key because a lumps-free filling feels so much more luxurious. Next, add the powdered sugar and vanilla extract. Beat them in well so that the sweetness and warmth are perfectly blended throughout. Now comes the magic touch—gently fold in the Cool Whip. This lightens the mixture and gives your filling that melt-in-your-mouth fluffiness that makes Classic Cherry Delight Recipe stand out.
Step 3: Assemble the Layers
Spread the creamy filling evenly over your prepared graham cracker crust, smoothing it out with a spatula for a perfect finish. Then, spoon the cherry pie filling right on top, spreading it gently so every corner is covered with those beautiful, glossy cherries. This vibrant layer is the star that draws everyone in, inviting you to enjoy that classic cherry flavor in every bite.
Step 4: Chill and Serve
For the best results, refrigerate your assembled Classic Cherry Delight Recipe for at least 2 hours, preferably overnight if you can wait that long. This chilling time allows all the layers to set properly, so each slice holds together beautifully. Plus, the flavors get a chance to meld, making every forkful taste like a little celebration of cherries and cream.
How to Serve Classic Cherry Delight Recipe
Garnishes
To add a little extra flair and texture when serving, consider topping your slices with a few extra maraschino cherries or a sprinkle of toasted sliced almonds. A light dusting of powdered sugar can also make this dessert look irresistible on a plate. These simple garnishes elevate the presentation and add contrasting flavors that complement the Classic Cherry Delight Recipe perfectly.
Side Dishes
This dessert pairs wonderfully with fresh fruit salads or a scoop of vanilla bean ice cream, which adds even more creaminess to the experience. For a refreshing finish, a cup of hot herbal tea or a rich, dark coffee can balance the sweetness and bring out the best of each bite.
Creative Ways to Present
If you want to impress your guests beyond just taste, try serving the Classic Cherry Delight Recipe in individual clear glasses or parfait cups. This way, the distinct layers of crunchy crust, creamy filling, and glossy cherry topping shine through visually. You can also prepare it as mini portions using small ramekins for a charming presentation that’s perfect for parties or special occasions.
Make Ahead and Storage
Storing Leftovers
Once you’ve enjoyed a few slices, cover the remaining Classic Cherry Delight Recipe tightly with plastic wrap or transfer it to an airtight container. Store it in the refrigerator where it will stay fresh and delicious for up to 3 days. The flavors might even deepen as it sits, so don’t be surprised if the leftovers taste just as amazing the next day.
Freezing
If you want to make this dessert well in advance, you can freeze the whole assembled dish. Wrap it securely in plastic wrap and then aluminum foil to avoid freezer burn. When properly wrapped, the Classic Cherry Delight Recipe will keep well for up to one month. When it’s time to enjoy, thaw it overnight in the refrigerator for the best texture.
Reheating
This dessert is best enjoyed chilled, so reheating is not recommended. Instead, simply thaw frozen leftovers in the fridge and serve cold to keep that creamy, dreamy texture intact exactly as it should be.
FAQs
Can I use fresh cherries instead of canned pie filling?
Absolutely! Fresh cherries can be a lovely substitute, but you’ll want to cook them down with sugar and a bit of cornstarch to mimic the texture and sweetness of cherry pie filling. This adds a fresh twist to your Classic Cherry Delight Recipe.
Is there a dairy-free version of this dessert?
Yes, you can swap out the cream cheese for a dairy-free alternative and use non-dairy whipped topping instead of Cool Whip. Just make sure your graham crackers and butter substitutes are also dairy-free. The key flavors remain delicious with these easy substitutions.
How long does the Classic Cherry Delight Recipe take to set?
Chilling the dessert for at least 2 hours is essential, but overnight refrigeration allows the layers to fully set and the flavors to marry beautifully, making your Classic Cherry Delight Recipe even more irresistible.
Can I double the recipe for a larger crowd?
Definitely! This recipe scales up well. Use a larger baking dish or prepare two pans to accommodate the increased volume. Just keep the same ratios and chilling time in mind for consistent results.
What should I do if my crust feels too soft?
If the crust seems soft, try pressing it even more firmly before adding the filling. You can also bake the crust for a few minutes before assembling to help it set firmly, though this isn’t necessary for the original no-bake recipe.
Final Thoughts
Cooking up this Classic Cherry Delight Recipe is like creating a little piece of happiness that’s guaranteed to brighten your day and those of your loved ones. Its layers of buttery crust, velvety cream cheese filling, and glossy cherry topping come together with ease, making it a perfect dessert anytime you crave something sweet and special. So, gather your ingredients, get comfortable in the kitchen, and treat yourself to this delightful classic that truly never goes out of style!
Print
Classic Cherry Delight Recipe
- Prep Time: 20 minutes
- Cook Time: 0 minutes
- Total Time: 2 hours 20 minutes
- Yield: 9 servings
- Category: Dessert
- Method: No-Cook
- Cuisine: American
Description
Classic Cherry Delight is a no-bake, creamy dessert featuring a buttery graham cracker crust topped with a smooth cream cheese and Cool Whip filling, finished with a luscious cherry pie topping. Perfect for entertaining or a refreshing treat, it requires minimal prep and chilling time to achieve a delightful, rich texture and vibrant flavor.
Ingredients
Crust:
- 7 tablespoons unsalted butter
- 1 1/2 cups graham cracker crumbs (about 9 whole crackers)
- 3 tablespoons granulated sugar
Filling:
- 8 ounces cream cheese, softened
- 1 cup powdered sugar
- 1 teaspoon pure vanilla extract
- 1 container Cool Whip (8 ounces)
Topping:
- 1 can cherry pie filling (21 ounces)
Instructions
- Prepare the Crust: Melt the butter in a medium bowl using the microwave for about 30 seconds until fully melted and warm.
- Mix Crust Ingredients: Combine the graham cracker crumbs and granulated sugar with the melted butter, stirring until the mixture is evenly moistened and crumbly.
- Press the Crust: Transfer the crumb mixture to a greased 8×8-inch baking dish and firmly press it down to create an even, compact crust layer. Set aside.
- Make the Filling: In a large mixing bowl, beat the softened cream cheese with an electric mixer until smooth and free of lumps.
- Incorporate Sugar and Vanilla: Add powdered sugar and vanilla extract to the cream cheese, mixing until fully combined and creamy.
- Fold in Cool Whip: Gently fold in the Cool Whip to the cream cheese mixture until it is smooth and uniformly mixed.
- Spread the Filling: Evenly spread the cream cheese and Cool Whip mixture over the prepared graham cracker crust in the baking dish.
- Add the Topping: Spoon the cherry pie filling over the cream cheese layer and carefully spread it out to cover the surface evenly.
- Chill and Serve: Refrigerate the assembled dessert for at least 2 hours to set, preferably overnight, before slicing and serving chilled.
Notes
- The dessert can be prepared a day in advance, allowing flavors to meld and making it convenient for gatherings.
- For a firmer crust, consider using slightly less butter or pressing the crumbs more firmly.
- To avoid lumps in your cream cheese filling, ensure the cream cheese is fully softened before beating.
- This no-bake dessert is ideal for warm weather when you want a cool, refreshing treat without heating up the kitchen.
- Optional garnishes include fresh cherries, whipped cream, or a sprinkle of chopped nuts for added texture.


